Loading ...
Loading ...
Loading ...
10
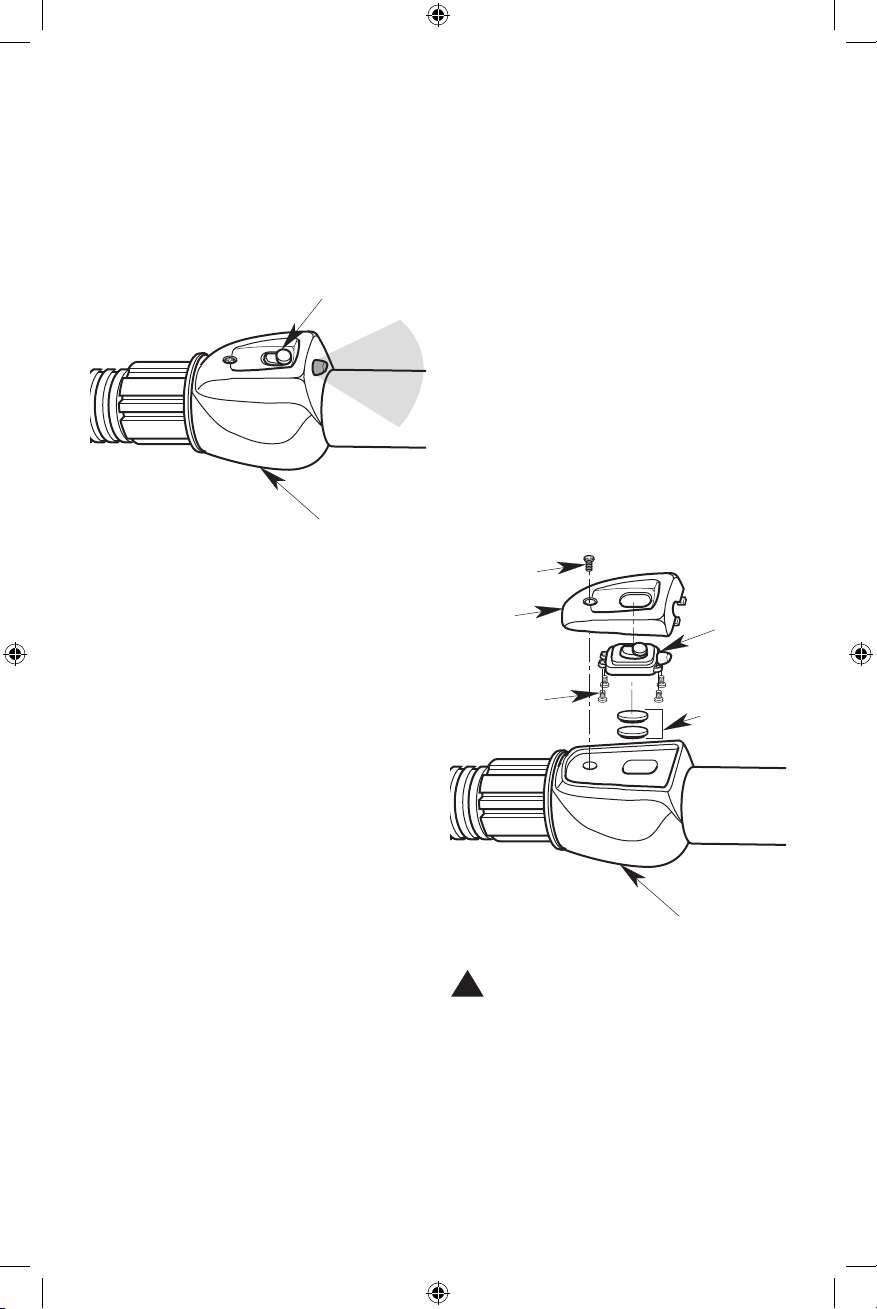
LED Lighted Nozzle Usage (Fig. K)
1. Press Button to activate LED light while Vacuuming.
2. Slide the Switch Forward to Lock the LED Light in the
ON position.
3. Slide the Switch Back to the OFF position after use.
Fig. K
LED Lighted Nozzle Battery Replacement
(Fig. L)
1. To access Batteries, remove and retain the Battery
Access Panel Screw.
2. Remove and retain the Four Screws from the LED
Assembly, releasing the Switch Button Module.
3. The Two Batteries are located under the Switch
Button module. Dispose Batteries in the proper waste
disposal container.
4. The LED Light uses Two CR2016 Lithium Batteries that
are replaceable.
5. Reposition the Switch Button Module over the Battery
Compartment. Install the previously removed Four
Screws into the Switch Button Module to secure.
6. Reposition the Battery Access Panel over the Switch
Button Module. Install the previously removed Screw
into the Battery Access Panel to secure.
WARNING:
Keep batteries out of reach of small children. Consult
a physician immediately if a battery is swallowed.
Severe burning or injury may occur.
Battery contains Perchlorate Material - Special handling
may apply.
See www.dtsc.ca.gov/hazardouswaste/perchlorate.
!
LED Button
LED
Assembly
Fig. L
Switch
Button
Module
CR2016
Lithium
Batteries
(2)
Battery
Access
Panel
Screw (1)
Screws (4)
LED
Assembly
SP7088-2 CMXEVBE175850.indb 10 10/24/19 11:59 AM
Loading ...
Loading ...
Loading ...