Loading ...
Loading ...
Loading ...
MODEL 113.2980g0 ONLY
MOUNTING YOUR SAW TO THE LEG SET
1. From among the loose parts, find the following hard-
ware.
*4 Hex Head Screws, 5/16-18 x 1-t/4
*4 Hex Nuts, 5/16-18
*4 Lockwashers, 5/16 In. External
*8 Fiat Washers, !1/32x 11/16x 1/16
items marked with an asterisk (*) are shown actual size.
5/16-18 x 1-1/4
HEX HEAD SCREW
G
5/16 iN. EXTERNAL
LOCKWASHER
5/16-18 HEX NUT
11/32 IN. i.D.
FLAT WASHER
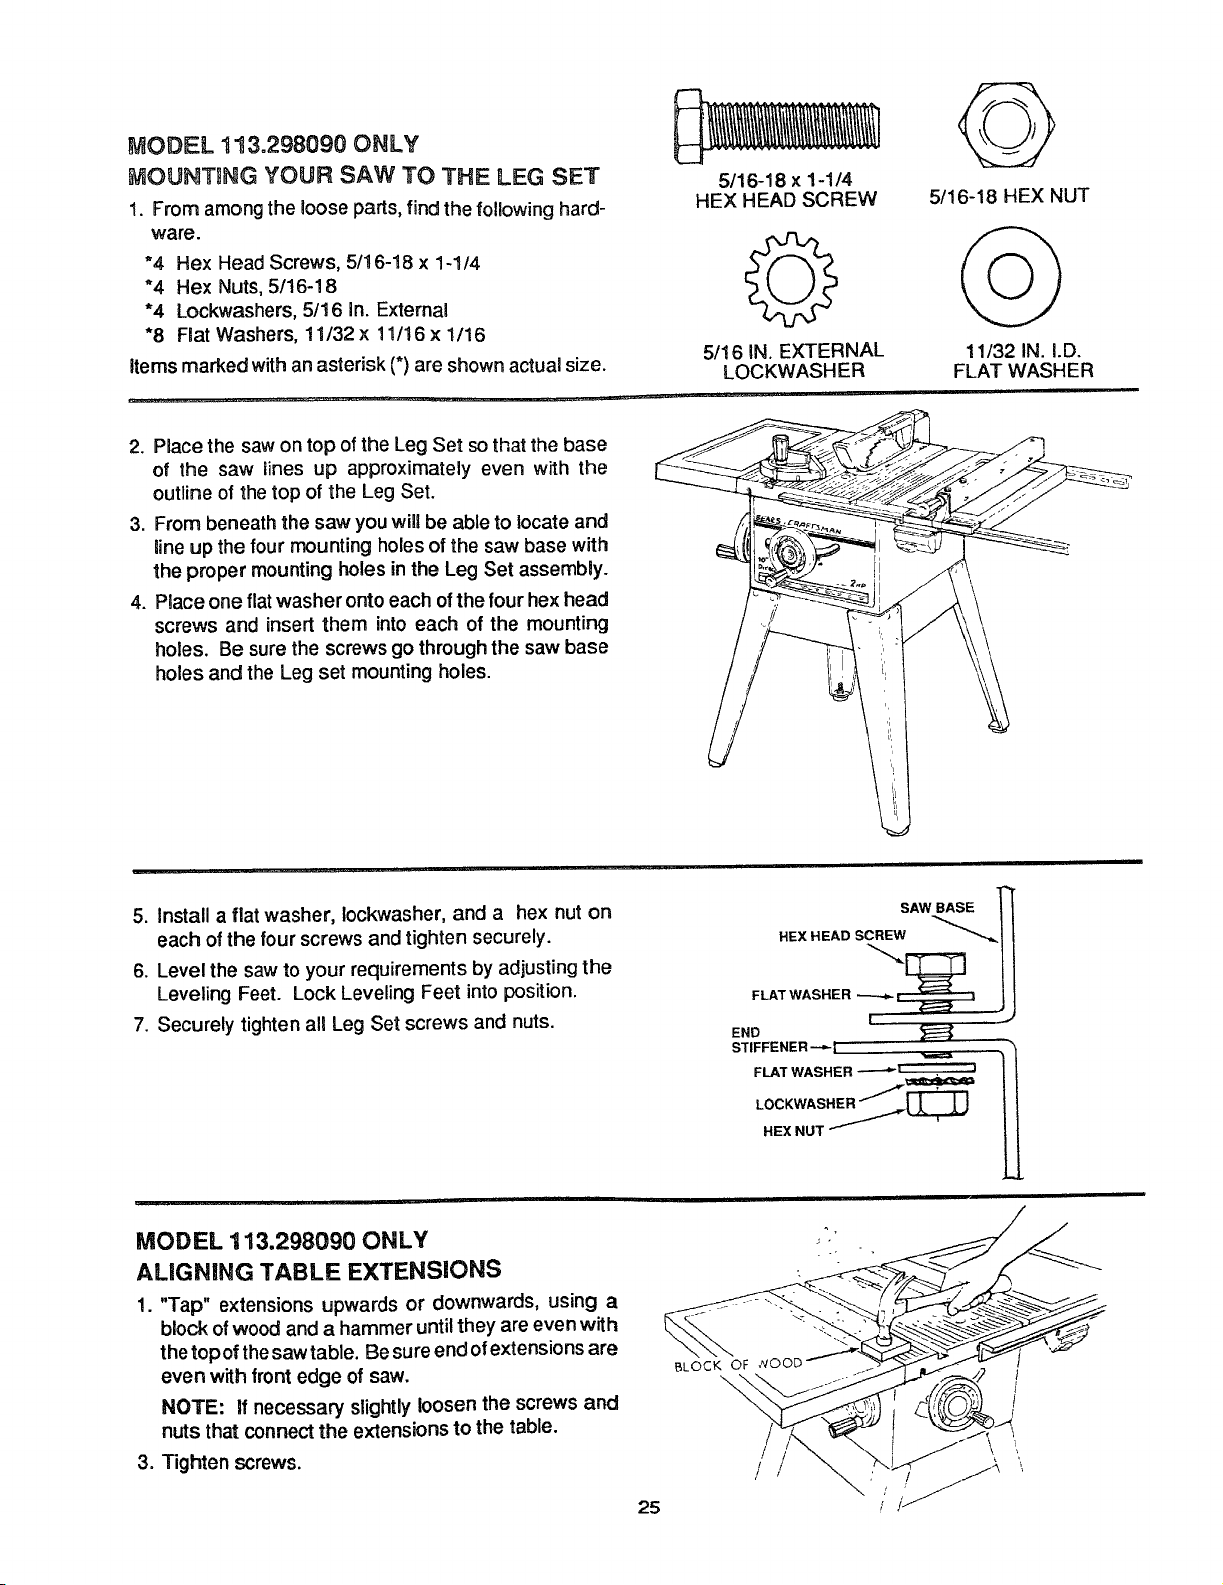
2. Place the saw on top of the Leg Set so that the base
of the saw lines up approximately even with the
outline of the top of the Leg Set.
3. From beneath the saw you wiU be able to locate and
line up the four mounting holes of the saw base wffh
the proper mounting holes in the Leg Set assembly.
4. Place one flat washer onto each of the four hex head
screws and insert them into each of the mounting
holes. Be sure the screws go through the saw base
holes and the Leg set mounting holes.
5. Install a fiat washer, Iockwasher, and a hex nut on
each of the four screws and tighten securely.
6. Level the saw to your requirements by adjusting the
Leveling Feet. Lock Leveling Feet into position.
7. Securely tighten all Leg Set screws and nuts.
SAW BASE !
FLAT WASHER
}|
LOCKWASHER/[-["_ //
HEXNUT""'/_'-'r-a'J H
MODEL 113.298090 ONLY
ALIGNING TABLE EXTENSIONS
1. "Tap" extensions upwards or downwards, using a
block of wood and a hammer until they are even with
the top of the saw table. Be sure end of extensions are
even with front edge of saw.
NOTE: If necessary slightly loosen the screws and
nuts that connect the extensions to the table.
3. Tighten screws.
BLOCK OF _OOD
\
25
I
t
t
f
Loading ...
Loading ...
Loading ...