Loading ...
Loading ...
Loading ...
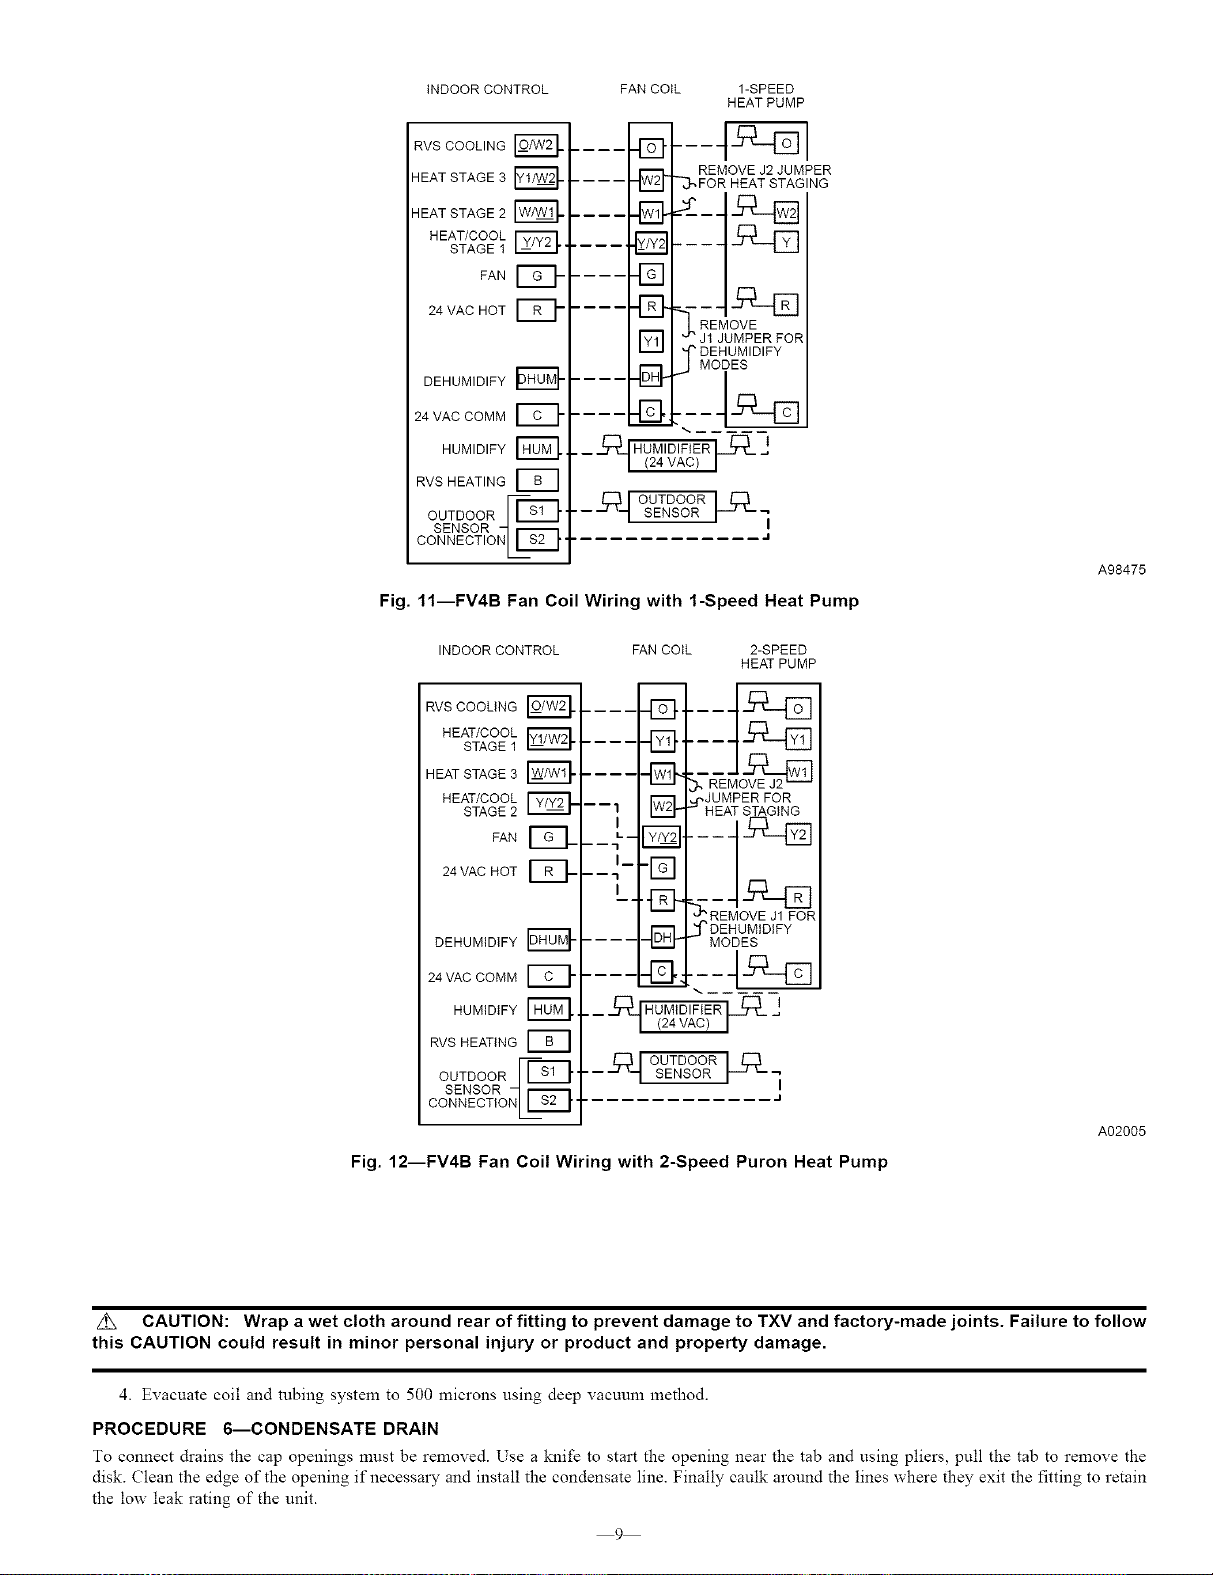
INDOOR CONTROL
RVS COOLING_
HEAT STAGE 3
HEAT STAGE 2
HEAT/COOL
STAGE 1F_"
FAN
24 VAC HOT
DEHUMIDIFY
24 VAC COMM
HUMIDIFY F'_-,
RVS HEATING
OUTDOOR I--F_'
SENSOR _
CONNECTIONLI s2 p
FAN COIL 1-SPEED
HEAT PUMP
....
__ REMOVE J2 JUMPER.... --_, FOR HEAT STAGING
....
•-r DEHUMIDIFY
.... ..._ --_J MOiES
....
____.q_IHUM'D'F'ERp:___j
[ (24VAC)
__4OUTDOORli_
--- SENSOR
............. J
Fig, 11--FV4B Fan Coil Wiring with l-Speed Heat Pump
INDOORCONTROL FANCOIL 2-SPEED
HEATPUMP
RVS COOLING
HEAT/COOL
STAGE 1
HEAT STAGE 3 D
HEAT/COOL
STAGE 2
FAN
24 VAC HOT D
DEHUMIDIFY
24VAC COMM
HUMIDIFY
RVSHEATING
OUTDOORI--F q
SENSOR _
CONNECTIONLI _z I
I
L--
-----I
I_
---'I
I
-EEl
-El
4E}
F_q
-FI
.42}
4_
:REMOVE J1FOR
DEHUMIDIFY
MODES
.__q4HUMID,FtER__ J
/ (24VAC) /
_IOUTDOOR
.... 1 SENSOR _-'7
J
Fig. 12--FV4B Fan Coil Wiring with 2-Speed Puron Heat Pump
A98475
A02005
Z_ CAUTION: Wrap a wet cloth around rear of fitting to prevent damage to TXV and factory-made joints. Failure to follow
this CAUTION could result in minor personal injury or product and property damage.
4. Evacuate coil and tubing system to 500 microns using deep vacuum method.
PROCEDURE 6--CONDENSATE DRAIN
To connect drains the cap openings must be removed. Use a knife to start the opening near the tab and using pliers, pull the tab to remove the
disk. Clean the edge of the opening if necessary and install the condensate line. Finally caulk around the lines where they exit the fitting to retain
the low leak rating of the unit.
9
Loading ...
Loading ...
Loading ...