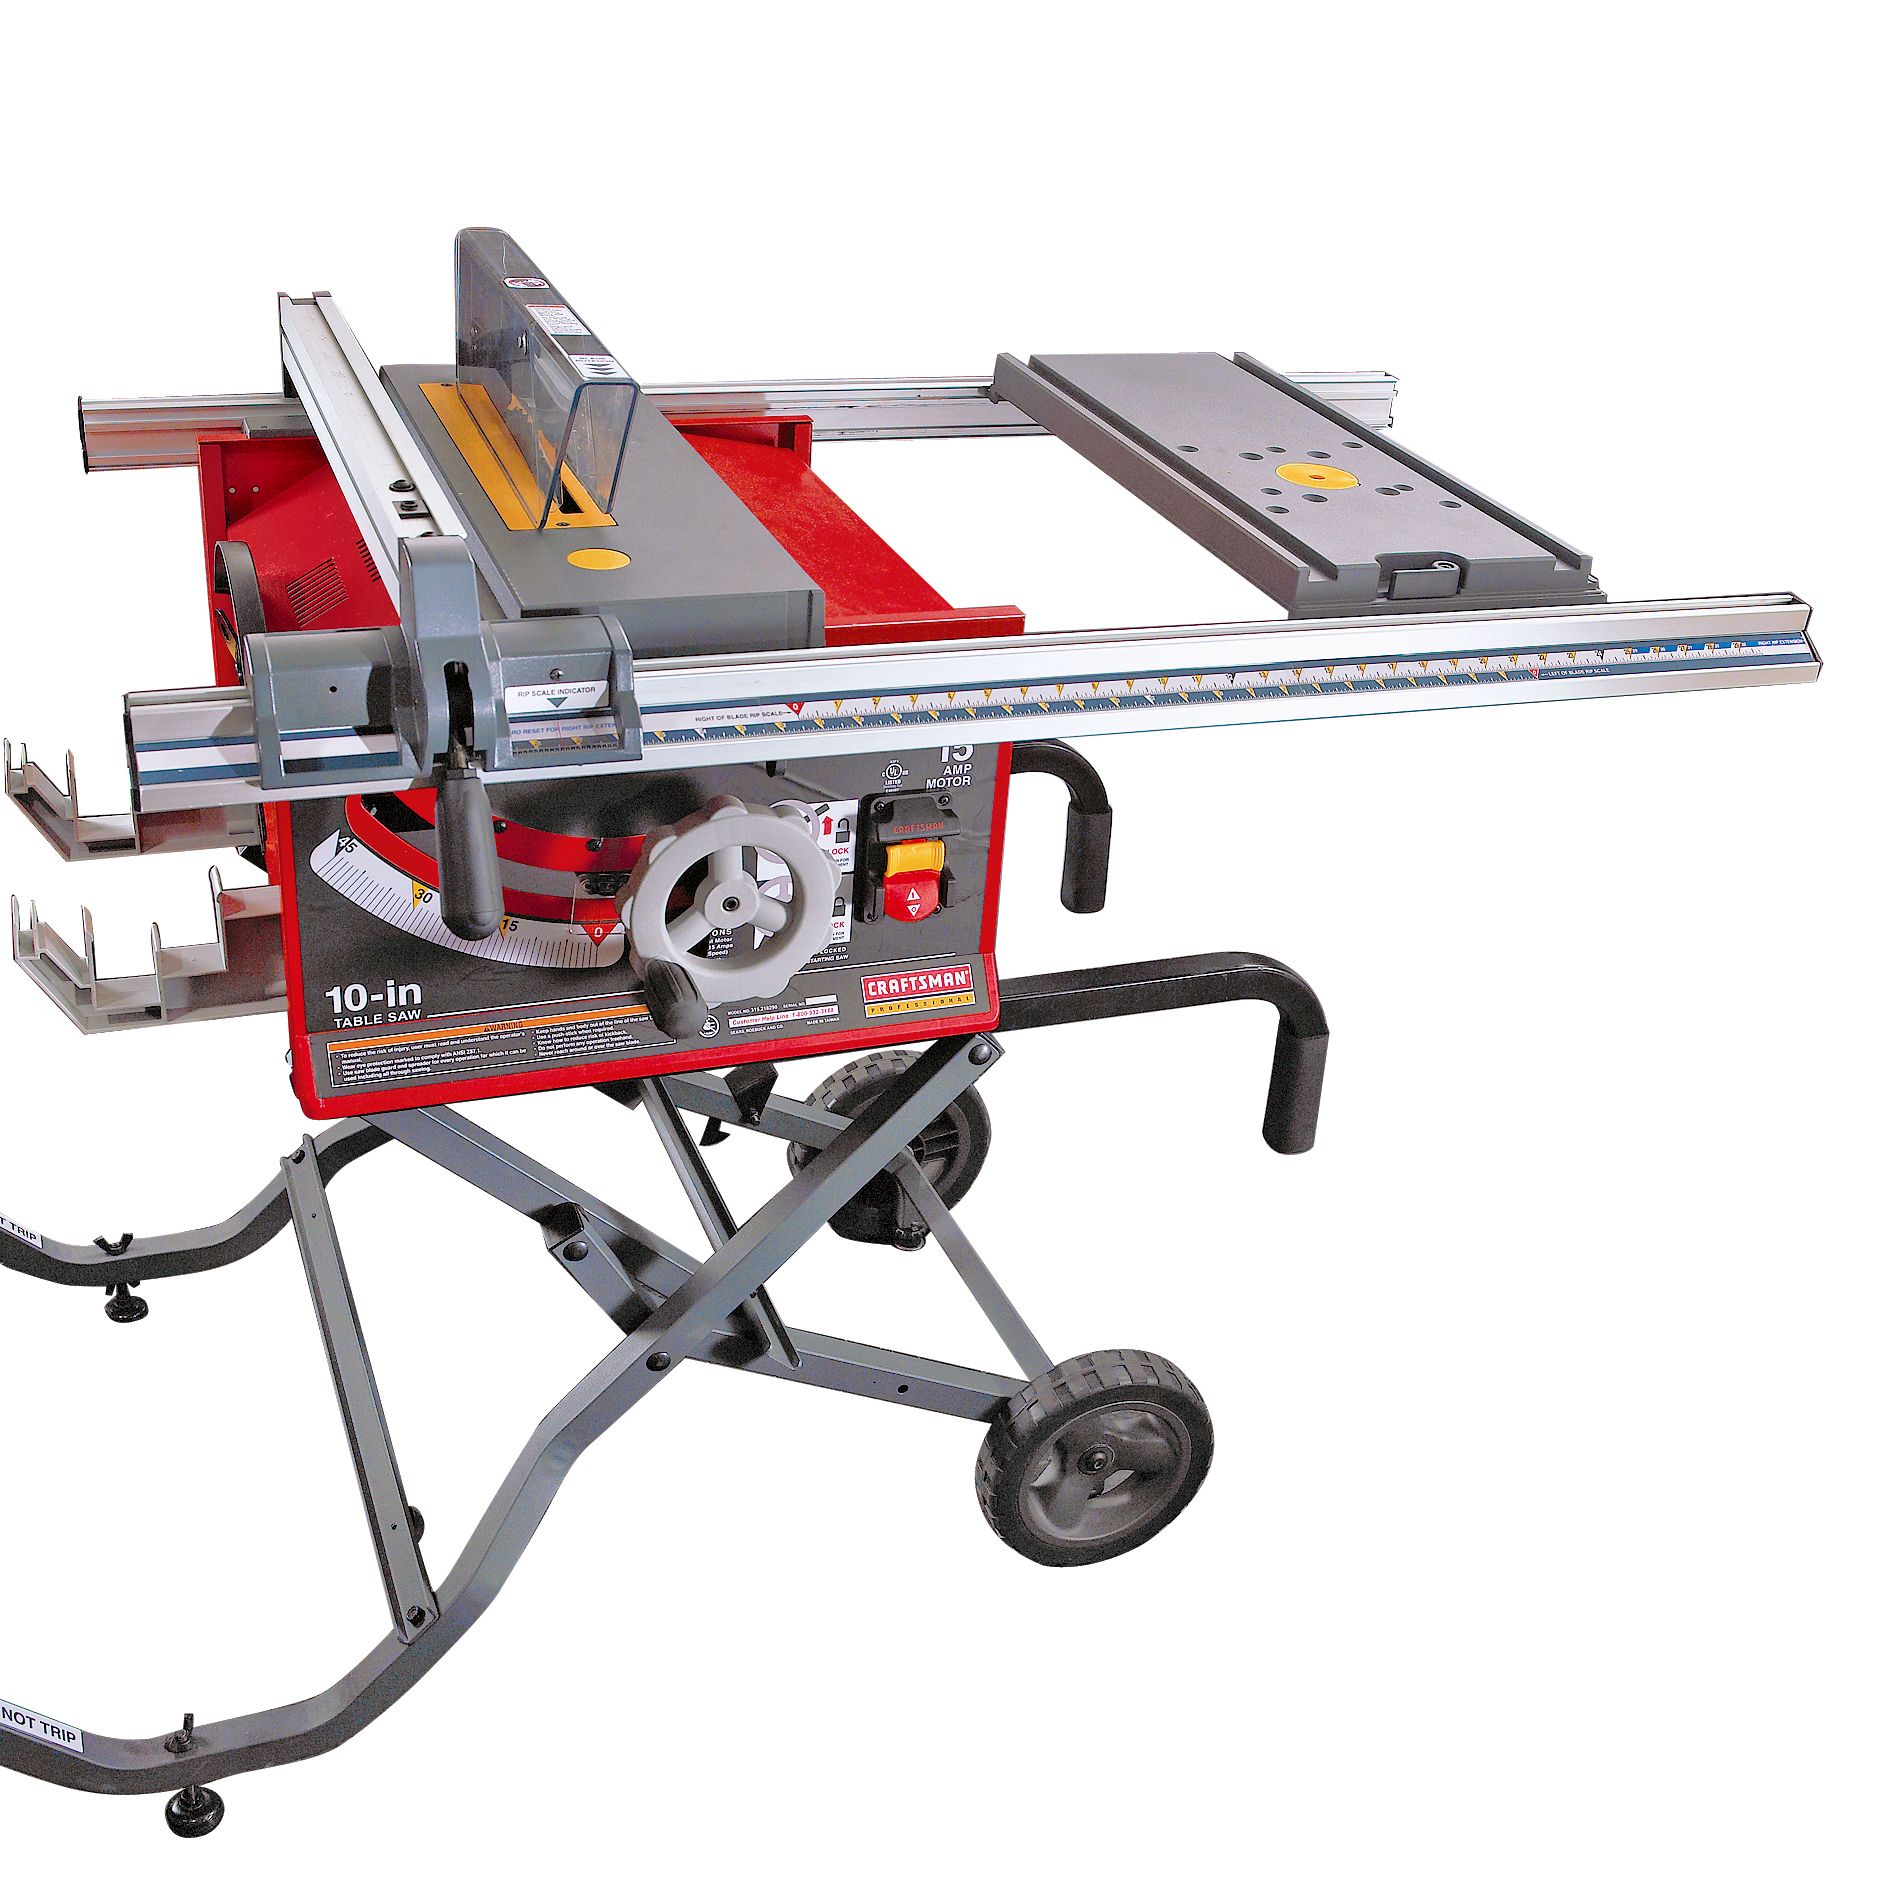
Loading ...
Loading ...
Loading ...
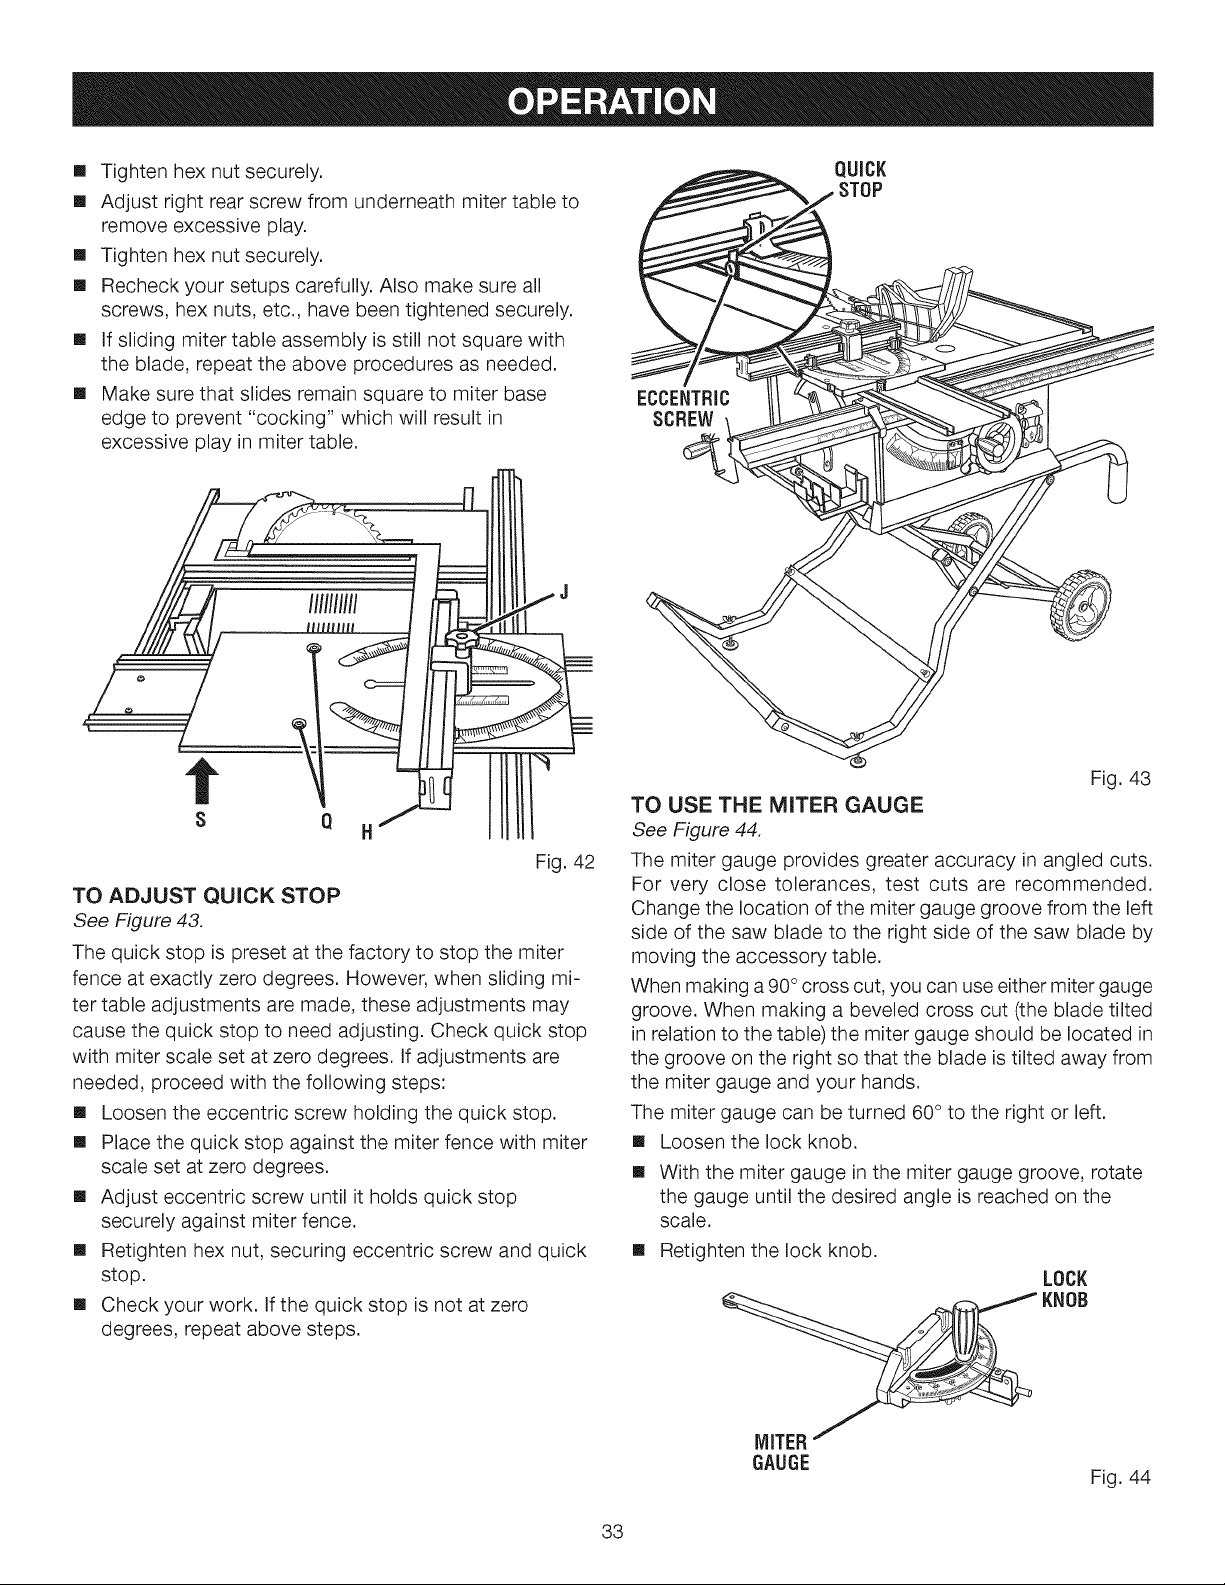
[] Tightenhexnutsecurely.
[] Adjustrightrearscrewfromunderneathmitertableto
removeexcessiveplay.
[] Tightenhexnutsecurely.
[] Recheckyoursetupscarefully.Alsomakesureall
screws,hexnuts,etc.,havebeentightenedsecurely.
[] Ifslidingmitertableassemblyisstillnotsquarewith
theblade,repeattheaboveproceduresasneeded.
[] Makesurethatslidesremainsquareto miterbase
edgeto prevent"cocking"whichwillresultin
excessiveplayinmitertable.
ECCENTRIC
SCREW
QUICK
STOP
Fig. 42
TO ADJUST QUICK STOP
See Figure 43.
The quick stop is preset at the factory to stop the miter
fence at exactly zero degrees. However, when sliding mi-
ter table adjustments are made, these adjustments may
cause the quick stop to need adjusting. Check quick stop
with miter scale set at zero degrees. If adjustments are
needed, proceed with the following steps:
[] Loosen the eccentric screw holding the quick stop.
[] Place the quick stop against the miter fence with miter
scale set at zero degrees.
[] Adjust eccentric screw until it holds quick stop
securely against miter fence.
[] Retighten hex nut, securing eccentric screw and quick
stop.
[] Check your work. If the quick stop is not at zero
degrees, repeat above steps.
Fig. 43
TO USE THE MITER GAUGE
See Figure 44.
The miter gauge provides greater accuracy in angled cuts.
For very close tolerances, test cuts are recommended.
Change the location of the miter gauge groove from the left
side of the saw blade to the right side of the saw blade by
moving the accessory table.
When making a 90° cross cut, you can use either miter gauge
groove. When making a beveled cross cut (the blade tilted
in relation to the table) the miter gauge should be located in
the groove on the right so that the blade is tilted away from
the miter gauge and your hands.
The miter gauge can be turned 60 ° to the right or left.
[] Loosen the lock knob.
[] With the miter gauge in the miter gauge groove, rotate
the gauge until the desired angle is reached on the
scale.
[] Retighten the lock knob.
LOCK
KNOB
MITER
GAUGE
Fig. 44
33
Loading ...
Loading ...
Loading ...