Loading ...
Loading ...
Loading ...
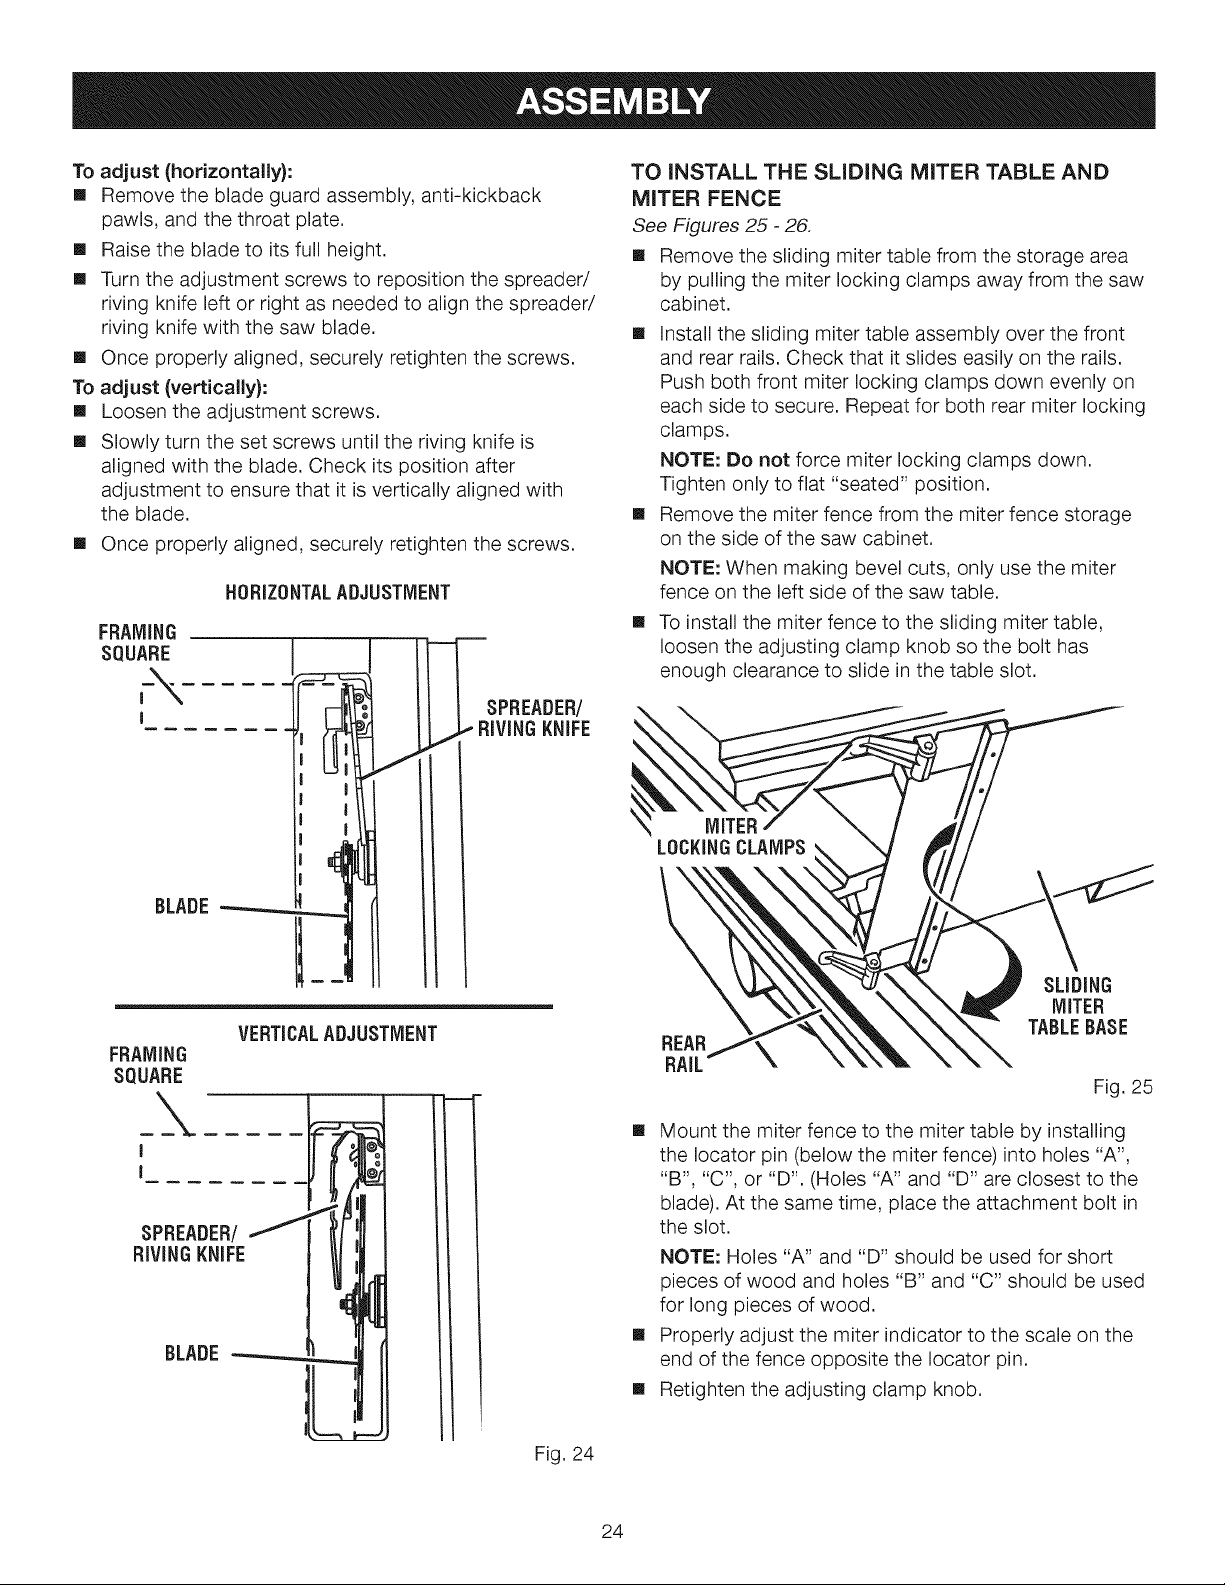
Toadjust(horizontally):
[] Remove the blade guard assembly, anti-kickback
pawls, and the throat plate.
[] Raise the blade to its full height.
[] Turn the adjustment screws to reposition the spreader/
riving knife left or right as needed to align the spreader/
riving knife with the saw blade.
[] Once properly aligned, securely retighten the screws.
To adjust (vertically):
[] Loosen the adjustment screws.
[] Slowly turn the set screws until the riving knife is
aligned with the blade. Check its position after
adjustment to ensure that it is vertically aligned with
the blade.
[] Once properly aligned, securely retighten the screws.
HORIZONTAL ADJUSTMENT
FRAMING
SQUARE
I
BLADE
FRAMING
SQUARE
\
I
I
SPREADER/
RiViNGKNIFE
VERTICALADJUSTMENT
BLADE
Fig. 24
TO INSTALL THE SLIDING MITER TABLE AND
MITER FENCE
See Figures 25 - 26.
[] Remove the sliding miter table from the storage area
by pulling the miter locking clamps away from the saw
cabinet.
[] Install the sliding miter table assembly over the front
and rear rails. Check that it slides easily on the rails.
Push both front miter locking clamps down evenly on
each side to secure. Repeat for both rear miter locking
clamps.
NOTE: Do not force miter locking clamps down.
Tighten only to flat "seated" position.
[] Remove the miter fence from the miter fence storage
on the side of the saw cabinet.
NOTE: When making bevel cuts, only use the miter
fence on the left side of the saw table.
[] To install the miter fence to the sliding miter table,
loosen the adjusting clamp knob so the bolt has
enough clearance to slide in the table slot.
LOCKINGCLAMPS
REAR
RAIL
SLiDiNG
MITER
TABLEBASE
Fig. 25
[] Mount the miter fence to the miter table by installing
the Iocator pin (below the miter fence) into holes "A',
"B', "C", or "D". (Holes "A" and "D" are closest to the
blade). At the same time, place the attachment bolt in
the slot.
NOTE: Holes "A" and "D" should be used for short
pieces of wood and holes "B" and "C" should be used
for long pieces of wood.
[] Properly adjust the miter indicator to the scale on the
end of the fence opposite the Iocator pin.
[] Retighten the adjusting clamp knob.
24
Loading ...
Loading ...
Loading ...