Loading ...
Loading ...
Loading ...
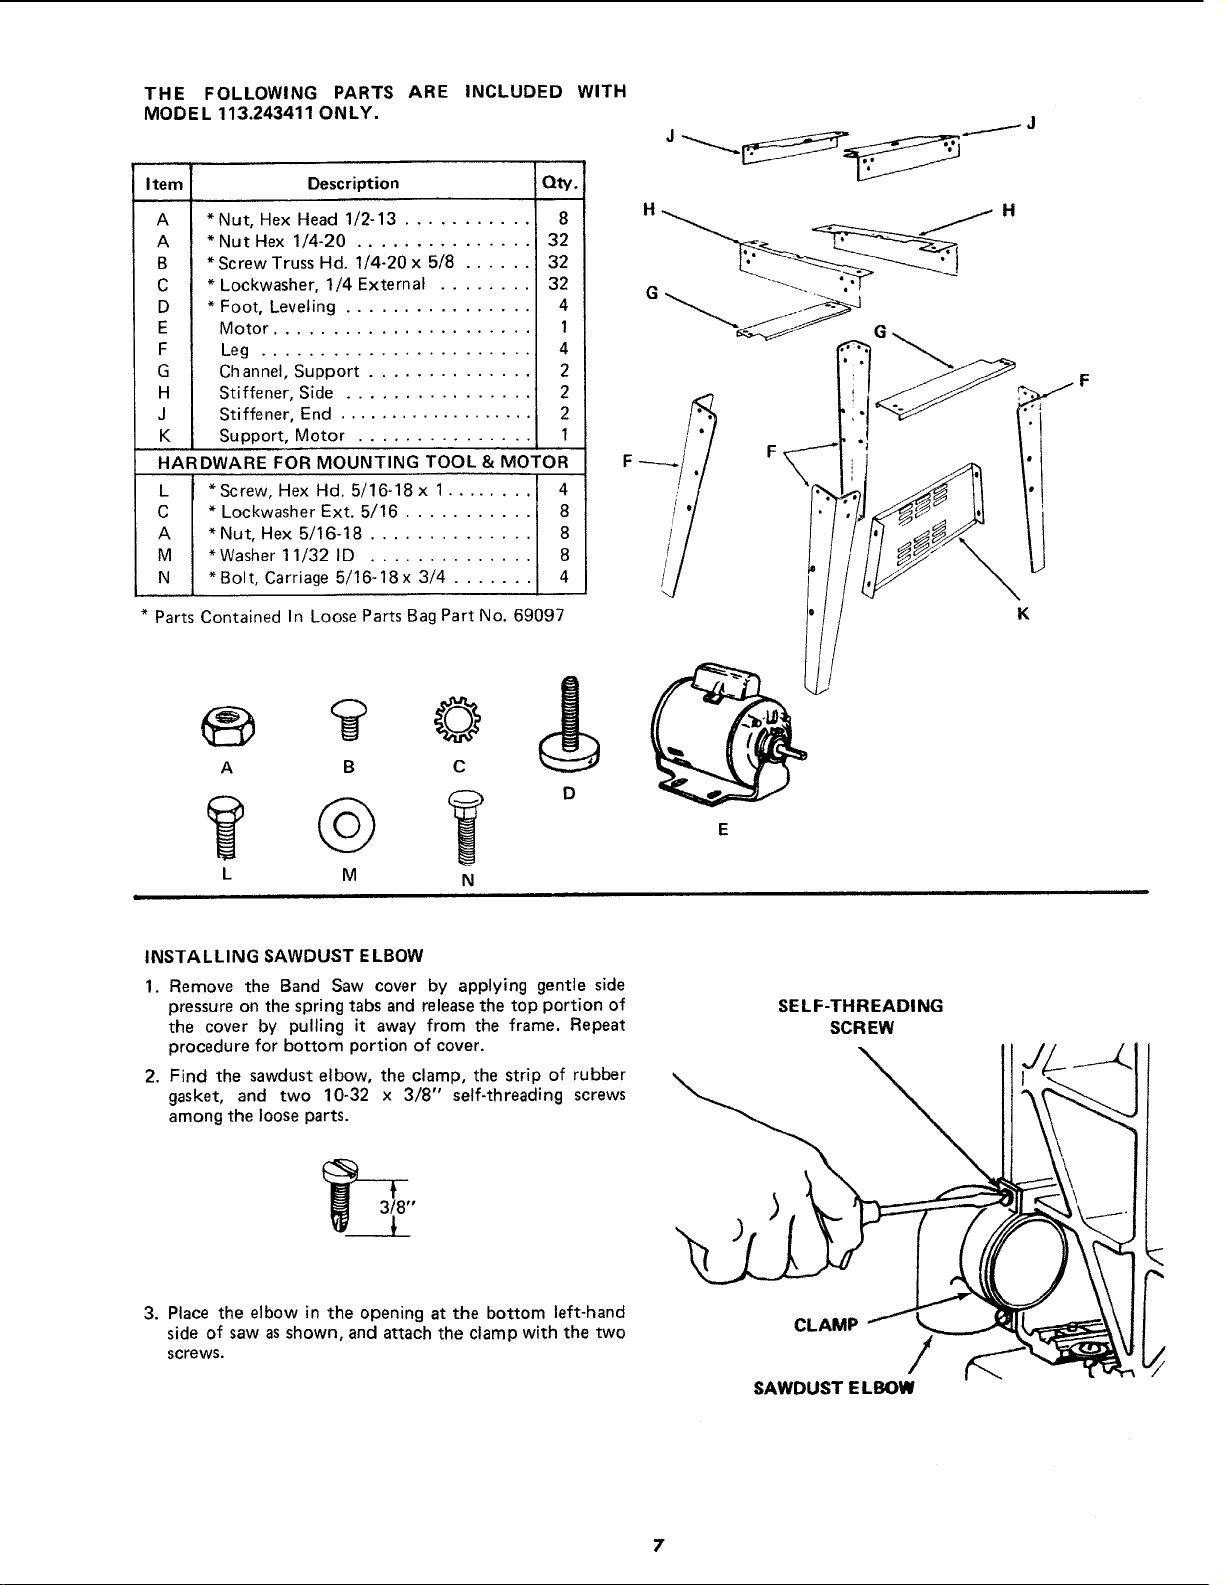
THE FOLLOWING PARTS ARE INCLUDED WITH
MODEL 113.243411 ONLY.
I tern Description Qty.
A
A
B
C
D
E
F
G
H
J
K
*Nut, Hex Head 1/2-13 ........... 8
* Nut Hex 1/4-20 ............... 32
*Screw Truss Hd. 1/4-20 x 5/8 ...... 32
* Lockwasher, 1/4 External ........ 32
* Foot, Leveling ................ 4
Motor ...................... 1
Leg ....................... 4
Channel, Support .............. 2
Stiffener, Side ................ 2
Stiffener, End ................... 2
Support, Motor ............... 1
HARDWARE FOR MOUNTING TOOL & MOTOR
L *Screw, Hex Hd. 5/16-18 x 1........ 4
C * Lockwasher Ext. 5/16 ........... 8
A *Nut, Hex 5/16-18 .............. 8
M *Washer 11/32 ID .............. 8
N *Bolt, Carriage 5/16-18x 3/4 ....... 4
* Parts Contained In Loose Parts Bag Part No. 69097
A B C
k M N
D
jJ
l
K
INSTALLING SAWDUST ELBOW
1. Remove the Band Saw cover by applying gentle side
pressure on the spring tabs and release the top portion of
the cover by pulling it away from the frame. Repeat
procedure for bottom portion of cover.
2. Find the sawdust elbow, the clamp, the strip of rubber
gasket, and two 10-32 x 3/8" self-threading screws
among the loose parts.
3. Place the elbow in the opening at the bottom left-hand
side of saw as shown, and attach the clamp with the two
screws.
SELF-THREADING
SCREW
CLAMP
SAWDUST E LBOW
Loading ...
Loading ...
Loading ...