Loading ...
Loading ...
Loading ...
NOTE:When using the Dado or Molding Head, it is
not necessary to install the loose collar. Refer to
instruction sheet packed with dado or molding
head.
To replace insert.
Place insert into insert opening in table and
push toward rear of saw to engage spring clip
and until keyslot in insert will drop over screw.
Tighten screw.
Do not tighten screw to the point where it will
deflect the insert.
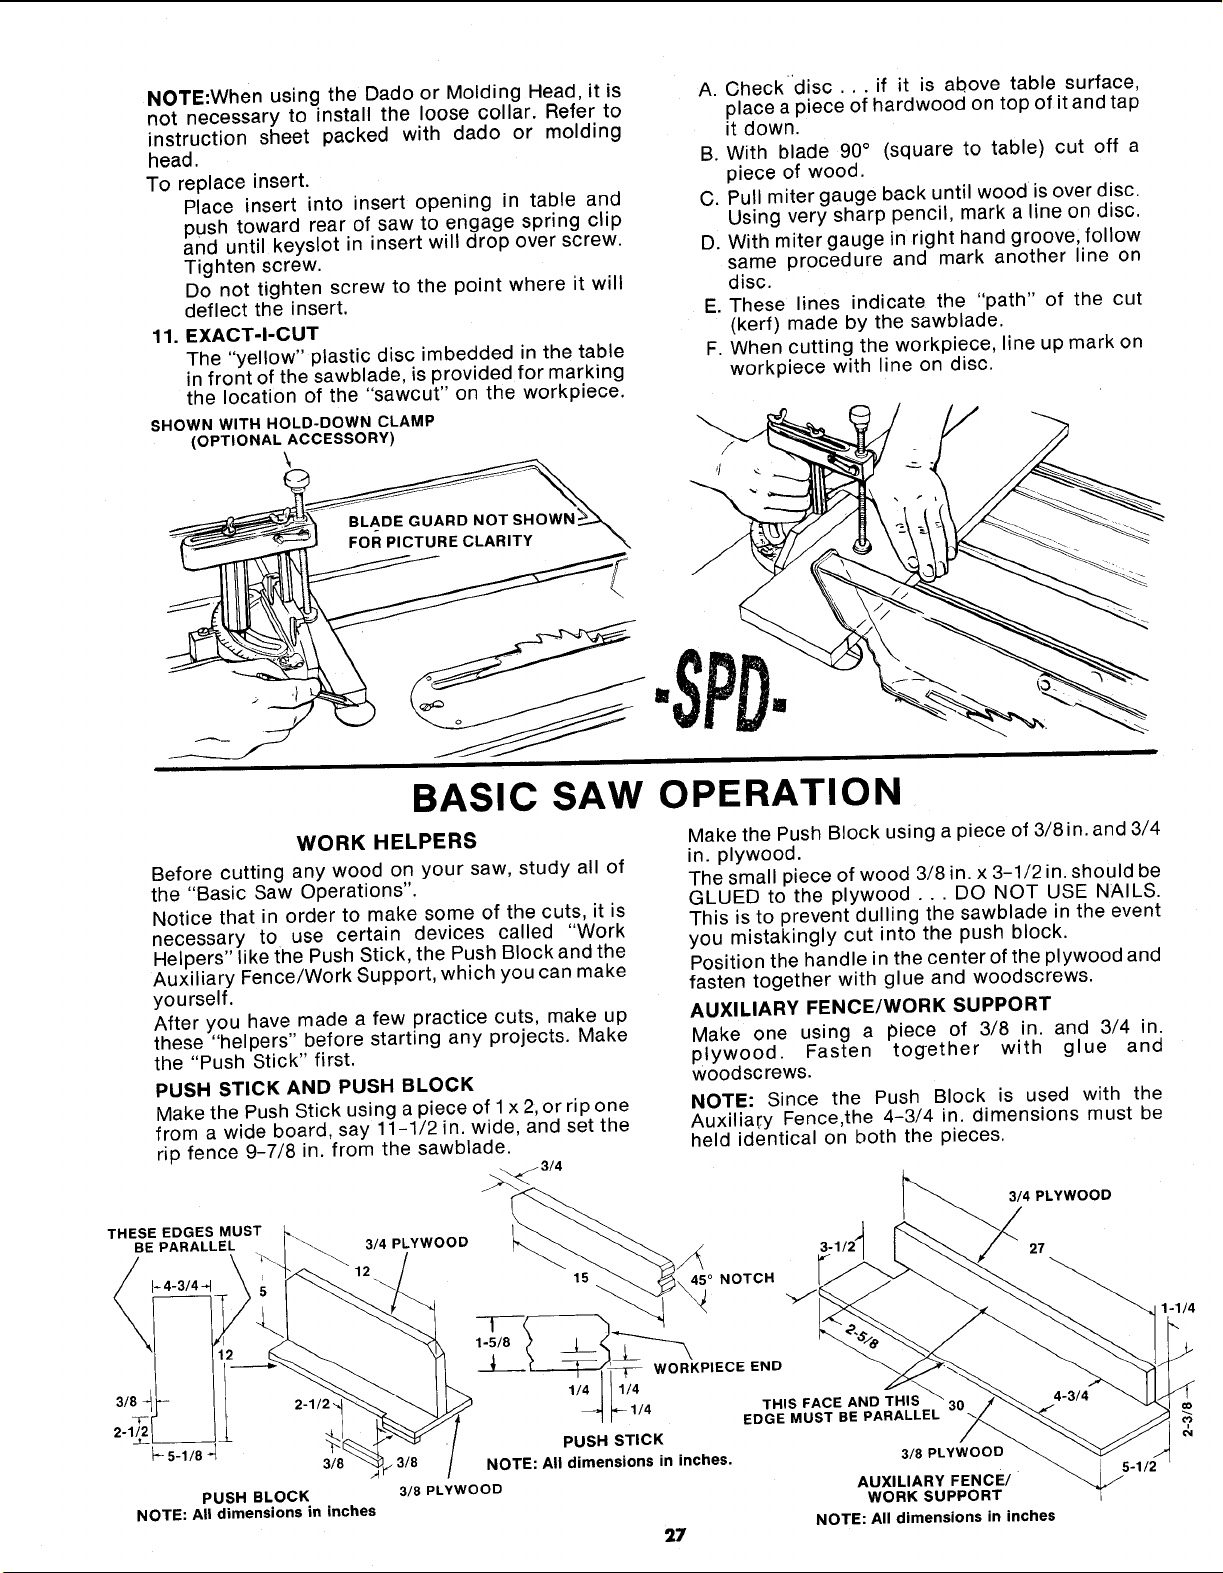
11. EXACT-I-CUT
The "yellow" plastic disc imbedded in the table
in front of the sawblade, is provided for marking
the location of the "sawcut" on the workpiece.
SHOWN WITH HOLD-DOWN CLAMP
(OPTIONAL ACCESSORY)
A. Checkdisc... if it is above table surface,
place a piece of hardwood on top of it and tap
it down.
B. With blade 90° (square to table) cut off a
piece of wood.
C. Pull miter gauge back until wood is over disc.
Using very sharp pencil, mark a line on disc.
D. With miter gauge in right hand groove, follow
same procedure and mark another line on
disc.
E. These lines indicate the "path" of the cut
(kerf) made by the sawblade.
F. When cutting the workpiece, line up mark on
workpiece with line on disc.
BASIC SAW OPERATION
WORK HELPERS
Before cutting any wood on your saw, study all of
the "Basic Saw Operations".
Notice that in order to make some of the cuts, it is
necessary to use certain devices called "Work
Helpers" like the Push Stick, the Push Block and the
Auxiliary Fence/Work Support, which you can make
yourself.
After you have made a few practice cuts, make up
these "helpers" before starting any projects. Make
the "Push Stick" first.
PUSH STICK AND PUSH BLOCK
Make the Push Stick using a piece of 1x 2,or rip one
from a wide board, say 11-1/2 in. wide, and set the
rip fence 9-7/8 in. from the sawblade.
Make the Push Block using a piece of 3/8in. and 3/4
in. plywood.
The small piece of wood 3/8 in. x 3-1/2 in. should be
GLUED to the plywood ... DO NOT USE NAILS.
This is to prevent dulling the sawblade in the event
you mistakingly cut into the push block.
Position the handle in the center of the plywood and
fasten together with glue and woodscrews.
AUXILIARY FENCE/WORK SUPPORT
Make one using a piece of 3/8 in. and 3/4 in.
plywood. Fasten together with glue and
woodscrews.
NOTE: Since the Push Block is used with the
Auxilia_:y Fence,the 4-3/4 in. dimensions must be
held identical on both the pieces.
THESE EDGES MUST
BE PARALLEL 3/4 PLYWOOD
3/4 PLYWOOD
PUSH BLOCK
NOTE: All dimensions in inches
45 ° NOTCH
27
t
1-5/8
NOTE: All dimensions in inches.
3/8 PLYWOOD
t _-- WORKPIECE END
111/4
I_- 1/4 THIS FACE AND THIS
/
EDGE MUST BE PARALLEL
PUSH STICK
3/8 PLYWOOD
27
AUXILIARY FENCE/
WORK SUPPORT
NOTE: All dimensions in inches
Loading ...
Loading ...
Loading ...