Loading ...
Loading ...
Loading ...
NOTE: All six screws can be reached through back
of saw. Use a 9/16-in. wrench. To reach left-hand
front trunnion screws, tilt blade to approximately
25° . After loosening screws reposition blade at 90° .
To make this adjustment:
a. Plug saw into power outlet.
b. Insert yellow key into MASTER switch and
turn on.
c. Press [-_ key.
d. Press and hold _-_ key to tilt sawbladeto
approximately 25° to obtain clearance for
wrench.
e. Turn switch off. Remove yellow key.
f. Loosen all three screws that hold the rear
trunnion and all three screws that hold the
front trunnion.
g. Insert yellow key into MASTER switch and
turn on.
h. Press [-_ key.
i. Press and hold _ keyto reposition blade
at 90° using a square.
j. Turn switch "OFF", remove yellow key and
unplug saw.
REAR TRUNNION
SCREWS
.EFT--HAND
RIGHT HAND CENTER (BEHIND HERE)
(BEHIND HERE)
! \
FRONT-TRUNNION SCREWS
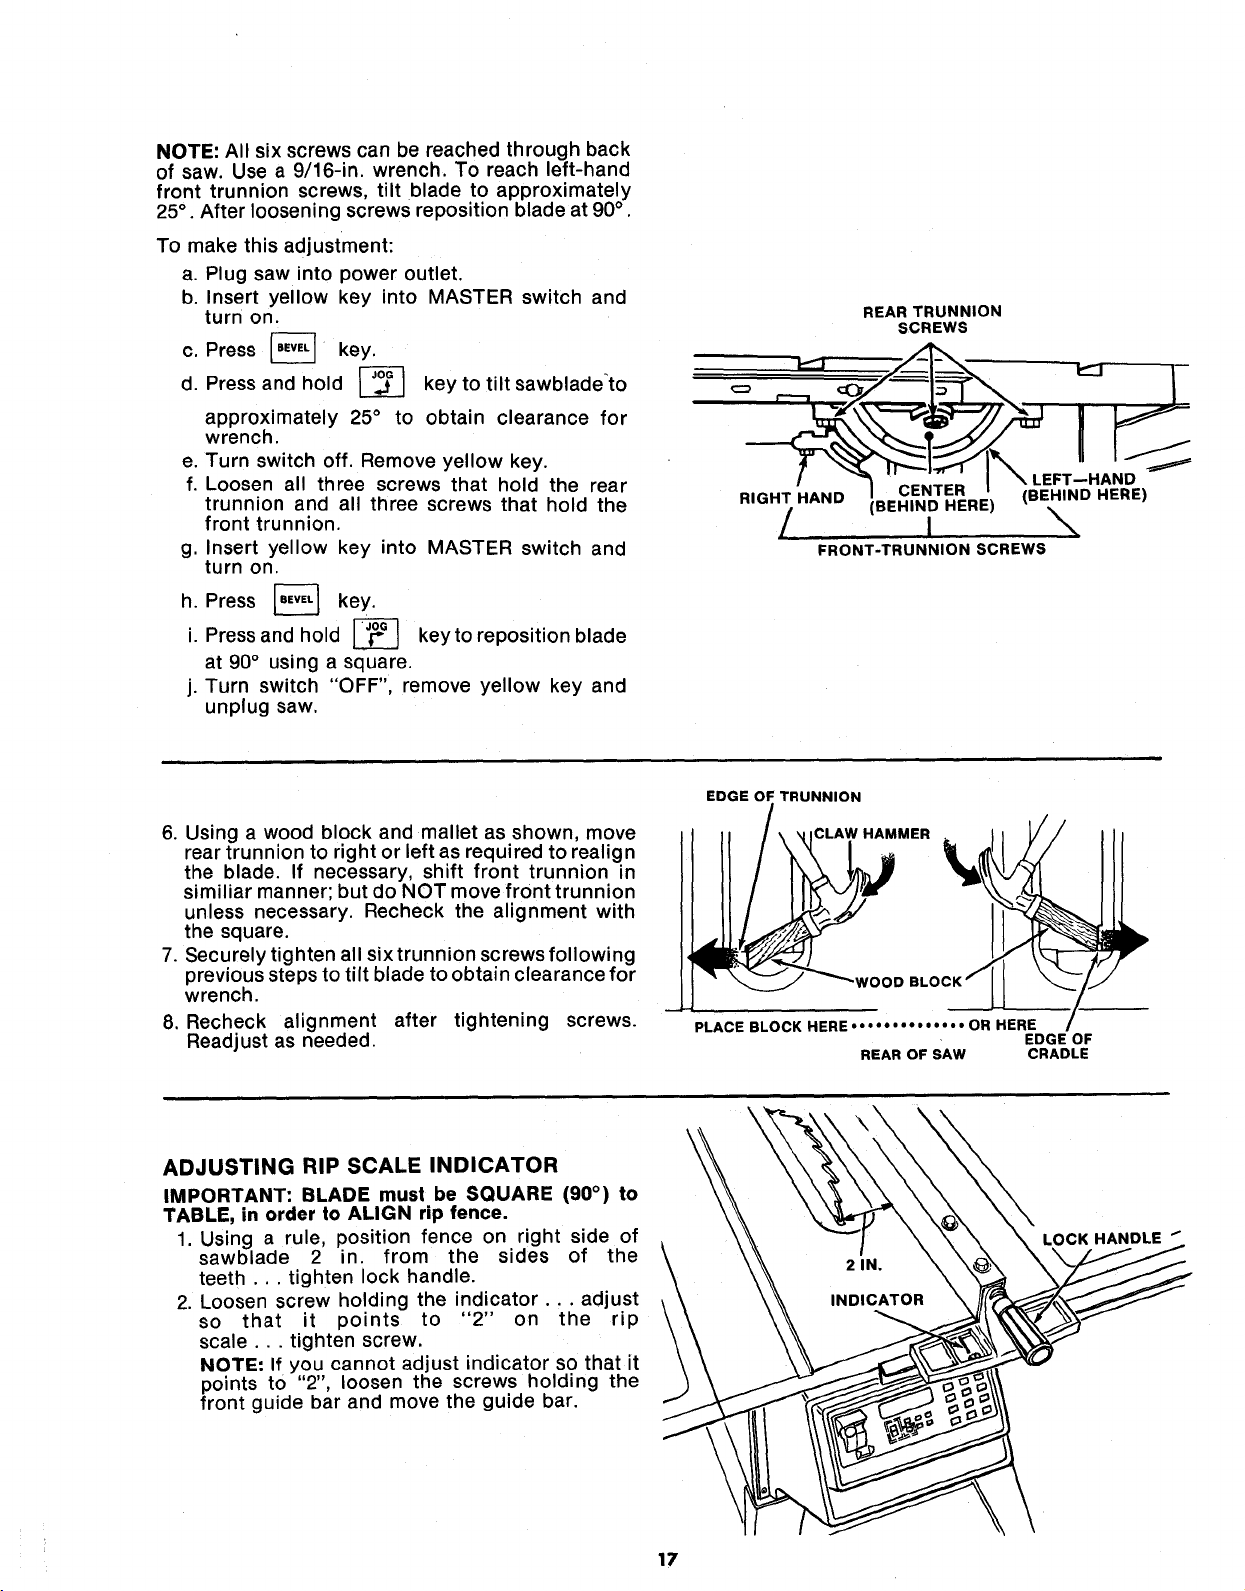
6. Using a wood block and mallet as shown, move
rear trunnion to right or left as required to realign
the blade. If necessary, shift front trunnion in
similiar manner; but do NOT move front trunnion
unless necessary. Recheck the alignment with
the square.
7. Securely tighten all six trunnion screws following
previous steps to tilt blade to obtain clearance for
wrench.
8. Recheck alignment after tightening screws.
Readjust as needed.
EDGE OF TRUNNION
CLAW HAMMER
PLACE BLOCK HERE .... • • • • • • • •" • OR HERE
EDGE OF
REAR OF SAW CRADLE
ADJUSTING RIP SCALE INDICATOR
IMPORTANT: BLADE must be SQUARE (90 °) to
TABLE, in order to ALIGN rip fence.
1. Using a rule, position fence on right side of
sawblade 2 in. from the sides of the
teeth ... tighten lock handle.
2. Loosen screw holding the indicator.., adjust
so that it points to "2" on the rip
scale.., tighten screw.
NOTE: If you cannot adjust indicator so that it
points to "2", loosen the screws holding the
front guide bar and move the guide bar.
\
LOCK HANDLE _
17
Loading ...
Loading ...
Loading ...