Loading ...
Loading ...
Loading ...
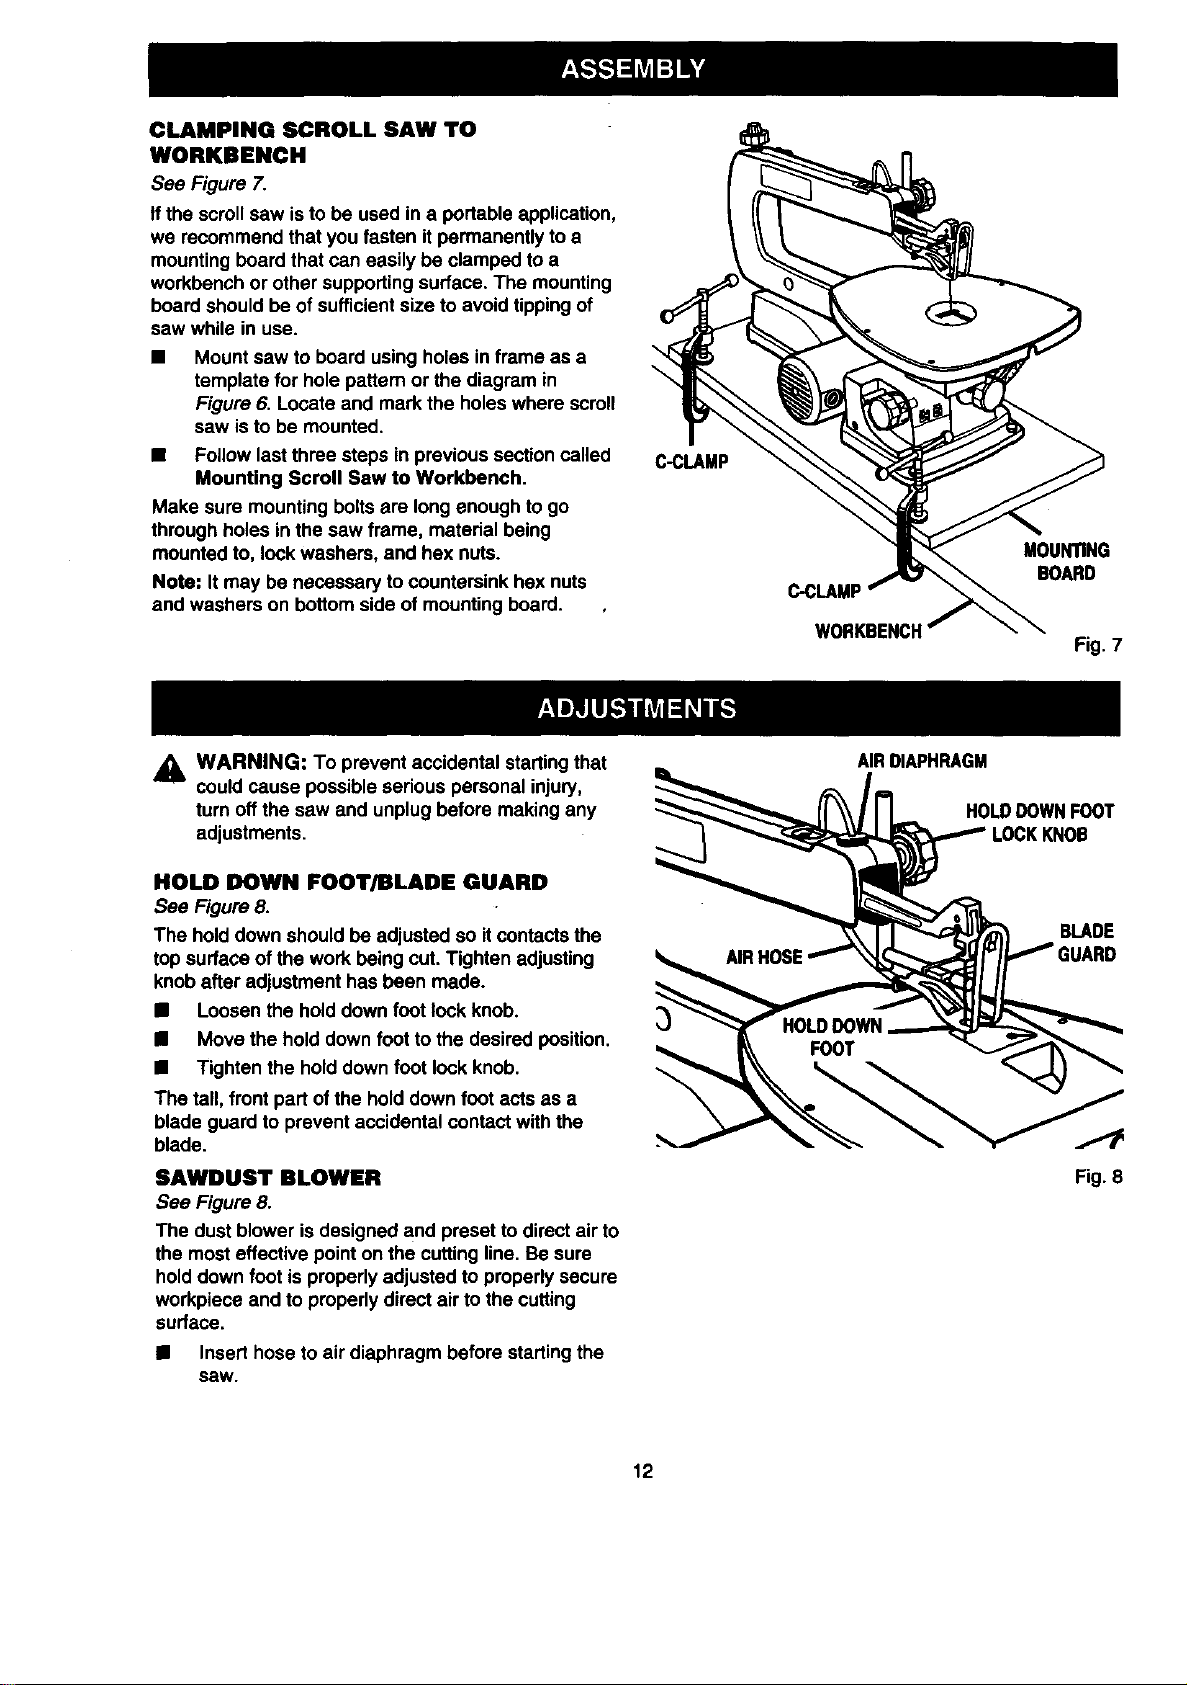
CLAMPING SCROLLSAW TO
WORKBENCH
See Figure 7.
tfthe scrollsaw isto be used in a portable application,
we recommend that you fasten itpermanently to a
mounting beard that can easily be clamped to a
workbenchor other supportingsurface. The mounting
board should be of sufficientsize to avoid tippingof
saw while in use.
Mount saw to board using holes in frame as a
template for hole pattern or the diagram in
Figure 6. Locate and mark the holeswhere scroll
saw isto be mounted.
• Follow lastthree steps in previoussection called
• ounUng Scroll Saw to Workbench.
Make sure mounting boltsare longenough togo
through holes in the saw frame, material being
mounted to, lock washers, and hex nuts.
Note: Itmay be necessary to countersink hex nuts
and washers on bettom side of mounting board.
\
C-CLAMP
C-CLAMP
WORKBENCH
MOUNTING
BOARD
Fig. 7
,_k WARNING: To preventaccidental startingthat
could cause possibleserious personal injury,
turn off the sew and unplug before making any
adjustments.
HOLD DOWN FOOT/BLADE GUARD
See Figure 8.
The hold down shouldbe adjusted so itcontactsthe
top surface of the work being cut. Tighten adjusting
knobafter adjustment has been made.
• Loosen the hold down foot lock knob.
• Move the hold down foot to the desired position.
• Tighten the hold downfoot lock knob.
The tall, front part of the hold down foot acts as a
blade guard to prevent accidental contact withthe
blade.
SAWDUST BLOWER
See Figure 8.
The dust blower isdesigned and preset to direct air to
the mosteffective point on the cutting line. Be sure
holddown foot isproperly adjusted to properly secure
workpiece and to properlydirect air to the cutting
surface.
• Inserthose to air diaphragm before startingthe
saw.
AIRDIAPHRAGM
HOLDDOWNFOOT
KNOB
BLADE
Fig. 8
12
Loading ...
Loading ...
Loading ...