Loading ...
Loading ...
Loading ...
5
w WARNING
Cut Hazard.
• Blades are sharp; handle carefully.
• Inspect parts before use. Do not
use if parts are cracked, bent, or
damaged.
• Do not place fingers or utensils into
the blade while in use.
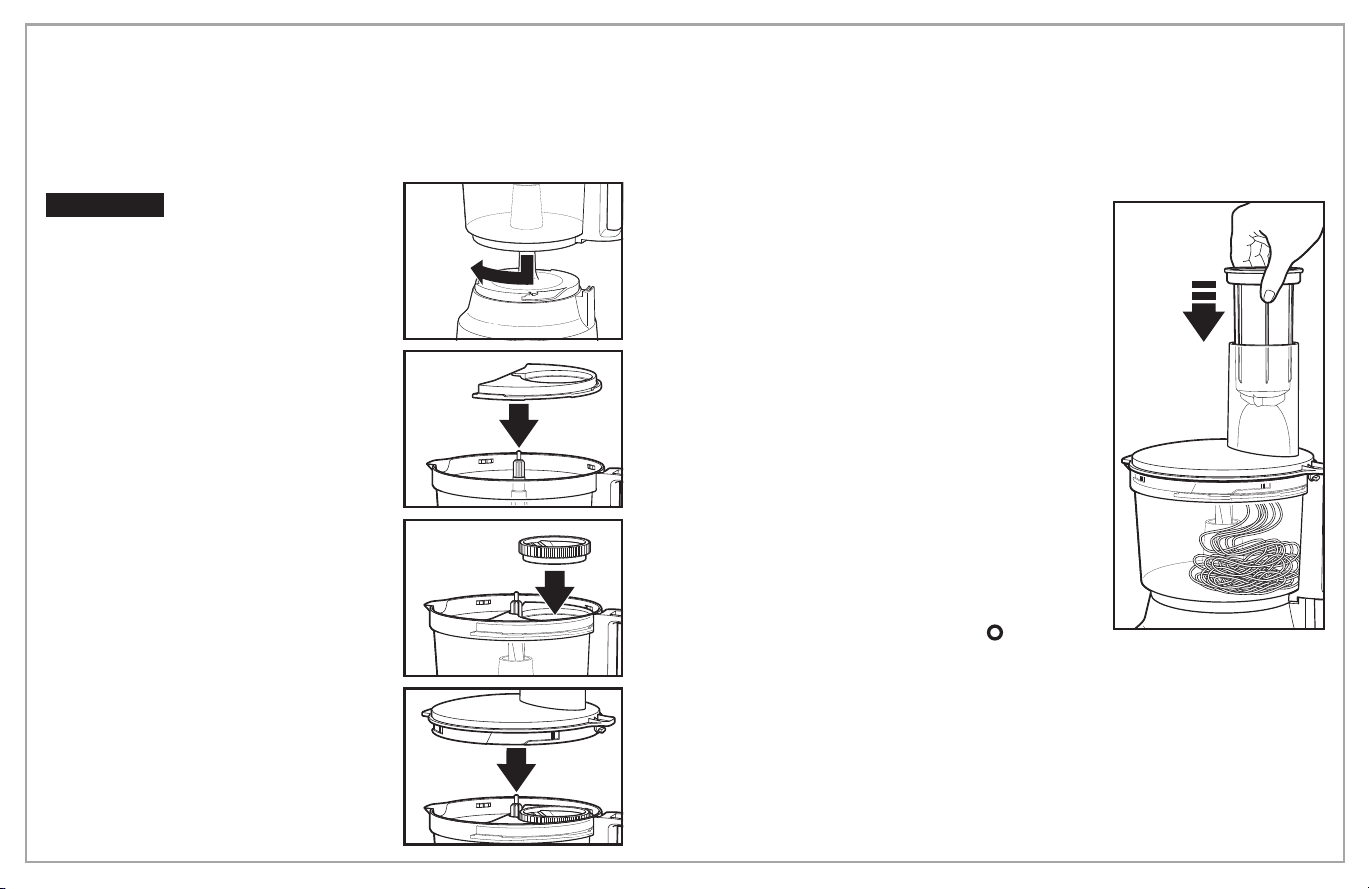
1. Align Bowl and Base. Turn Bowl
clockwise to lock into place.
2. With the tabs on the Spiral Slicing
Plate aligned to the tabs on inside
of Bowl, insert Spiral Slicing Plate
into the Bowl facing handle. Refer
to graphic on the Spiral Slicing
Plate. Ensure the small hole on the
Spiral Slicing Plate aligns with the
Motor Shaft.
3. Place end of Spiral Blade or Ribbon
Blade into Spiral Slicing Plate, as
shown at right.
4. Replace Lid.
5. Slide Food Pusher into Food
Chute.
How to Assemble
Spiral Slicer
How to Use Spiral
Blade and Ribbon Blade
1. Plug into outlet.
2. Place the food in center of the Food Chute.
Process only one piece of food at a time.
3. Press Food Pusher securely into food by
pushing down on the Food Pusher.
4. Turn Control Knob to 1.
5. Apply light, constant pressure to Food
Pusher while processing food. Allow the
Food Pusher and motor to work at their
own pace.
6. Keep processing until food stops being
cut. About 1 inch (2.5 cm) of food will
always remain unprocessed.
7. Remove the small cone-shaped piece of
food left on the Food Pusher. Use as a
snack or add to stock, soup, or salads.
8. Check Spiral Blade before spiralizing more
food. If pulp is caught in Blade, clean with
a brush and rinse.
9. When finished, switch to OFF ( ). Unplug.
NOTES:
• Pressing harder will not speed up the process or make the Spiral
Slicer cut better. The Spiral Blade turns, not the food.
• Do not lift up the Food Pusher during processing. This can cause
the Food Pusher to lose its grip on the food.
Loading ...
Loading ...
Loading ...