Loading ...
Loading ...
Loading ...
16 English
Before you start
Before you start
You should know about the following features and components before you use
your range for the rst time.
Sleep mode
Sleep
After 2 minutes of inactivity (or 1 minute when the oven is in standby mode),
the control panel enters Sleep mode. In Sleep mode, the control panel is inactive,
displaying only the time, until it is reactivated by the user.
Wake-Up
To activate the control panel, push or
turn the dial knob. User preferences are
available in this mode including the timer,
oven light, and control lock.
Clock
You must set the clock correctly to ensure the automatic features work properly.
This product supports two time formats: 12-hour (default) and 24-hour.
Set time
12:00PM
2
1
To set the clock time
1. Tap .
2. Select Set time using the dial knob.
3. Enter the current time using the dial
knob.
4. Push the dial knob to conrm the
settings.
Set Date
Dec 31, 2020
2
1
To set the Date
1. Tap .
2. Select Set Date using the dial knob.
3. Enter the current Date using the dial
knob.
4. Push the dial knob to conrm the
settings.
Time format
24hr
2
1
To change the time format (12hr/24hr)
1. Tap .
2. Select Time format using the dial knob.
3. Turn the dial knob to select 12hr or 24hr.
4. Push the dial knob to save the changes.
NOTE
You can set or change the clock or the kitchen timer before you start a cooking
mode or while most cooking modes are operating. However, you cannot set or
change the time if a time based function is operating (Time Bake, for example) or
the Sabbath option is enabled.
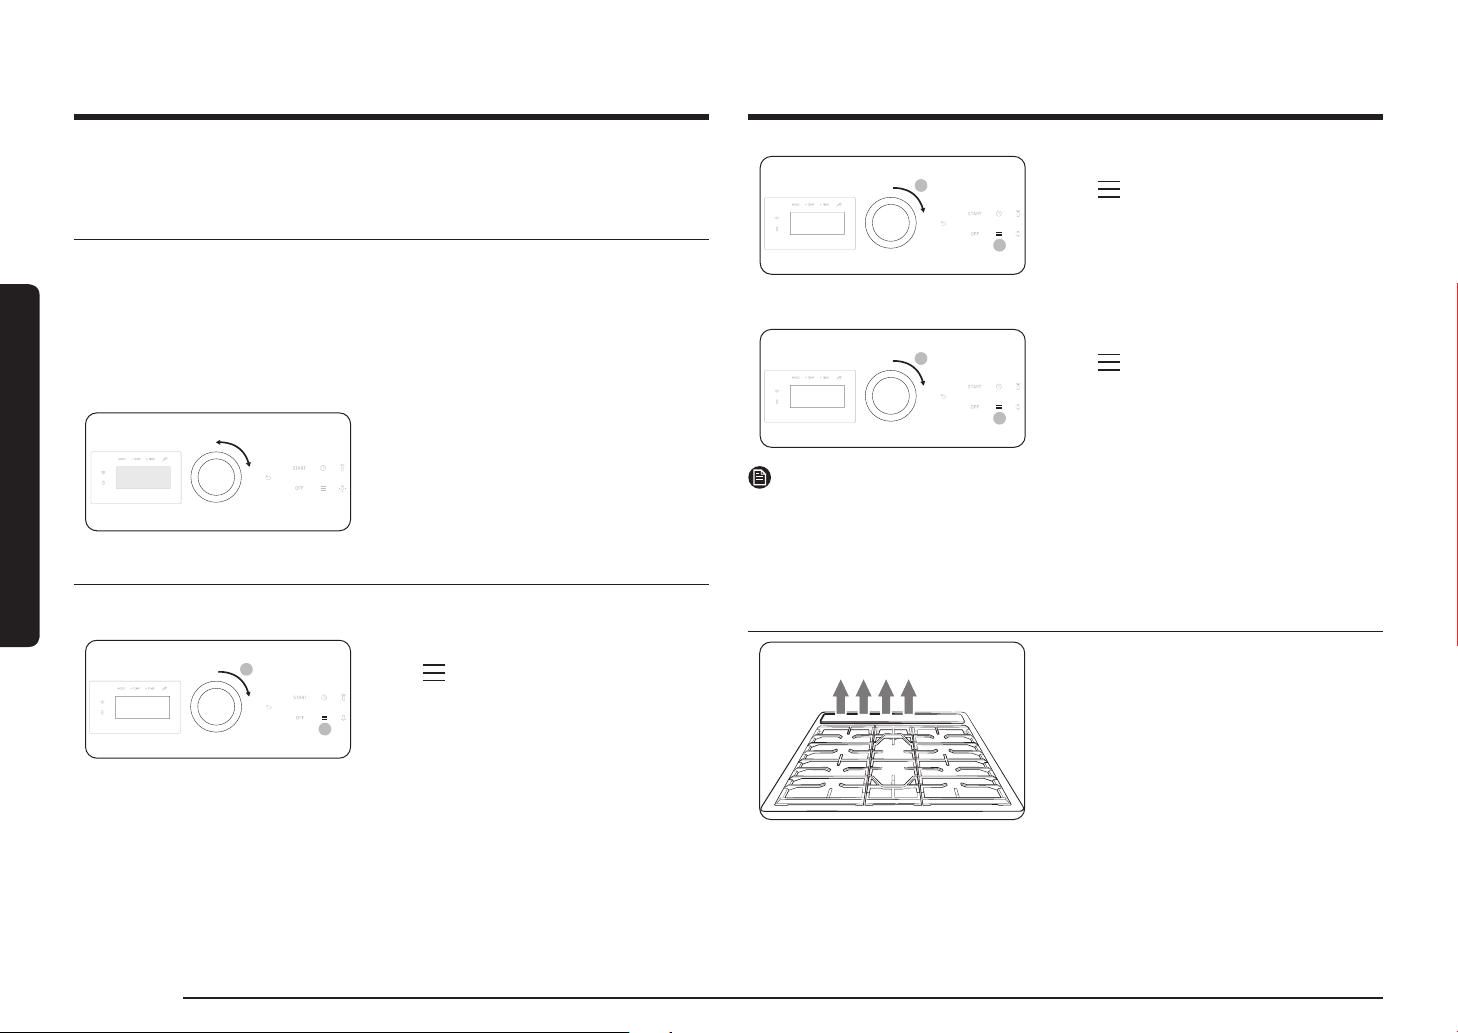
Oven vent/cooling vent
The Oven/Cooling vents are located at
the back of the oven range. Proper air
circulation prevents combustion problems
and ensures good performance.
• Do not block the vent or its surroundings.
• Use caution when placing items near
the vent. Hot steam can cause them to
overheat or melt.
Loading ...
Loading ...
Loading ...