Jeep
SPV-65-JLT v20200731 1/6
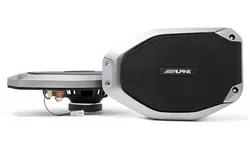
SPV-65-JLT
6.5” 2-Way Component System
Soundbar
Installation Manual
Model: Wrangler JL 2018-Up
Model: Gladiator JT 2020-Up
**Not compatible with OEM amplied systems
Note
Design and specifications are subject to change without notice for improvement.
To Ensure Safe Use, Always Follow These Precautions
The installation of this product requires specialized skills and experience. We recommend that you have the
product installed by an Alpine authorized dealer.
Before you use this product, be sure to carefully read this installation manual and the separate user's manual
so that you can use the product correctly. Alpine Electronics bears no responsibility for problems that arise as
a result of failure to follow the instructions in the manuals.
This manual includes a number of symbols that are intended to help you use the product safely, to prevent
harm to you and others, and to protect against damage to property. These symbols and their meanings are
listed below. Make sure you fully understand these symbols before you begin reading the main text.
Explanations of Injury and Damage That May Result from Incorrect Use
Warning
Ignoring the content marked by this indication and using the product incorrectly is
expected to lead to death or serious injury.
Caution
Ignoring the content marked by this indication and using the product incorrectly is only
expected to lead to injury or property damage.
Introduction
Congratulations on purchasing the SPV-65-JLT. This installation manual is designed to take you through the
step-by-step installation of SPV-65-JLT into a 2018-Up Jeep Wrangler JL or Jeep Gladiator JT 2020-Up. Please
familiarize yourself with the owners manual as this is a challenging installation. If you still have additional
questions please call 1-800-TECH-101.
* The specified vehicles have been tested and have met compatibility specs at the time of testing. Compatibility is
not guaranteed if the manufacturer has made production changes to the listed vehicles above.
Jeep
SPV-65-JLT v20200731 2/6
Forbidden
Indicates actions that are
forbidden (must not be
performed)
Forbidden
Indicates that disassembly is
forbidden.
Mandatory
Indicates actions that are
mandatory (must be performed)
Marks content that should receive
your full attention.
Warning
Do not disassemble or modify the product.
Doing so could lead to an accident, fire, or
electric shock.
Forbidden
Store screws and other small objects where
children cannot reach them. If one of those
small objects is swallowed, consult with a
doctor immediately.
When replacing fuses be sure to
use the fuses with the specified current
rating. Failing to do so could lead to
an accident or fire.
Forbidden
Only connect the product to a 12 VDC negative
ground car. Failing to do so could lead to an
accident or fire.
Mandatory
Do not cut the insulation on a cord and take
power from another device. Doing so could
lead to fire or electric shock.
Forbidden
Do not install the product in a location where
it willl obstruct the driver’s forward view;
interfere with the operation of the steering
wheel, gear shift, or the like; or pose a threat
to passengers. Doing so could lead to an ac-
cident or injury.
Forbidden
When making a hole in the vehicle body, be
careful to avoid damaging pipes, the fuel tank,
electrical wiring, and the like. This kind of
damage could lead to an accident or fire.
When installing and grounding the product, do
not use any of the bolts or nuts of the steering
wheel, brakes, fuel tank, or the like. Doing so
could make the brakes stop working or could
lead to fire.
Forbidden
Do not install the product near the passenger-
side airbag. Doing so could interfere with the
operation of the airbag and lead to an acci-
dent or injury.
Forbidden
Bundle cords so that they don’t interfere with
driving. Wrapping cords around the steer-
ing wheel, gearshift, brake pedal, or the like
could lead to an accident or damage equip-
ment.
Caution
Connect the product properly according to the
instructions. Failing to do so could lead to fire
or an accident.
Forbidden
Do not sandwich cords between the seat
railing or allow them to touch protrusions. Re-
sulting breaks or shorts could lead to electric
shock or fire.
Do not block vents or heat sinks. Doing so
could lead to fire or damage equipment.
Use the accessories according to the instruc-
tions, and attach them securely. Failing to
do so could lead to an accident or damage
equipment.
Forbidden
Do not install the product where it may be ex-
posed to water or in a place with high levels
of humidity or dust. Doing so could lead to fire
or damage equipment.
Forbidden
The installation and wiring of this product re-
quires specialized skills and experience. Have
the product installed by an Alpine authorized
dealer.
Types of Precautions
Mandatory
Jeep
SPV-65-JLT v20200731 3/6
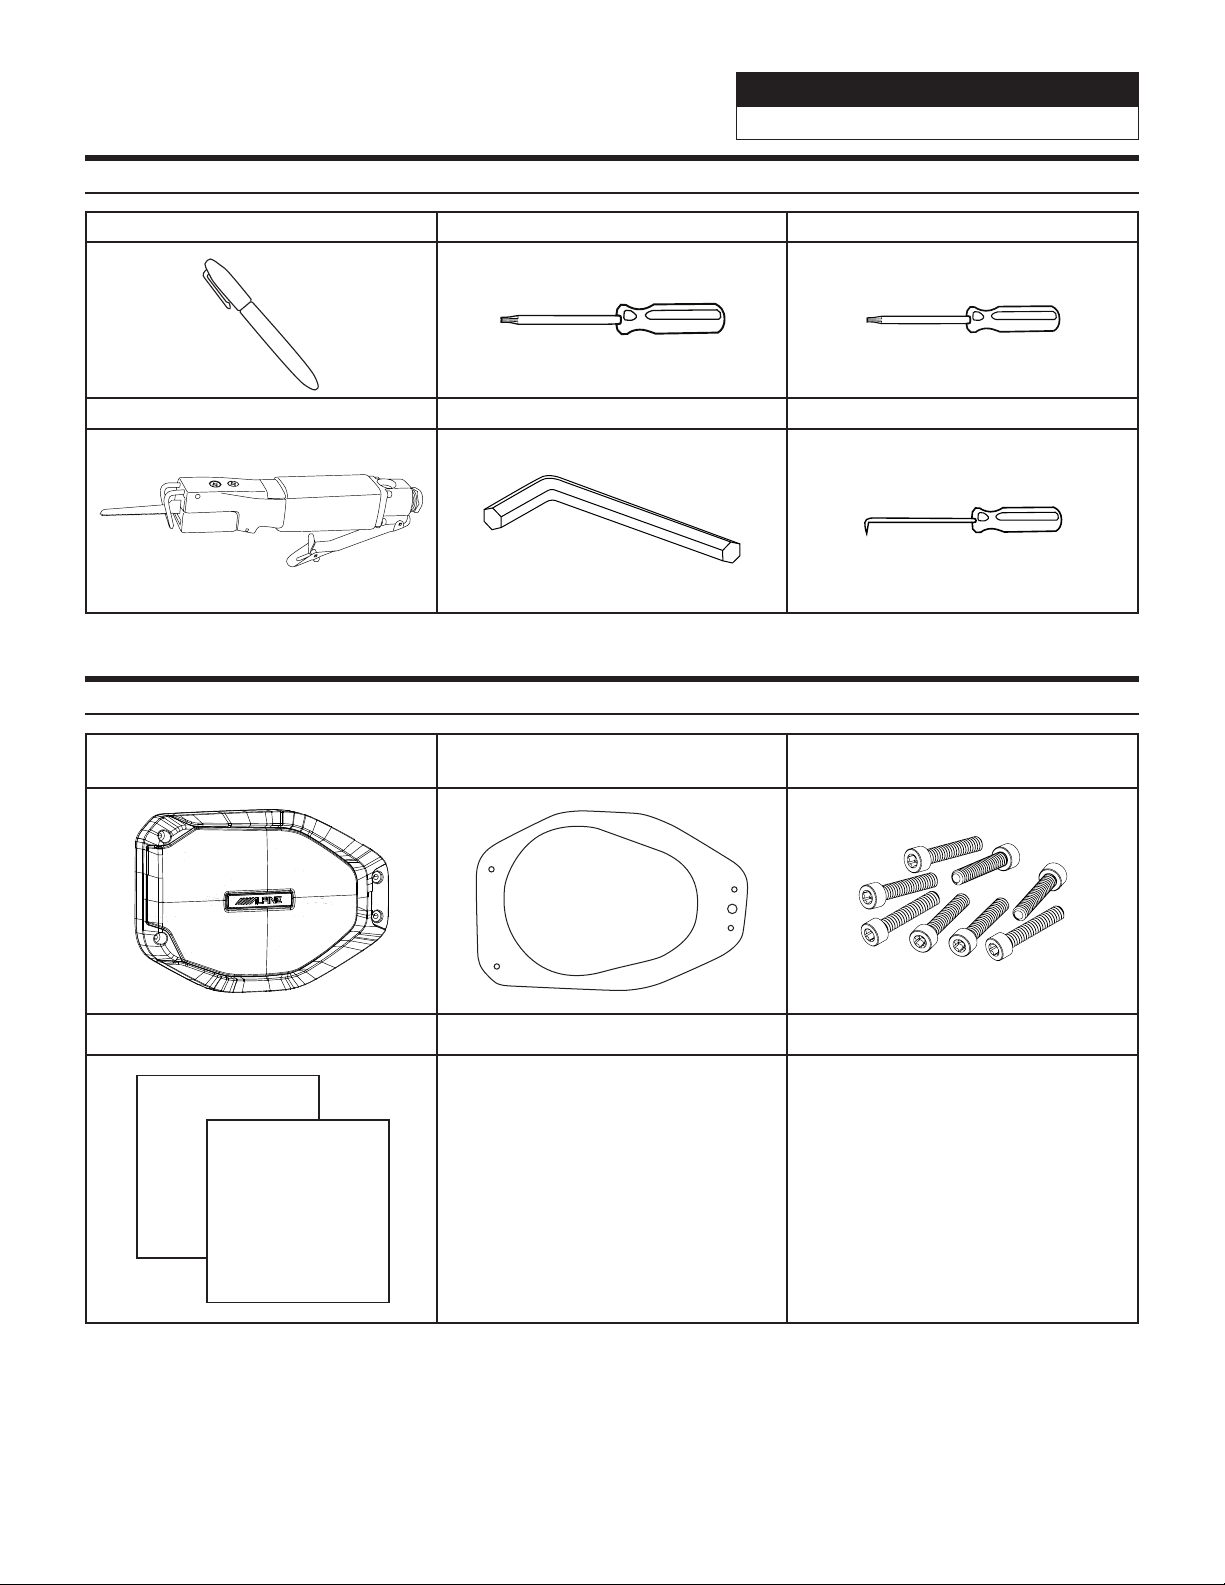
Tools Potentially Needed
Permanent Marker T30 Torx Driver T20 Torx Driver
Air Saw 5mm Allen Wrench Hook Tool
Accessory List
Speakers With Attached Adapter
Plate x 2
Template Replacement Bolts x 8
Polyfill Sheets
Jeep
SPV-65-JLT v20200731 4/6
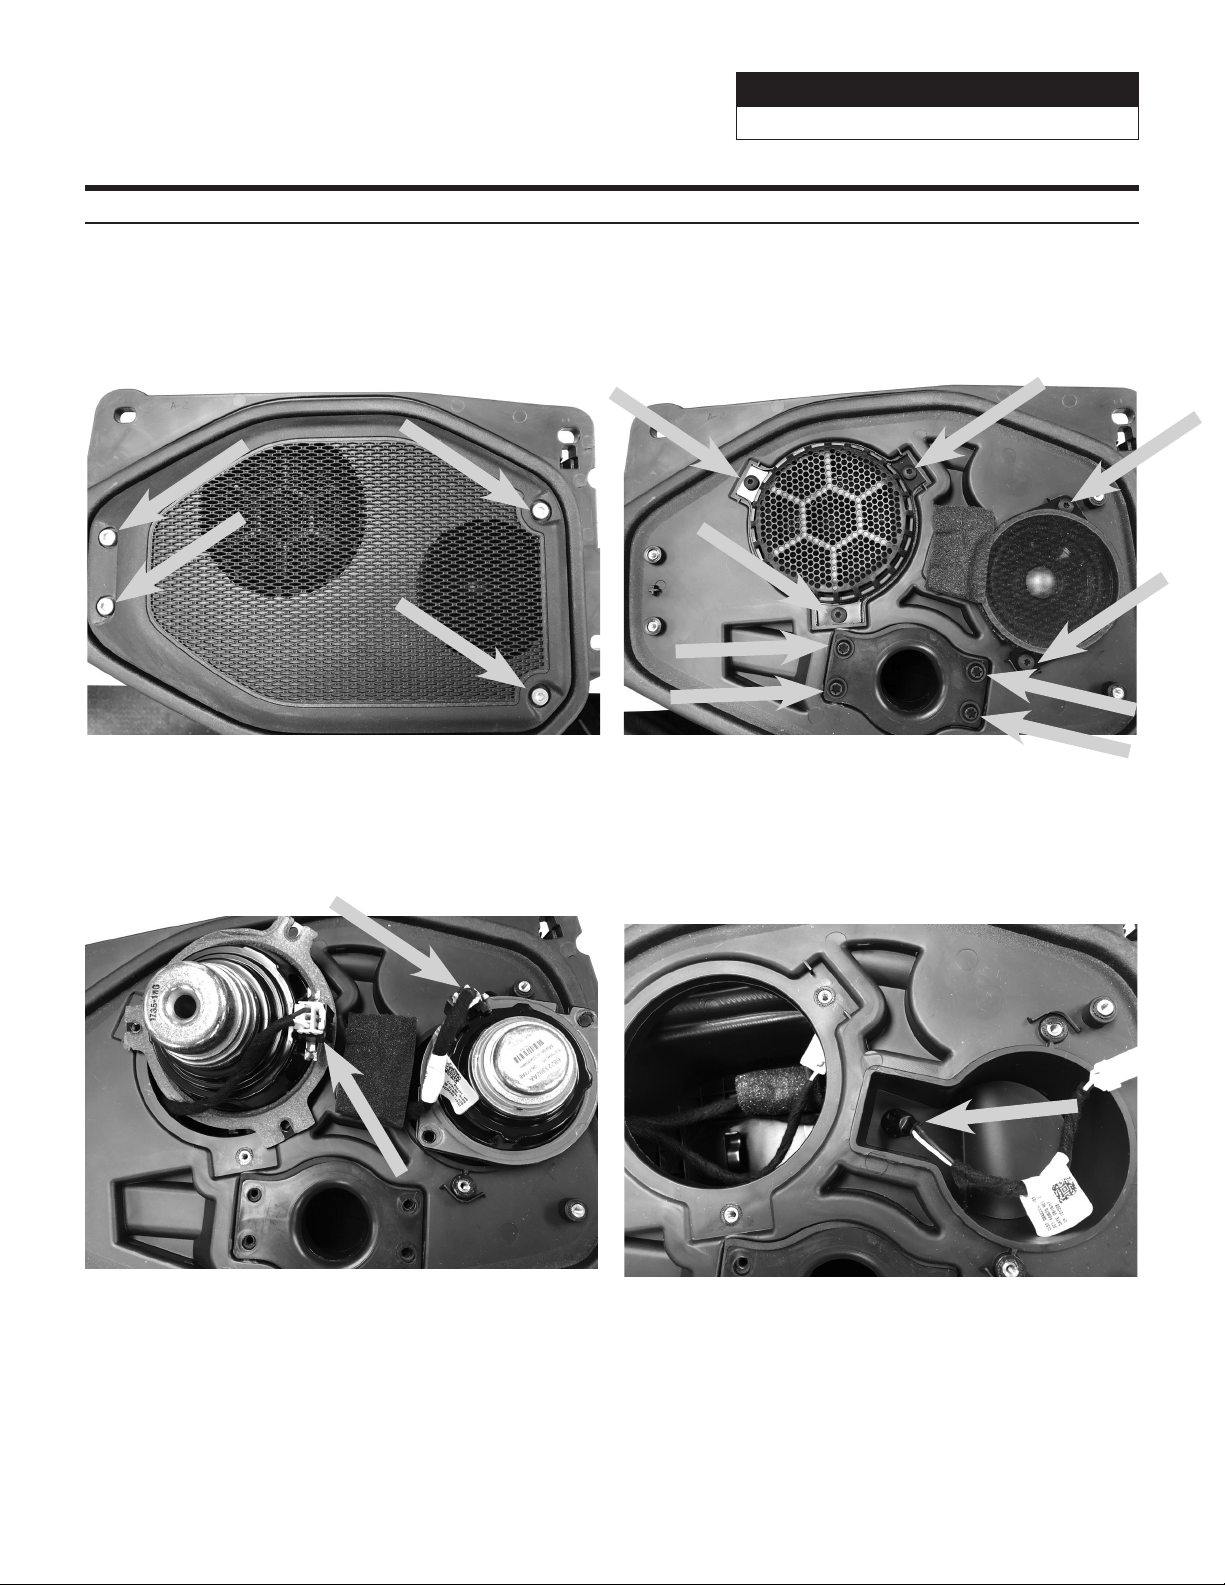
Rear Soundbar Speaker Removal & Installation (2018-Up)
1 Extract the (4) 5mm allen head bolts and remove
factory grills.
2 Extract (5) T20 torx from the speakers. Extract (4)
T30 torx from the port and remove.
3 Use a pick tool to disconnect the speakers and
remove them.
4 Remove gromment holding speaker wire in place
and secure speaker wire out of the way.
Jeep
SPV-65-JLT v20200731 5/6
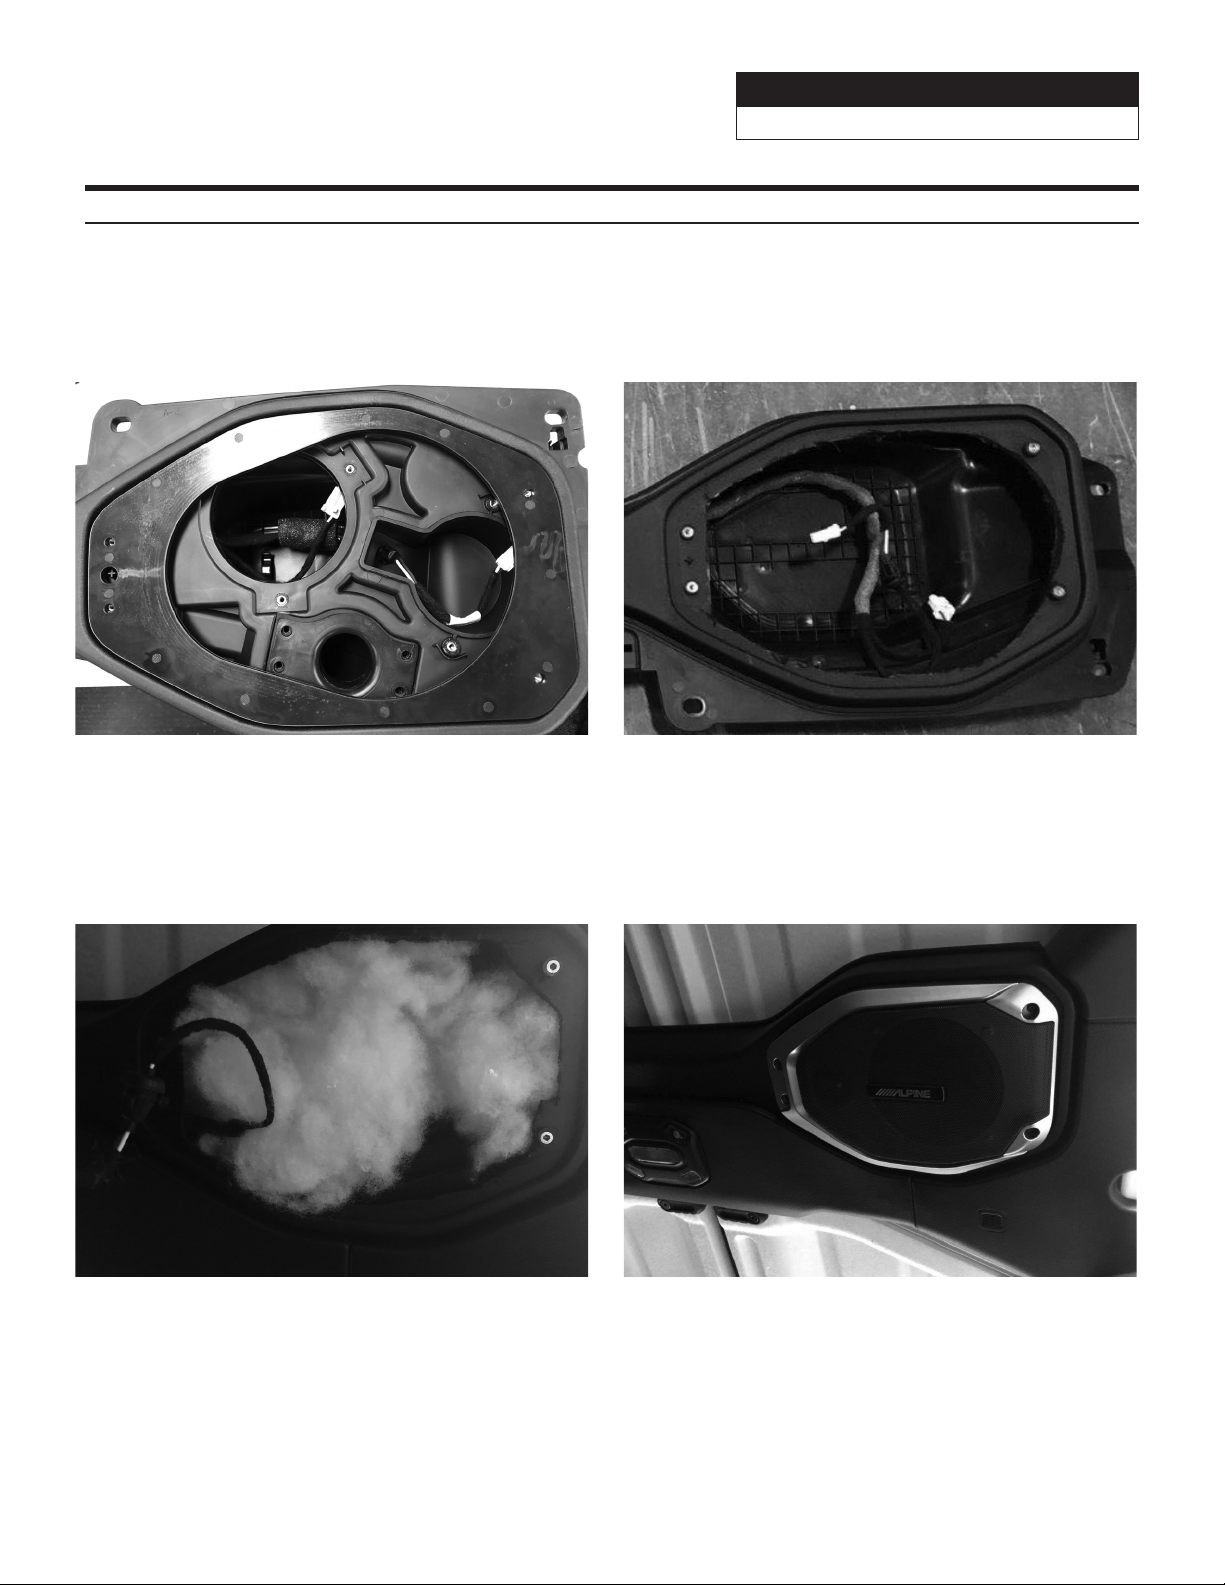
5 Use supplied template and mark area of each side
for soundbar cutting.
6 With a reciprocating air saw or preferred cutting
device, carefully cut following markings from Step
5. Be carefull on cutting depth. Failure to do so will
result in cutting through the soundbar.
Rear Soundbar Speaker Removal & Installation (2018-Up)
7 Fill the right and left speaker cavities using (1) of
the supplied polyfil sheets per cavity.
8 Plug in the speaker. Use the supplied replacement
bolts (not the OEM 5mm allen heads) and mount the
speaker in the bar.

Jeep
SPV-65-JLT v20200731 6/6
Specifications
Continuous Power Handling
(RMS)
90W
Woofer Size 6-1/2”
Nominal Impedance 4 Ohms
Frequency Response 50-22kHz
Voice Coil Resistance (Re) 3.6 Ohms
Free Air Resonance (Fs) 49 Hz
Efficiency 87.8 dB @ 1W / 1m
Electrical “Q” (Qes) .61
Mechanical “Q” (Qms) 11.19
Total Speaker “Q” (Qts) .57
Equivalent Compliance (Vas) 20.17 Liters
Moving Mass (Mms) 14.22
Mechanical Compliance (Cms) 735.84 mm/N
Magnetic Strength (BL) 5.13 T-m
Effective Piston Area (Sd) 21.5 sq in
One Way Linear Excursion (Xmax) 4.9mm
IP Rating IP55
