Loading ...
Loading ...
Loading ...
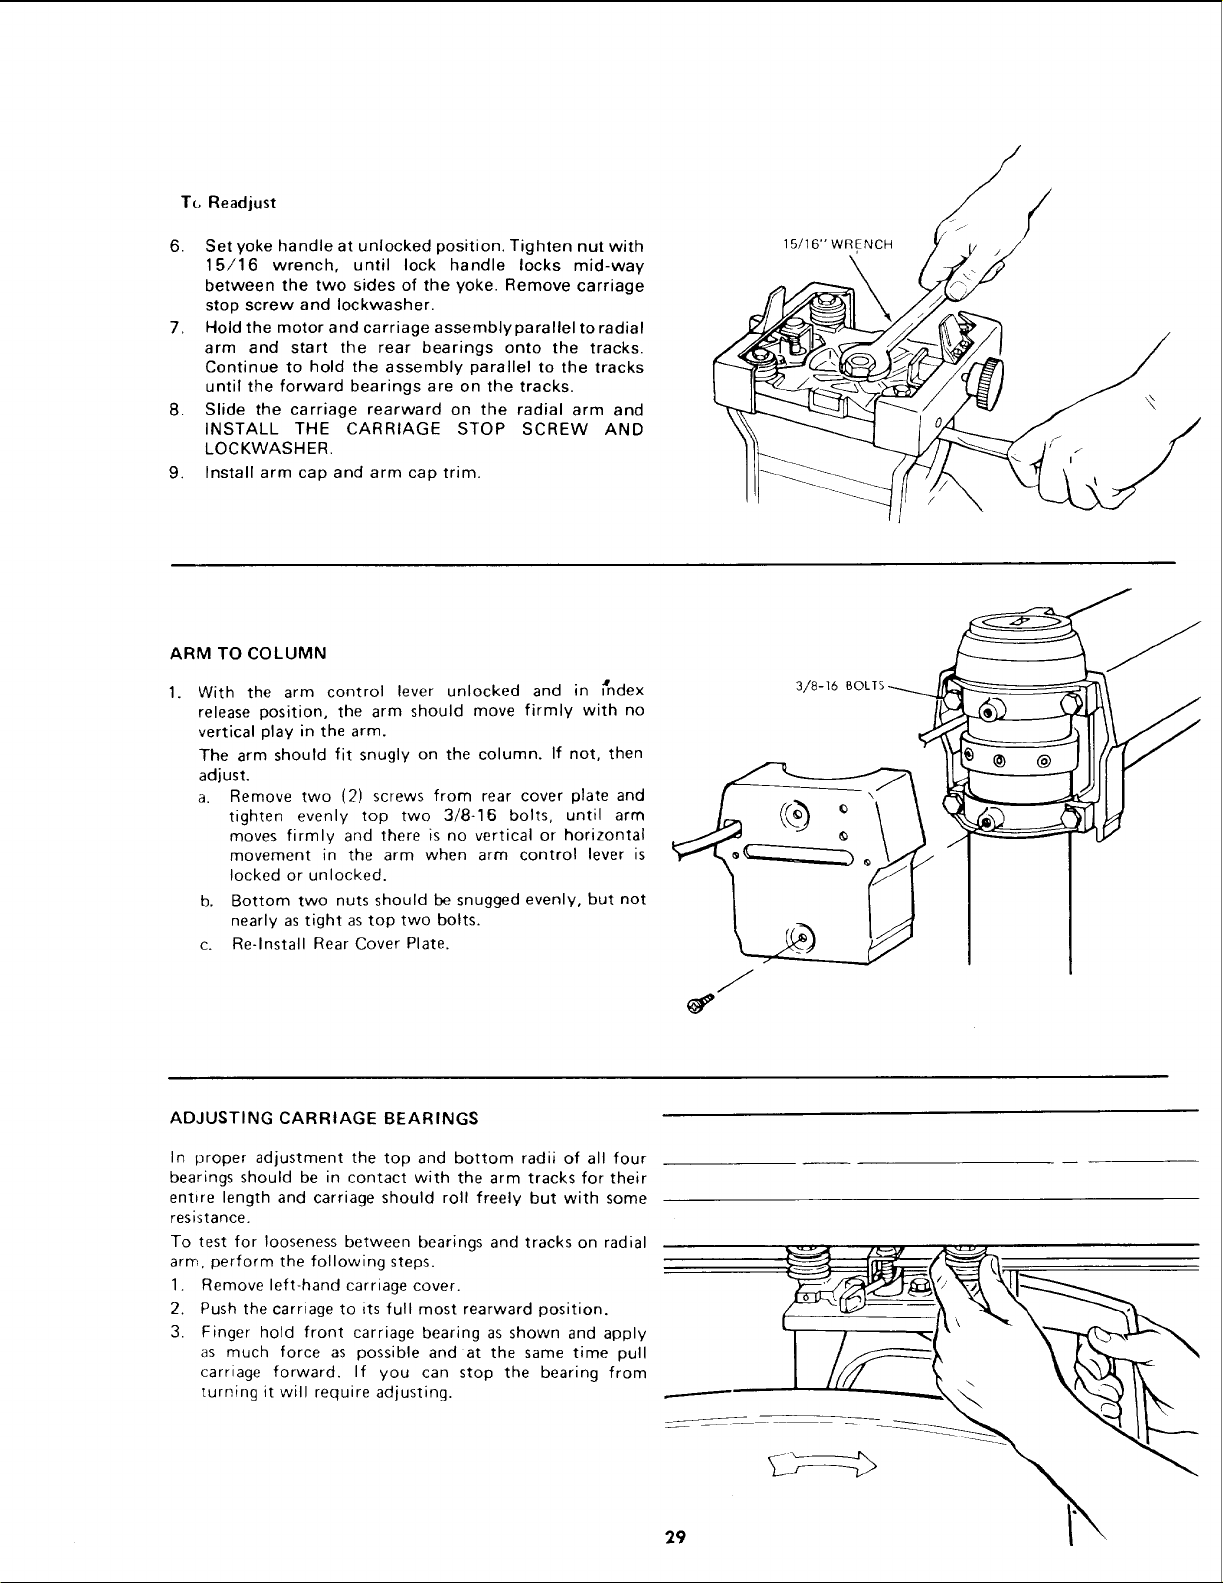
T_ Readjust
6. Set yoke handle at unlocked position. Tighten nut with
15/16 wrench, until lock handle locks mid-way
between the two sides of the yoke. Remove carriage
stop screw and Iockwasher.
7. Hold the motor and carriage assembly parallel to radial
arm and start the rear bearings onto the tracks.
Continue to hold the assembly parallel to the tracks
until the forward bearings are on the tracks.
8. Slide the carriage rearward on the radial arm and
INSTALL THE CARRIAGE STOP SCREW AND
LOCKWASHER.
9. Install arm cap and arm cap trim.
15/16" WRENCH
ARM TO COLUMN
With the arm control lever unlocked and in irndex
release position, the arm should move firmly with no
vertical play in the arm.
The arm should fit snugly on the column. If not, then
adjust.
a. Remove two (2) screws from rear cover plate and
tighten evenly top two 3/6-16 bolts, until arm
moves firmly and there is no vertical or horizontal
movement in the arm when arm control lever is
locked or unlocked.
b. Bottom two nuts should be snugged evenly, but not
nearly as tight as top two bolts.
c. Re-Install Rear Cover Plate.
3/8-]6 BOLTS
ADJUSTING CARRIAGE BEARINGS
In proper adjustment the top and bottom radii of all four
bearings should be in contact with the arm tracks for their
entire length and carriage should roll freely but with some
resistance.
To test for looseness between bearings and tracks on radial
arm, perform the following steps.
1. Remove left-hand carriage cover.
2. Push the carriage to its full most rearward position.
3. Finger hold front carriage bearing as shown and apply
as much force as possible and at the same time pull
carriage forward. If you can stop the bearing from
turning it will require adjusting.
Loading ...
Loading ...
Loading ...