Loading ...
Loading ...
Loading ...
basic saw operation
Basic saw operations are summarized into six categones,
explained and illustrated in the following paragraphs. A
book entitled "Power Tool Know How Radial Saw is
available at your nearest Sears Retail Store or Catalog
Store. This book contains considerable data applicable to
the radial saw.
NOTE: Refer to paragraphs under 'LOCATION AND
FUNCTION OF CONTROLS" for illustrations and
description of controls.
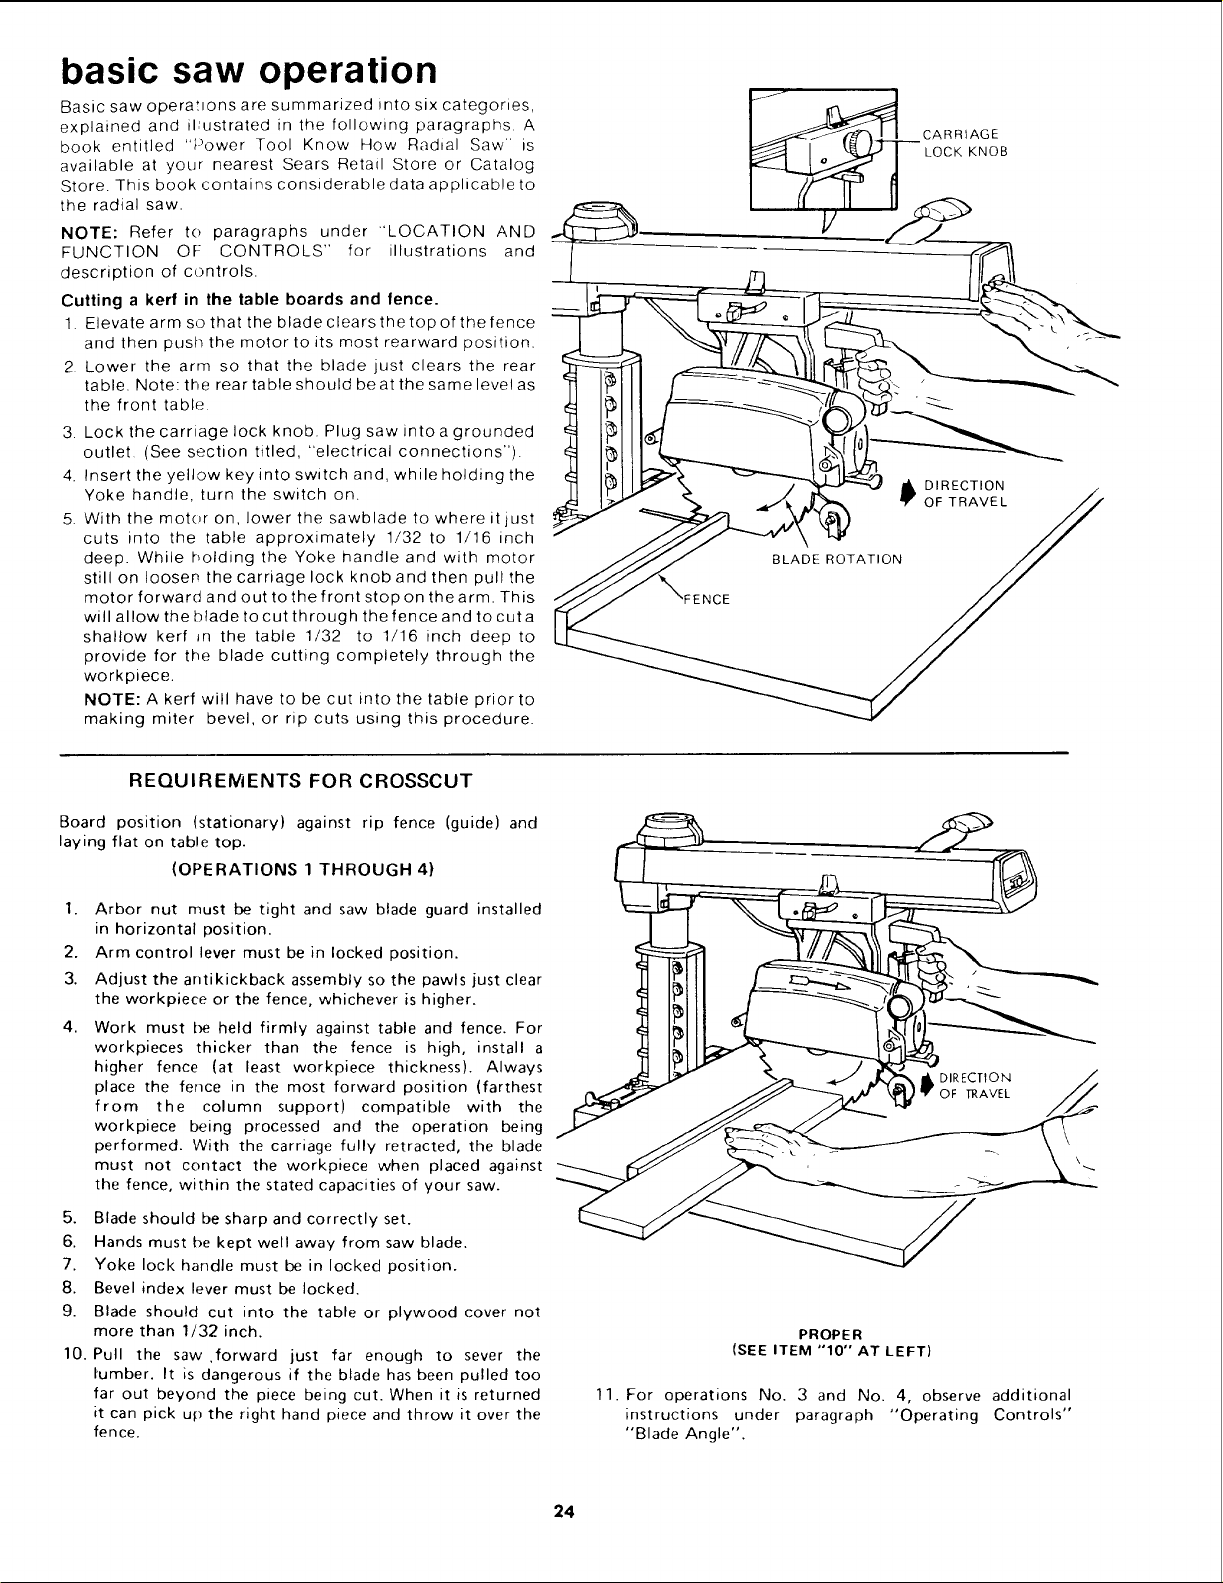
Cutting a kerf in the table boards and fence.
1. Elevate arm so that thebladeclearsthetopofthefence
and then push the motor to its most rearward position.
2 Lower the arm so that the blade just clears the rear
table. Note: the rear table should be at the same level as
the front table
3. Lock the carriage lock knob. Plug saw into a grounded
outlet (See section titled, "electrical connections").
4. Insert the yellow key into switch and, while holding the
Yoke handle, turn the switch on.
5. With the motor on, lower the sawblade to where it just
cuts into the table approximately 1/32 to 1/16 inch
deep. While holding the Yoke handle and with motor
still on loosen the carriage lock knob and then pull the
motor forward and out to the front stop on the arm. This
will allow the blade to cut through the fence and to cuta
shallow kerf _n the table 1/32 to 1/16 inch deep to
provide for the blade cutting completely through the
workpiece.
NOTE: A kerf will have to be cut into the table prior to
making miter bevel, or rip cuts using this procedure.
CARRIAGE
LOCK KNOB
Y
DIRECTION
OF TRAVEL
'_FENCE
BLADE ROTATION
REQUIREMENTS FOR CROSSCUT
Board position (stationary) against rip fence (guide) and
laying flat on table top.
(OPERATIONS 1 THROUGH 4)
I. Arbor nut must be tight and saw blade guard installed
in horizontal position.
2. Arm control lever must be in locked position.
3. Adjust the antikickback assembly so the pawls just clear
the workpiece or the fence, whichever is higher.
4. Work must be held firmly against table and fence. For
workpieces thicker than the fence is high, install a
higher fence (at least workpiece thickness). Always
place the fence in the most forward position (farthest
from the column support) compatible with the
workpiece being processed and the operation being
performed. With the carriage fully retracted, the blade
must not contact the workpiece when placed against
the fence, within the stated capacities of your saw.
5. Blade should be sharp and correctly set.
6. Hands must be kept well away from saw blade.
7. Yoke lock handle must be in locked position.
8. Bevel index lever must be locked.
9. Blade should cut into the table or plywood cover not
more than 1/32 inch.
10. Pull the saw ,forward just far enough to sever the
tumber. It is dangerous if the blade has been pulled too
far out beyond the piece being cut. When it is returned
it can pick up the right hand piece and throw it over the
fence.
PROPER
(SEE ITEM "10" AT LEFT)
11. For operations No. 3 and No. 4, observe additional
instructions under paragraph "Operating Controls"
"Blade Angle".
24
Loading ...
Loading ...
Loading ...