Loading ...
Loading ...
Loading ...
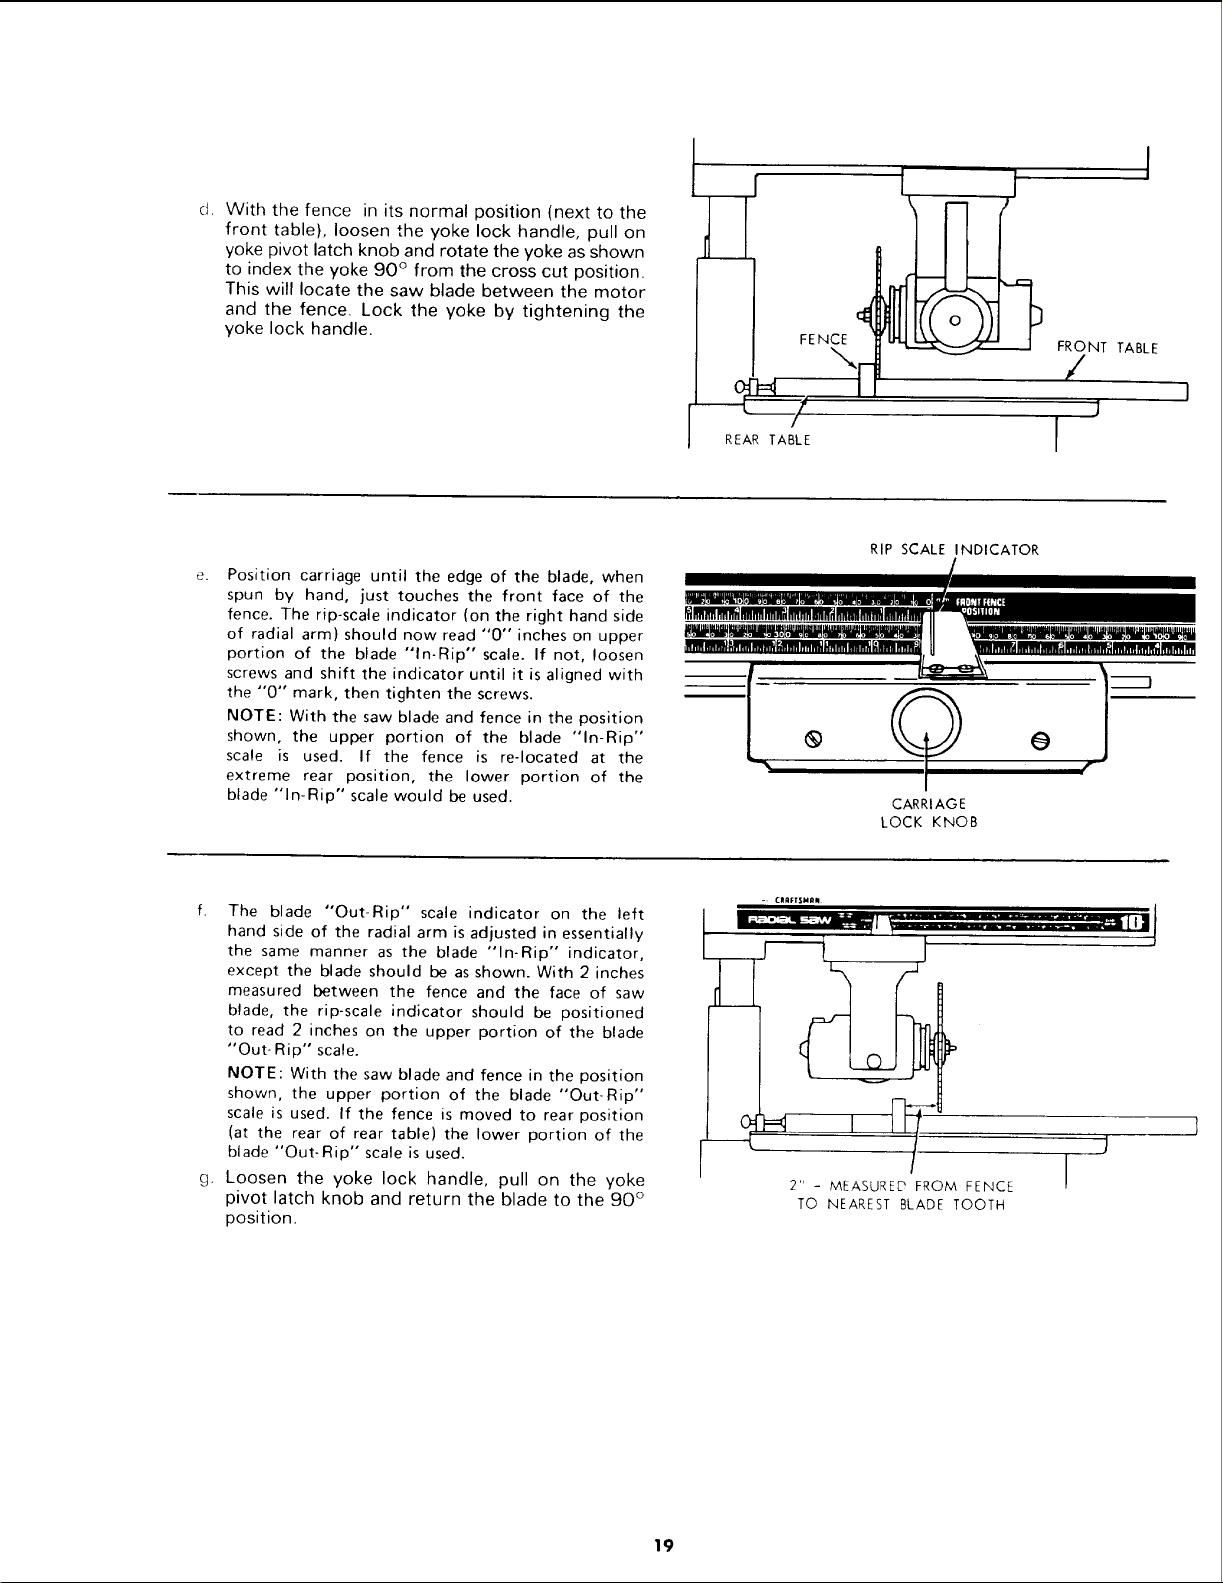
d. Withthefenceinitsnormalposition(nexttothe
fronttable),loosentheyokelockhandle,pullon
yokepivotlatchknobandrotatetheyokeasshown
toindextheyoke90°fromthecrosscutposition.
Thiswilllocatethesawbladebetweenthemotor
andthefence.Locktheyokebytighteningthe
yokelockhandle.
FENCE
REAR TABLE
I
1
FRONT TABLE
/
I
Position carriage until the edge of the blade, when
spun by hand, just touches the front face of the
fence. The rip-scale indicator (on the right hand side
of radial arm) should now read "0" inches on upper
portion of the blade "In-Rip" scale. If not, loosen
screws and shift the indicator until it is aligned with
the "0" mark, then tighten the screws.
NOTE: With the saw blade and fence in the position
shown, the upper portion of the blade "In-Rip"
scale is used. If the fence is re-located at the
extreme rear position, the lower portion of the
blade "In-Rip" scale would be used.
RIP SCALE INDICATOR
CARRIAGE
LOCK KNOB
f. The blade "Out-Rip" scale indicator on the left
hand side of the radial arm is adjusted in essentially
the same manner as the blade "In-Rip" indicator,
except the blade should be as shown. With 2 inches
measured between the fence and the face of saw
blade, the rip-scale indicator should be positioned
to read 2 inches on the upper portion of the blade
"Out- Rip" scale.
NOTE: With the saw blade and fence in the position
shown, the upper portion of the blade "Out-Rip"
scale is used. If the fence is moved to rear position
(at the rear of rear table) the lower portion of the
blade "Out-Rip" scale is used.
g. Loosen the yoke lock handle, pull on the yoke
pivot latch knob and return the blade to the 90 °
position.
1
I
_1=_
---{ j
2" - MEASURED FROM FENCE
TO NEAREST BLADE TOOTH
19
Loading ...
Loading ...
Loading ...