
Loading ...
Loading ...
Loading ...
EN
W415-2349 / A / 10.31.19
39
fi nishing
6
7
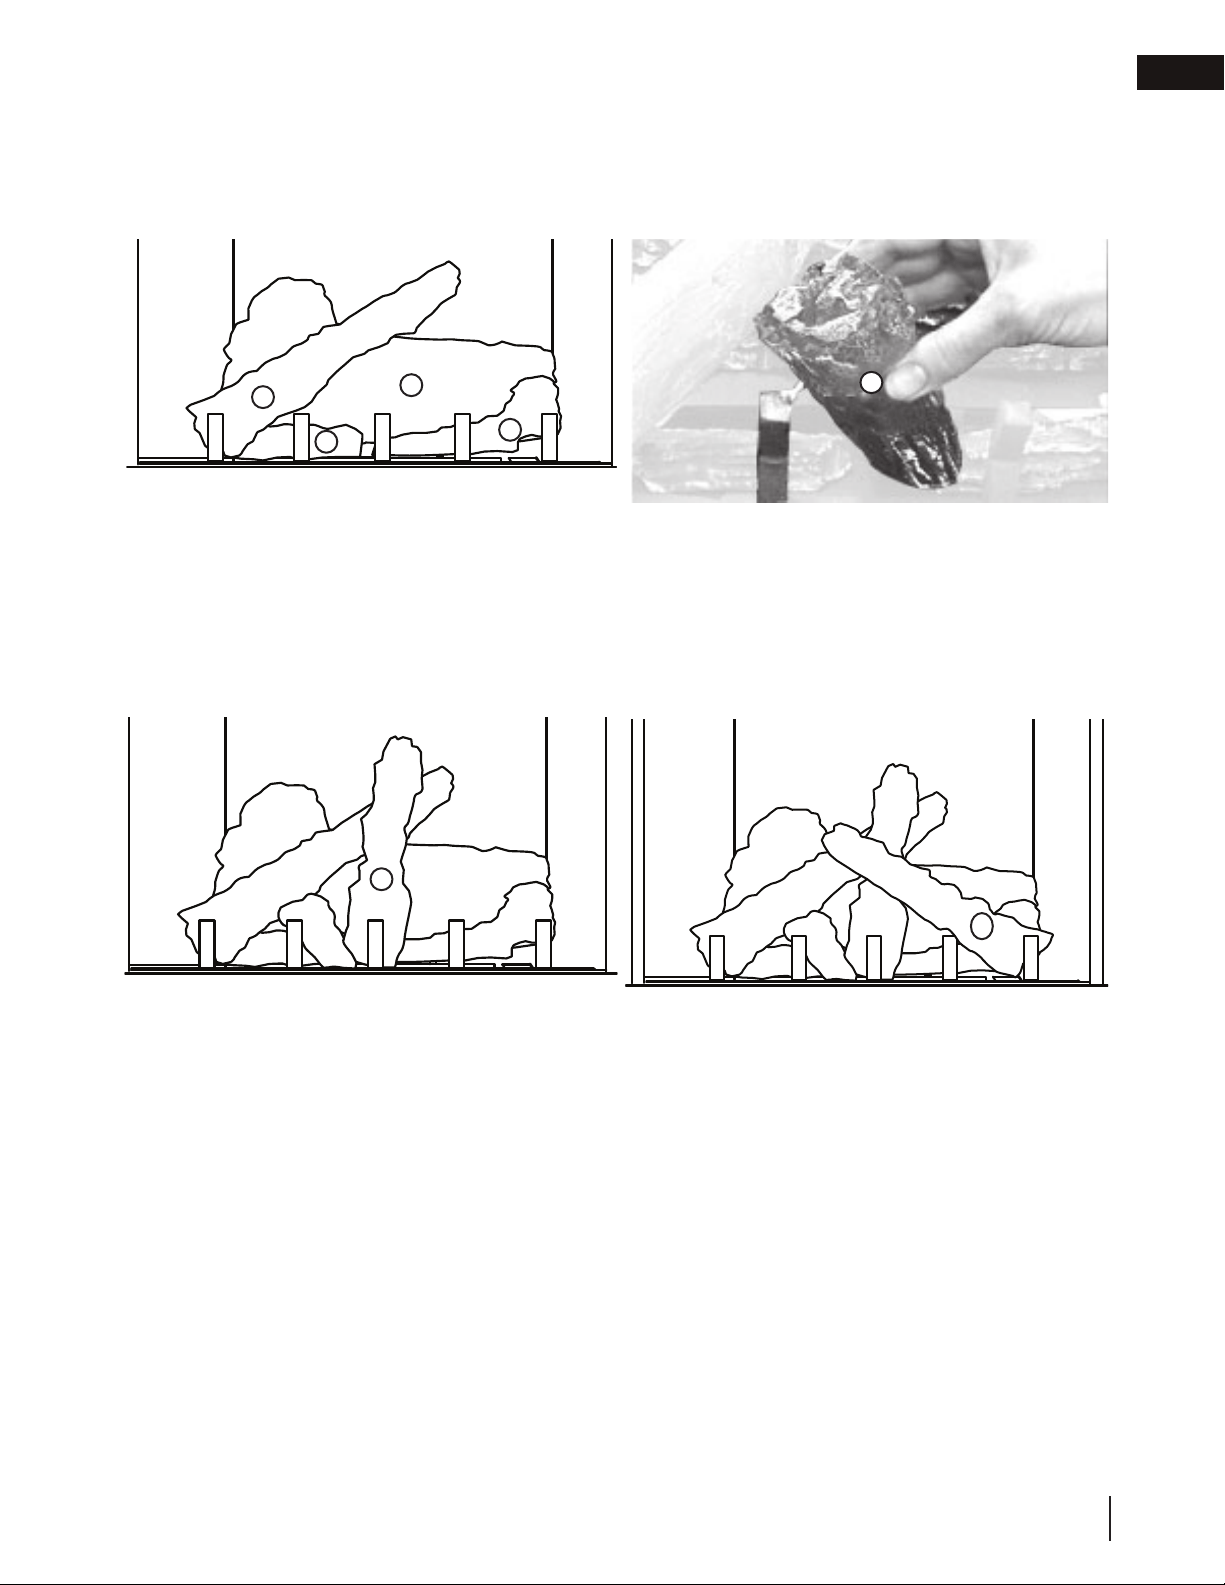
Position the notch located in log #6 against the grate
post.
Place the bottom of log #7 against the right outermost
grate post and the top into the pocket provided on the
center log (#6). Bend up the tab in the log support to
cradle log #7. Tear the glowing embers into pieces and
place onto the front of the burner. Care should be taken
to shred the embers into thin, small irregular pieces as
only the exposed edges of the fi bre hairs will glow when
exposed to direct fl ame; however care should be taken
to not block the burner ports. Blocked ports can cause
an incorrect fl ame pattern, carbon deposits and delayed
ignition.
Log colours may vary. During the initial use of the
appliance, the colours will become more uniform as
colour pigments burn in during the heat activated curing
process.
POSITIONING THE LOGS IMPROPERLY WILL
CAUSE FLAME IMPINGEMENT AND CARBONING.
The notch in log #5 should be pressed down onto the
skewering pin located at the end of the grate as shown
to prevent it from rocking.
Place log #1 onto the burner, centering it onto the
burner tray and pushing it as close to the rear wall
of the fi rebox as possible. Move logs # 2 and 3 into
position, lining up the studs located on the burner with
the holes on the bottom of the logs. Sit the notch at
the bottom of log #4 against the left outermost grate
post and position the top of the log into the pocket
provided on the rear log (#1).
Blocked burner ports can cause an incorrect fl ame pattern, carbon deposits and delayed ignition. Phazer
tm
logs
glow when exposed to direct fl ame and provide a unique and realistic glowing effect. Use only certifi ed phazer
tm
logs available from your Napoleon® dealer.
5.6 log placement
4
2
3
1
5
Loading ...
Loading ...
Loading ...