
Loading ...
Loading ...
Loading ...
EN
W415-2349 / A / 10.31.19
35
installation
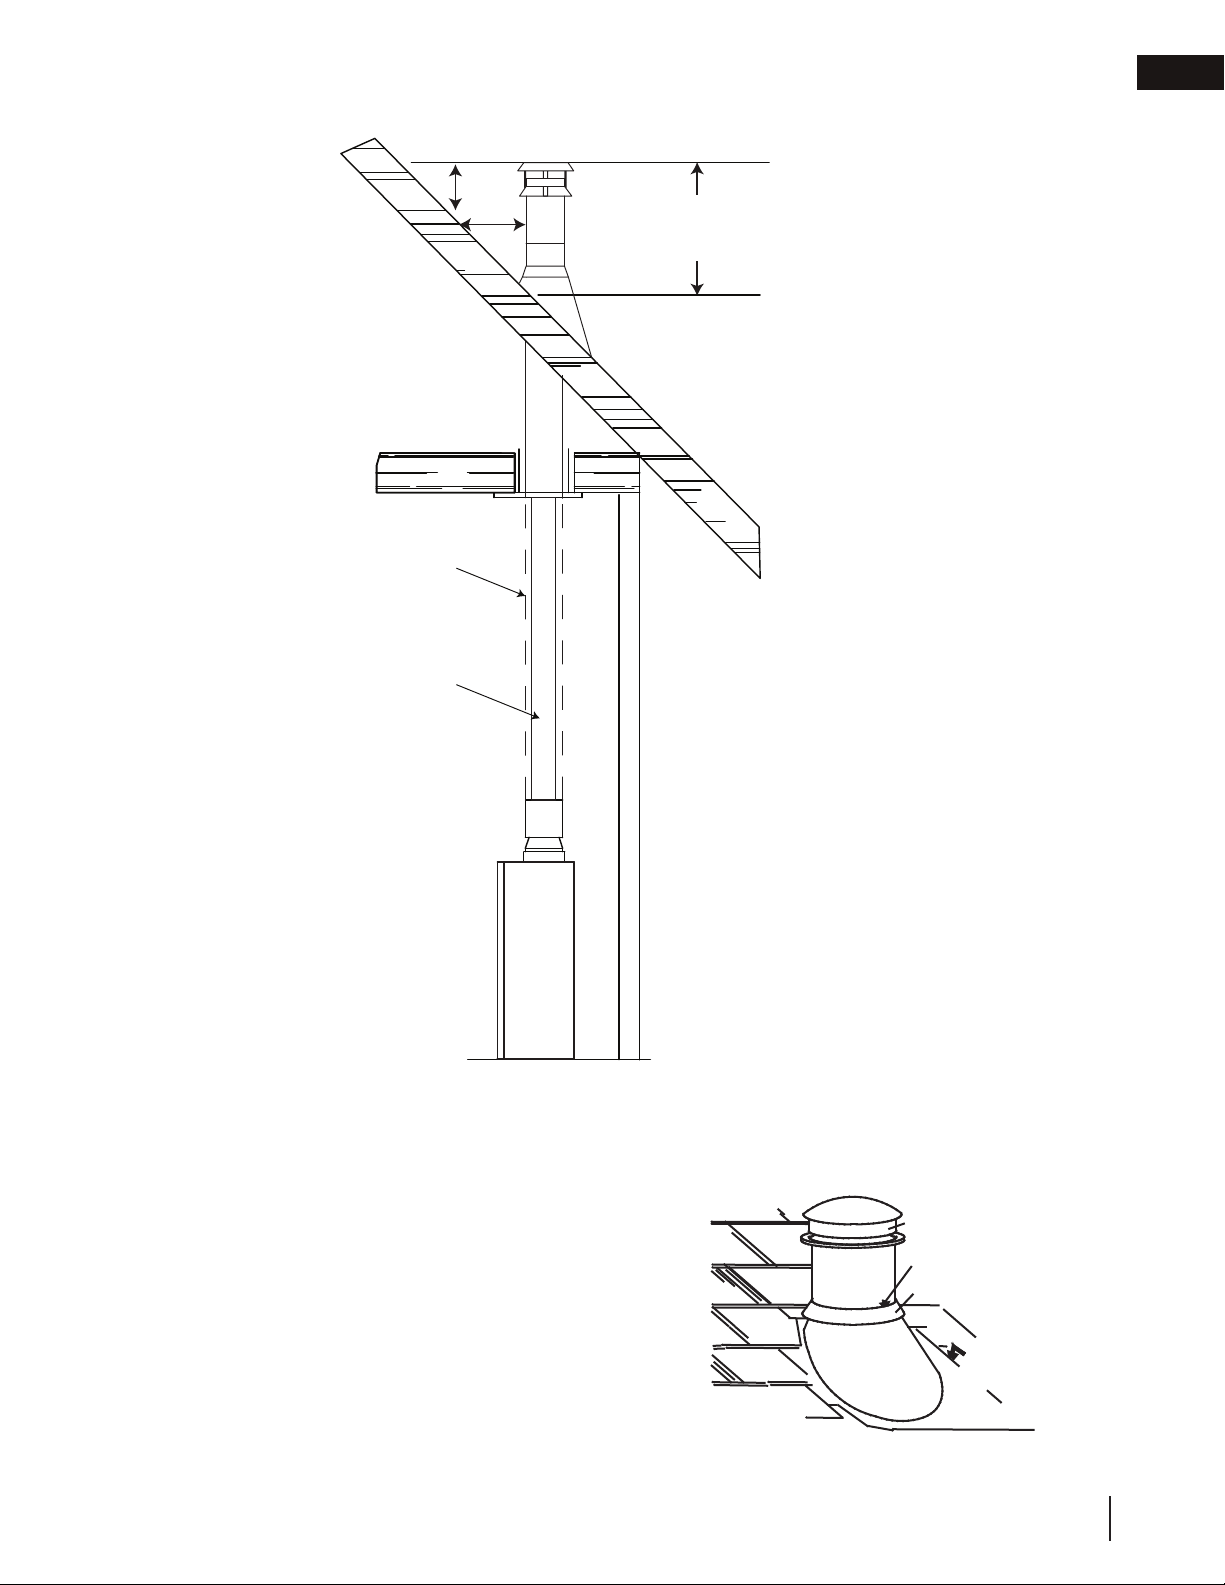
4.7.6 installing fl ashing and storm collar
SECURELY
ATTACH VENT
ADAPTER TO
FLUE COLLAR
4” (102mm)
“B” VENT
7” (178mm)
OPTIONAL
VENT PIPE
3 FT
(1m)
MIN
2 FT
(0.6m)
MIN
10 FT
(3M)
RAIN CAP
CAULKING
STORM COLLAR
WEATHER
SEALANT
FLASHING
The following are generic installation instructions for installing the flashing around a chimney. Installation of all
types of factory-built chimney systems is to be in accordance with the chimney manufacturer’s installation
instructions. Remove the nails from the shingles above and to the sides of the chimney. Place the flashing over
the chimney pipe and slide underneath the sides and upper edge
of the shingles. Ensure that the chimney pipe is properly
centered within the flashing, giving a 3/4” (19.1mm) margin all
around. Fasten to the roof on the top and sides. DO NOT NAIL
through the lower portion of the flashing. Make weather-tight by
sealing with caulking. Where possible, cover the sides and top
edges of the flashing with roofing material. Apply waterproof
caulking, provided with the flashing, around the chimney, 1”
(25.4mm) above the top of the flashing and push the storm collar
down into the caulking. Insert a rain cap onto the top of the last
chimney section.
Loading ...
Loading ...
Loading ...