Loading ...
Loading ...
Loading ...
ASSEMBLY INSTRUCTIONS
20
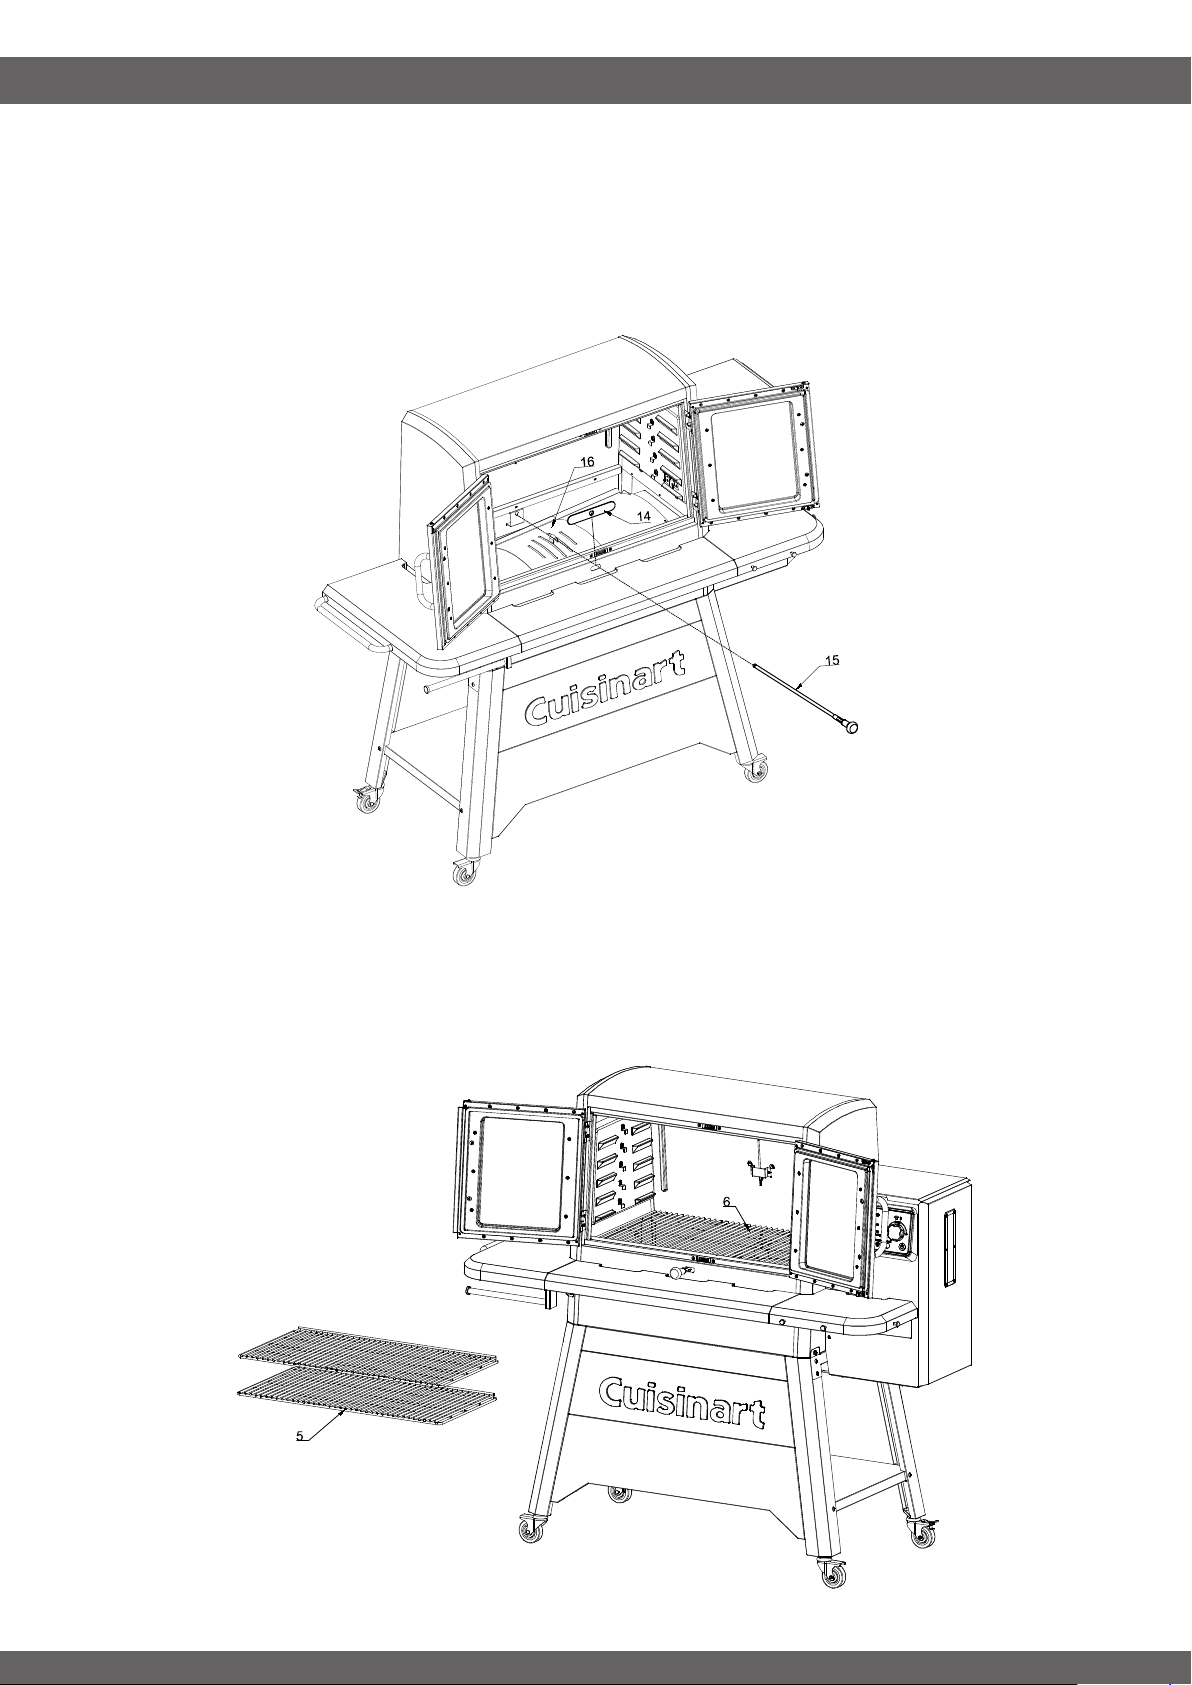
STEP 24
-----------------------------------------------------------------------------------
Insert the Sear Rod Cover (14) on the inside edge of the cooking chamber so that the hole lines up with •
the oval shaped hole in the Main Body (1). Insert the Searing Rod (15) through the oval shaped hole, Sear
Rod Cover (14) hole, Sear Shutter (16) hole, and finally secure it in the key shaped slot towards the back
of the cooking chamber. Verify proper assembly by actuating the searing rod by the knob and seeing if the
Sear Shutter (16) opens and closes a direct path to the fire pot below.
STEP 25
-----------------------------------------------------------------------------------
Insert the 3x Cooking Grates (6) into the bottom of the cooking chamber. When those are in, slot the 2x •
Smoking Racks (5) into any of the slots in the cooking chamber. Note that you will need to tilt the rack up
slightly when inserting to get it past the pull out stops.
Peel off protective film from control panel. Peel off all POP labels that are in or attached to the cooking •
chamber.
Loading ...
Loading ...
Loading ...