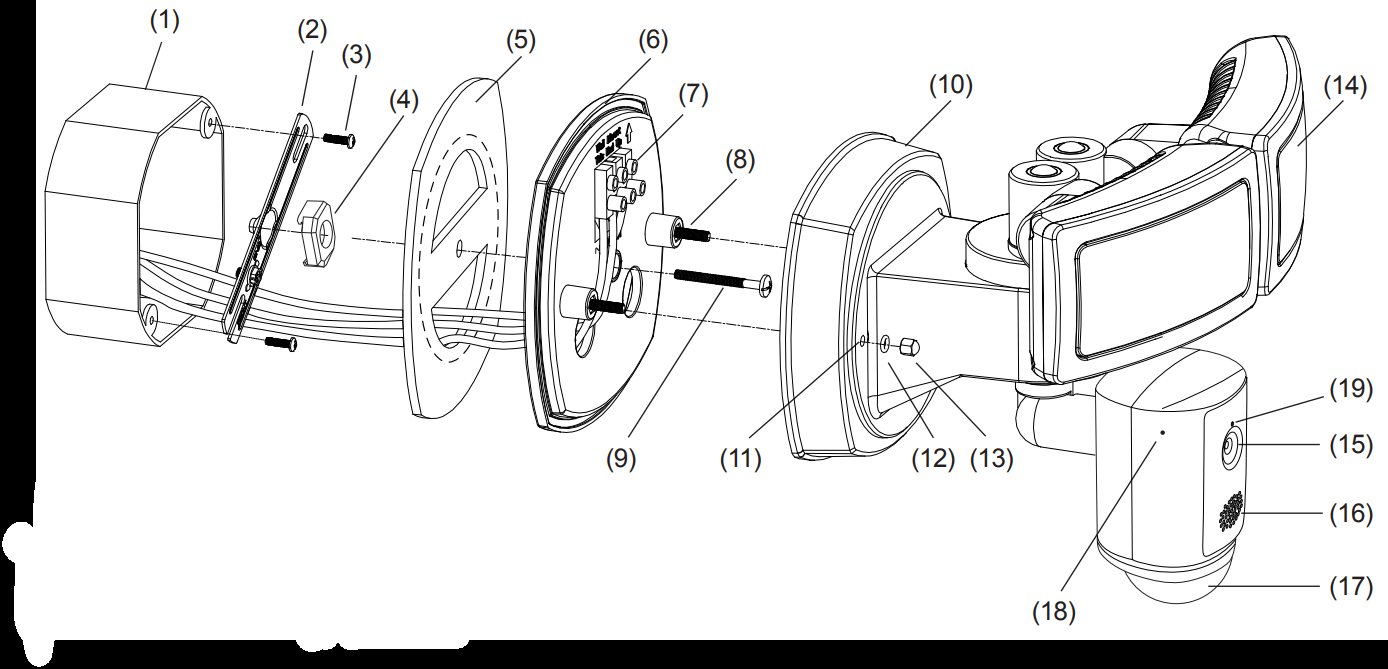
11. Mounting Holes 12. Rubber Washers (2 pieces) 13. Decorative Nuts (2 pieces) 14. LED Flood Lights 15. Camera Lens and Photocell Sensor 16. Speaker 17. Motion Sensor 18. Mic 19. Indicator Light
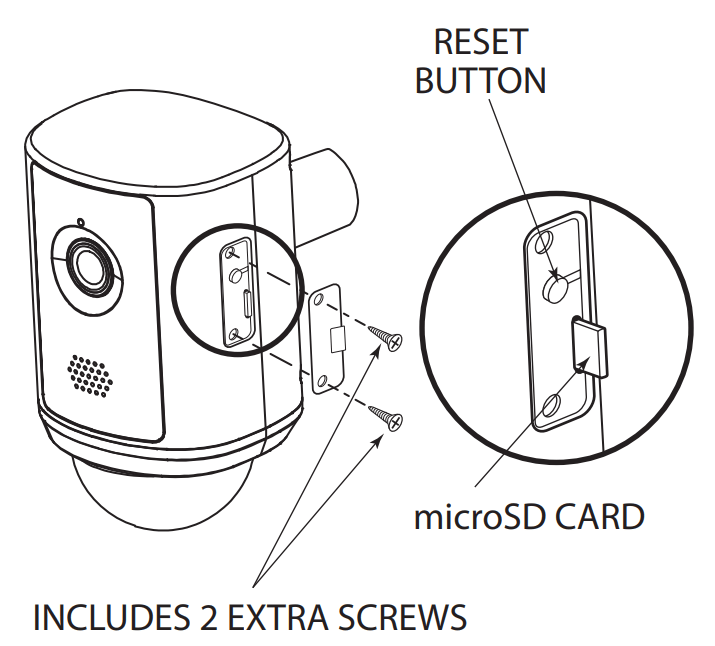
RESETTING UNIT & ACCESSING SD CARD
To access Reset Button and microSD™ card, remove cover using a small screwdriver (included).
To reset the unit, (unit must be connected to power) press the Reset Button for 15 seconds or until you hear an audible tone.
To remove microSD card, push card in with your finger and release. Card will eject halfway.
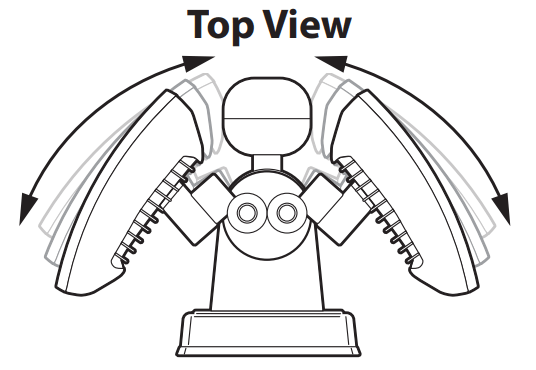
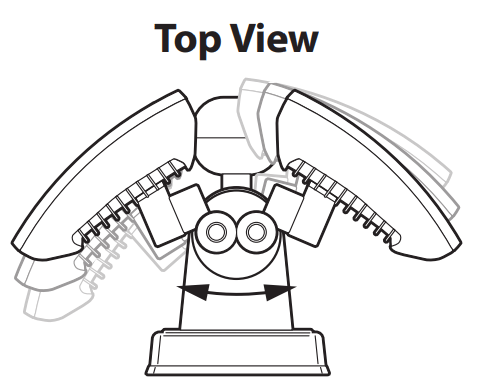
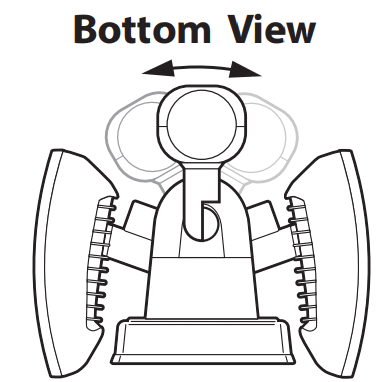
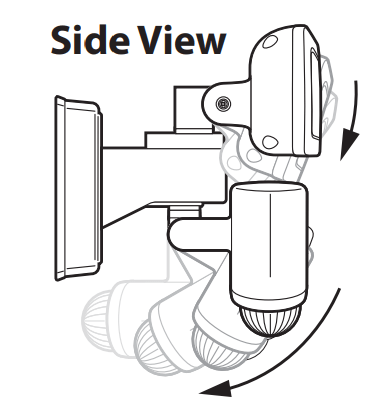
ADJUSTING FIXTURE
Adjust flood lights side to side
Adjust flood light carousel side to side
Adjust camera side to side
Adjust flood lights and camera up and down
PRE-INSTALLATION
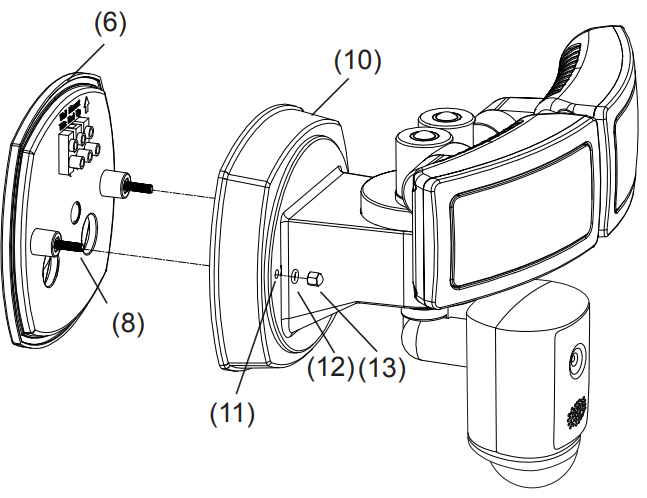
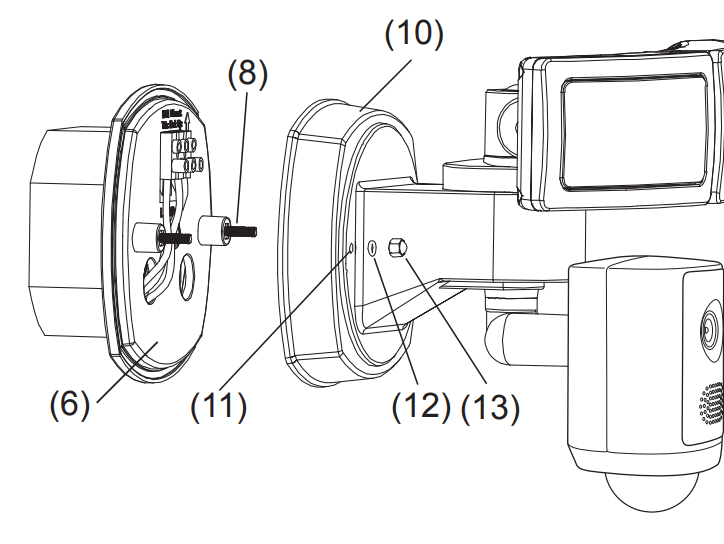
Remove the Mounting Plate (6) by unscrewing and removing the Decorative Nuts (13) and Rubber Washers (12).
INSTALLATION
EXTERNAL J-BOX INSTALLATION
1. Turn main power Off at circuit breaker or fuse box.
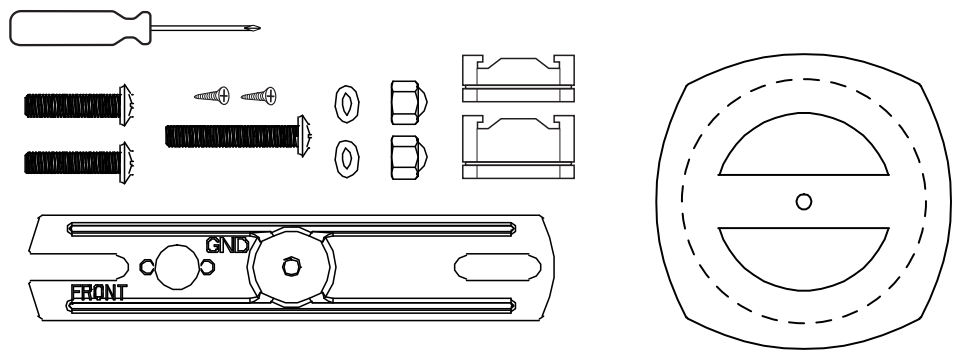
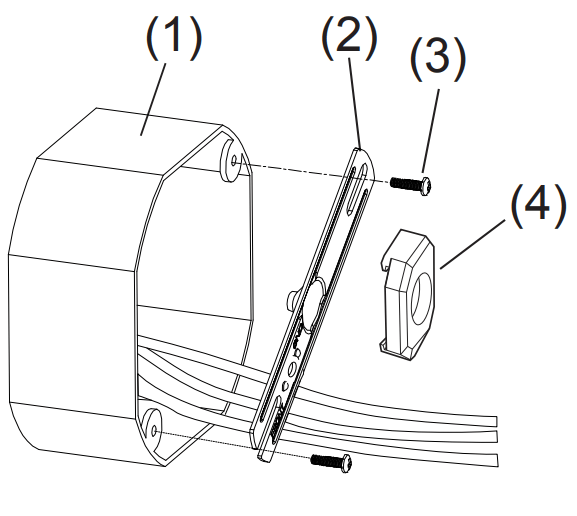
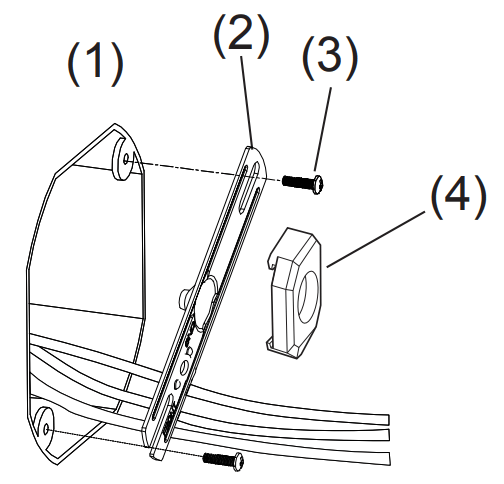
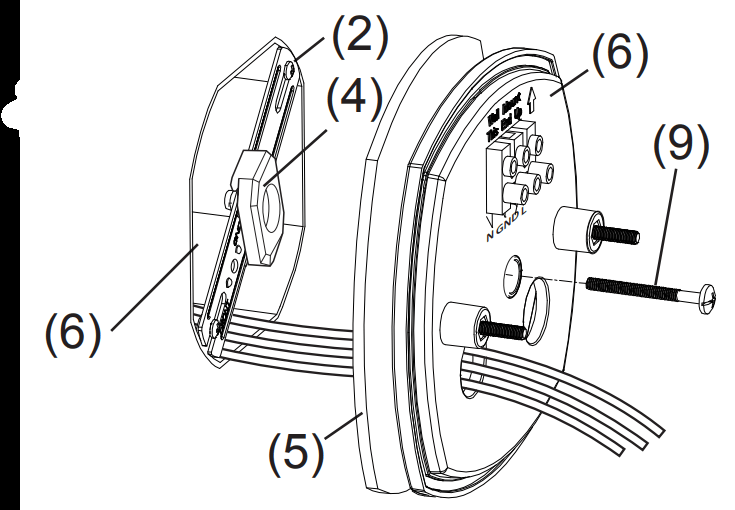
2. Install Mounting Bar (2) to an External J-Box (1) using provided J-Box Screws (3). Add Spacer (4) to eliminate gap between Mounting Bar and Mounting Plate.
NOTE: Spacer (4) may or may not be needed.
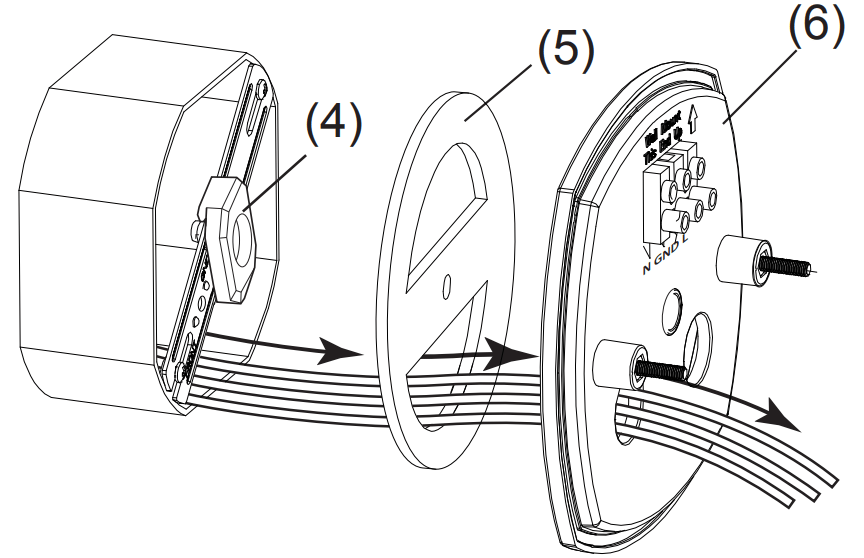
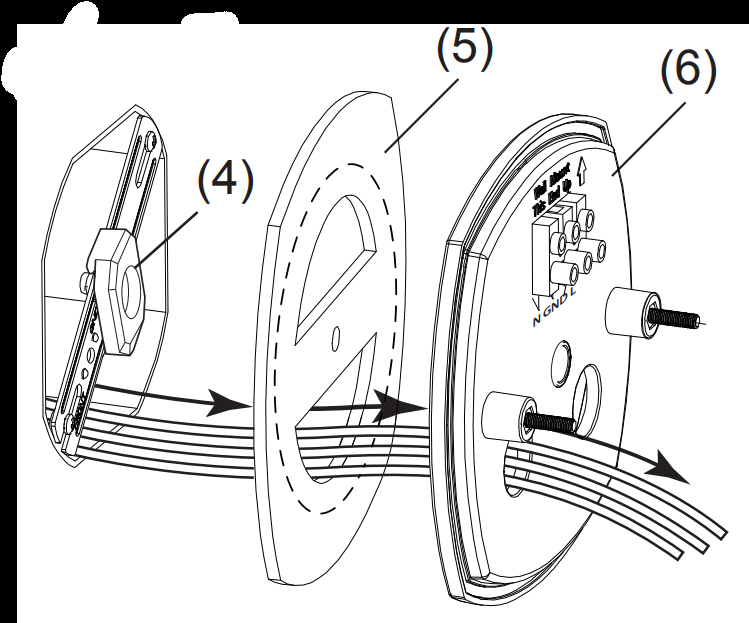
3. Extend and feed J-Box wires through openings on Mounting Gasket (5) and Mounting Plate (6).
NOTE: Tear away at perforation on Mounting Gasket (5)
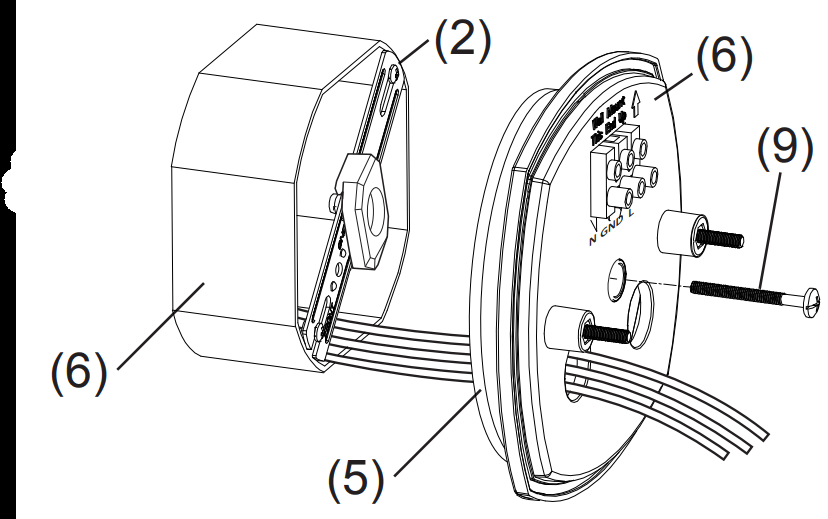
4. Secure Mounting Gasket (5) and Mounting Plate (6) to Mounting Bar (2) using Mounting Bar Screw (9). Do not over-tighten.
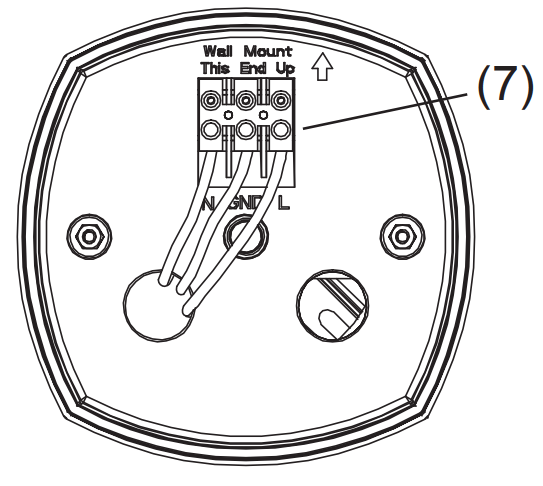
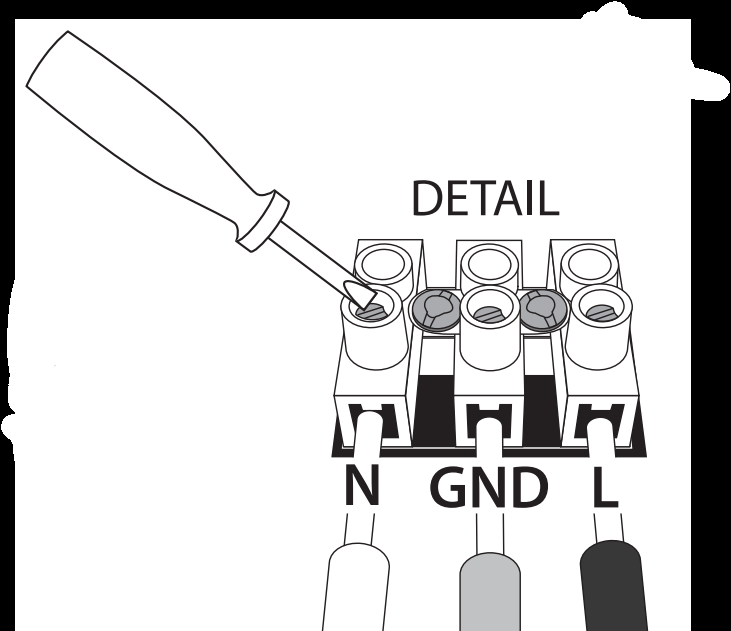
5. Connect power supply wires directly to Terminal Block (7). Secure wires to Terminal Block by using a small screwdriver. See below.
CONNECT: Black wire to“L” input. Ground wire to “GND” input. White wire to “N” input.
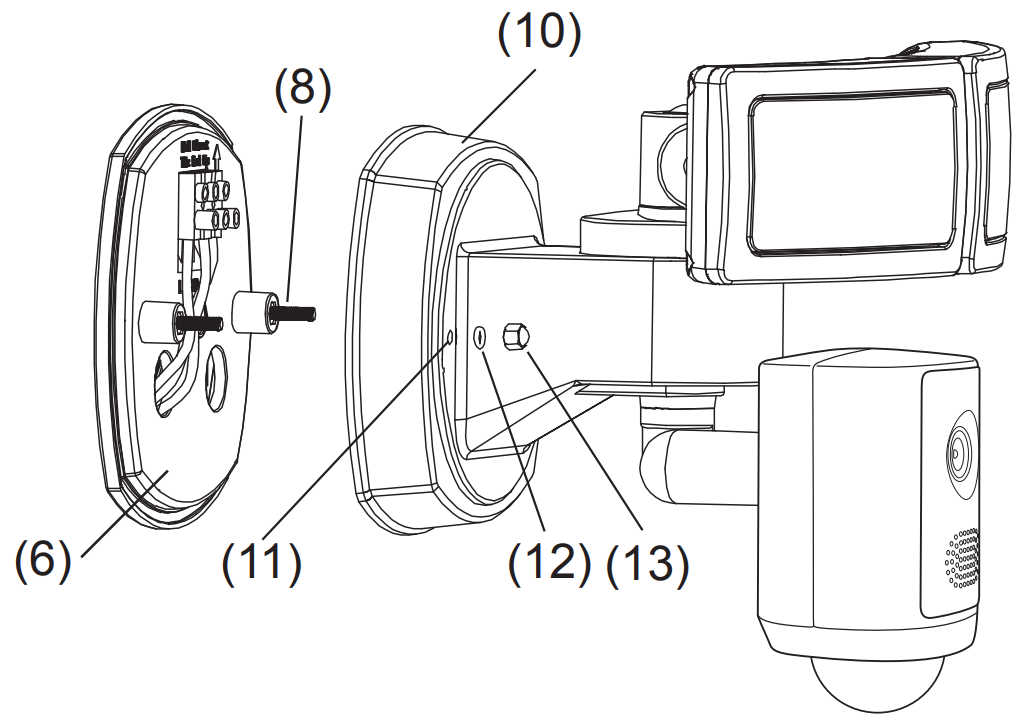
6. Position and align the Mounting Holes (11) on Fixture Body (10) to the Mounting Plate Screws (8). Secure Fixture Body (10) to Mounting Plate (6) using Rubber Washers (12) and Decorative Nuts (13).
7. Turn power On at circuit breaker or fuse box. Turn On wall switch if connected to one. Ensure lights work before proceeding to step 8.
8. Once fixture is tightly secured to J-Box, apply silicone sealant around the base of the fixture to prevent moisture from reaching the connections.
FLUSH J-BOX INSTALLATION
1. Turn main power Off at circuit breaker or fuse box.
2. Install Mounting Bar (2) to a Flush J-Box (1) using provided J-Box Screws (3). Add Spacer (4) to eliminate gap between Mounting Bar and Mounting Plate.
NOTE: Spacer (4) only needed if J-Box is recessed too deep.
3. Extend and feed J-Box wires through openings on Mounting Gasket (5) and Mounting Plate (6).
NOTE: Do not tear away at perforation on Mounting Gasket (5)
4. Secure Mounting Gasket (5) and Mounting Plate (6) to Mounting Bar (2) using Mounting Bar Screw (9). Do not over-tighten.
5. Connect power supply wires directly to Terminal Block (7). Secure wires to Terminal Block by using a small screwdriver. See below.
CONNECT: Black wire to“L” input. Ground wire to “GND” input. White wire to “N” input.
6. Position and align the Mounting Holes (11) on Fixture Body (10) to the Mounting Plate Screws (8). Secure Fixture Body (10) to Mounting Plate (6) using Rubber Washers (12) and Decorative Nuts (13).
7. Turn power On at circuit breaker or fuse box. Turn On wall switch if connected to one. Ensure lights work before proceeding to step 8.
8. Once fixture is tightly secured to J-Box, apply silicone sealant around the base of the fixture to prevent moisture from reaching the connections.
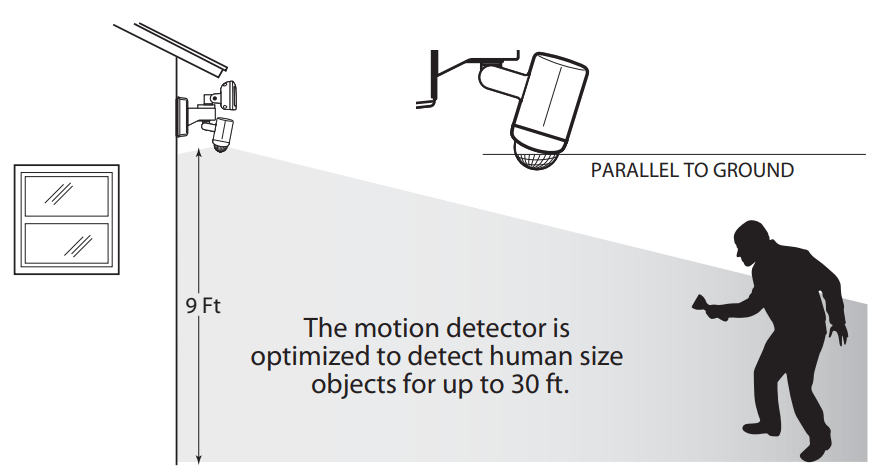
9. POSITION MOTION SENSOR AND CAMERA
For optimal performance, base of motion sensor should be placed parallel and 9 feet above the ground. Camera can be angled in a different direction than lights.
10. APP SETUP
Download and install the Feit Electric app
Search for the Feit Electric app in the App Store or Google Play Store.
Download and install the Feit Electric app on your smart device.
Set up the flood light camera using the Feit Electric app
Check to be sure the flood light camera is in pairing mode. The BLUE indicator light must be blinking rapidly to connect. If not already blinking, press and hold the Reset Button until you hear an audible tone. Use the Feit Electric app to complete the set up.
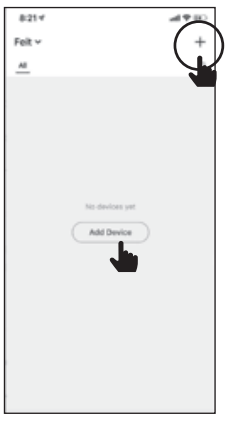
Tap Add Device or the + sign, then select Flood Light Camera and confirm. You will be prompted to enter your Wi-Fi network and password.
Be sure to connect to a 2.4 GHz Wi-Fi network that covers your installation location.
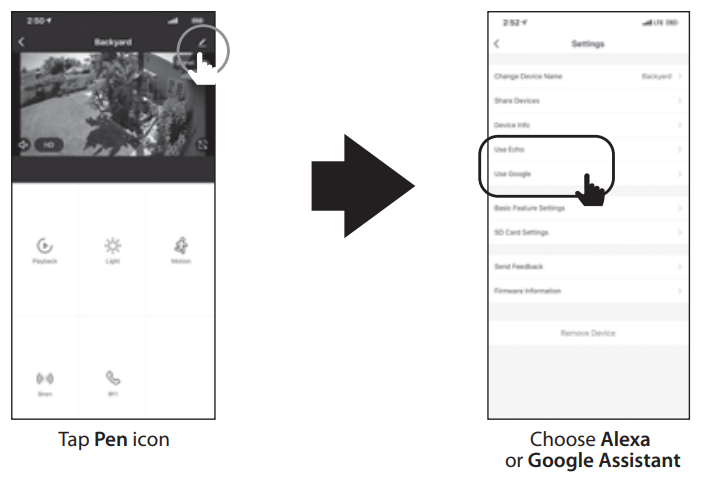
Optional - Connect to Google Assistant or Alexa using the in app guide
Optional - See App User Guide to setup Siri Shortcuts
TROUBLESHOOTING TIPS – Q & A
Camera will not connect to my Wi-Fi network
Make sure the LED is blinking blue. If the LED is blinking red, you will need to press and hold Reset Button located behind the cover on the side of the camera (see the Resetting Unit & Accessing SD Card section).
Make sure the Wi-Fi network is a 2.4GHz network, device will not connect to a 5GHz network.
Test your Wi-Fi network with other devices such as your phone or computer to make sure it is operating properly.
The Wi-Fi connection may be out of range during pairing. Use your phone to check range, it is recommended to have at least 2 signal bars showing for proper connection.
Your Wi-Fi network password is case sensitive, make sure you are entering it correctly.
The camera is off-line
There could be a temporary issue with your internet connection (e.g., service disruption). Please try again in a few minutes.
Make sure your Wi-Fi router is turned On.
The camera may not have power to it, make sure the wall switch and breaker is in the On position.
Cycle the power Off and On. You will hear an audible tone and the status LED should blink red then to a solid blue in about 1 minute. If it does not turn blue after a minute, please go through the setup process again to reconnect to your Wi-Fi signal.
Make sure the camera is getting a good signal from your Wi-Fi router. Use your phone to check range, it is recommended to have at least 2 signal bars showing for proper connection.
The camera may have been disconnected from your Wi-Fi network, press and hold
Reset Button (see the Resetting Unit & Accessing SD Card section) until you see a blinking blue LED and hear an audible tone.
What do the blinking LEDs mean?
Blinking BLUE = Pairing Mode
Solid RED = Rebooting
Blinking RED = No Wi-Fi Connection
Solid BLUE = Connected to Internet
Live video stream is slow to load
Camera streaming issues may be caused by any of the following:
Your phone's cellular connection, which is reliant on mobile coverage and signal reception is slow.
Limited internet bandwidth at home, for example, other video streaming services running at the same time on your network can cause congestion slowing down the internet upload and download speeds.
Wi-Fi reception may not be stable or work reliably if the camera's Wi-Fi signal strength is less than 2 signal bars. You may need to install a Wi-Fi repeater or extender to boost the Wi-Fi signal.
How to reset the camera to reenter pairing mode?
Press and hold reset button located behind the cover on the side of the camera (see the Resetting Unit & Accessing SD Card section) until you see a blinking blue LED and hear an audible tone.
The camera is not recording?
Make sure Record Switch is turned On in app, under SD Card Settings. This is located in the Settings menu on the upper right corner in the control panel.
Make sure that the microSD card is installed correctly. To confirm the camera is recognizing the microSD card, go to the SD Card Settings in the Settings menu and make sure microSD Card Capacity menu shows Total Capacity, Used and Free Space. If this does not appear you may consider reformatting the microSD cardd. WARNING: Reformatting microSD card will delete all videos stored on card. Please go through the trouble shooting section before doing so or contact our Customer Support Team.
How do I set the camera to Event or Continuous Recording?
In the Settings menu under SD Card Settings make sure Record Switch is turned On and then select Event Recording or Continuous Recording.
How can I check the available space on the SD Card?
In the Settings menu under SD Card Settings, you will see Used Space and Free Space. Note: Camera will not support microSD cards greater than 128GB.
What happens when the microSD card reaches full capacity?
You will get notification if storage is almost full. Once the microSD card reaches full capacity, new videos will start rewriting (deleting) over the oldest videos.
Can I use a new microSD card if I do not want to record over existing videos?
Yes, you can use a new microSD card if you do not want to record over existing videos by removing the side cover on the camera and replacing the exiting microSD card with a new one as long as it does not exceed 128GB. Once this is completed you will need to format the microSD card by going to the SD Card Settings in the Settings menu and pressing Format SD Card then Confirm. WARNING: Reformatting microSD card will delete all content stored on card.
#1 How to reset the camera to reenter pairing mode?
Press and hold reset button located behind the cover on the side of the camera (see the Resetting Unit & Accessing SD Card section) until you see a blinking blue LED and hear an audible tone.