User Manual
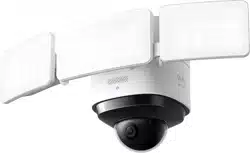
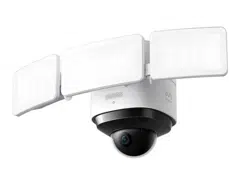
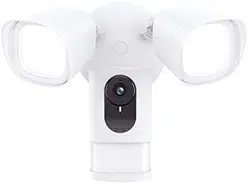
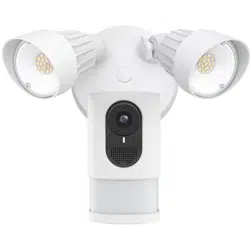
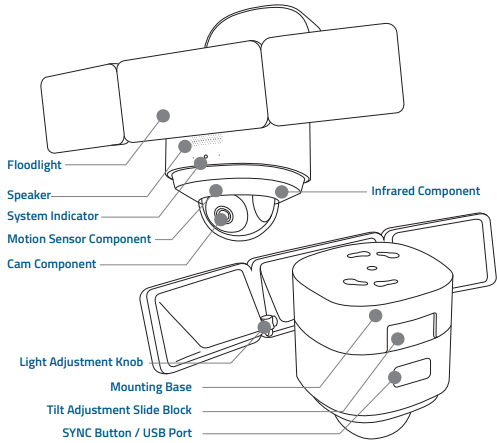
PRODUCT OVERVIEW
DECLARATIONS
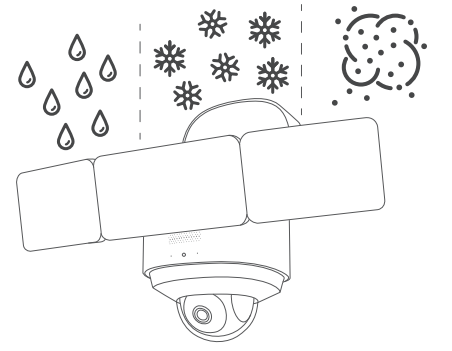
IP65-rated dustproof and waterproof
This product meets IP65 (dustproof and waterproof) requirements.
For dustproof testing, the product was vacuumed and placed in a dust box. After 8 hours of testing, no dust was found in the product.
For waterproof testing, the product was sprayed by a nozzle with an inner diameter of 6.3mm, and water flow of 12.5 L/min. After the test, the product operated normally with no water found inside.
Anti-corrosion
The metal surface of the product is galvanized, and can survive continuous exposure to salt spray at 35 ° C +/- 2 ° C (relative humidity: 90%-95%) with a salt concentration of 5% NaCl for 48 hours in the salt spray test.
Load-bearing tests
The L-shaped bracket and center screw of the product are made of SUS304 steel and have passed industrial-grade outdoor reliability and durability tests. NOTE: The total weight of the product is 2.2kg (4.9lbs), and the L-shaped bracket and center screw is strong enough to carry a load of 10kg (22lbs).
POWERING ON YOUR FLOODLIGHT CAMERA
To avoid scratching the Floodlight Camera, do not peel off the protective film for the time being.
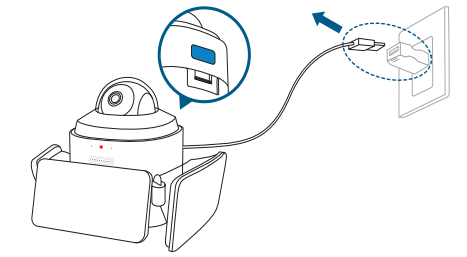
Put your Floodlight Camera in the direction as illustrated on a table, and open the USB port cover. Connect the device to a power source inside your home using the micro USB charging cable and a power adapter (5V/1A, not provided). Wait 1 minute or until the LED indicator blinks red.
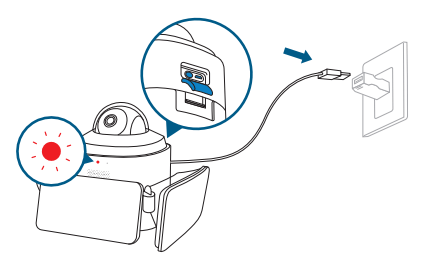
The Floodlights will only light up when in wired power mode. The USB-powered connection is used for setting up the camera safely inside your home.
SETTING UP THE FLOODLIGHT CAMERA
Push and hold the button to open the mounting base and find a QR Code.
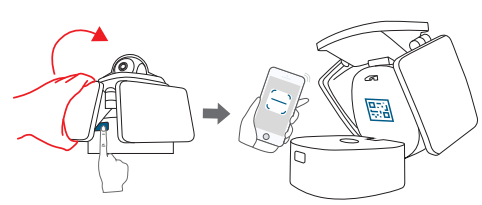
Download the eufy Security app from the App Store (iOS devices) or Google Play (Android devices).

Log in or sign up for a eufy Security account, then follow the on-screen instructions to complete the setup.
Make sure you can livestream video from Floodlight Camera before mounting.
If the Floodlight Camera LED keeps blinking red, it means the floodlight is not connected to the Internet. Please make sure the Wi-Fi signal is strong at the desired location. You may consider moving the wireless router closer to Floodlight Camera or using a Wi-Fi range extender.
PREPARING FLOODLIGHT CAMERA FOR INSTALLATION
1. Unplug the power adapter. Close the mounting base and USB port cover.
2. Shut down the circuit breaker in your house. Switch on/off the lights to make sure the electricity in your house is properly shut off.
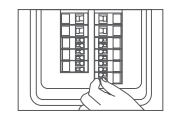
WARNING: To avoid risk of shock, injury or death, always be cautious when working with electricity.
3. Remove the previous Floodlight or Floodlight Camera from the junction box and install the mounting plate.
The junction box and existing electrical wires are required for installing the Floodlight Camera.
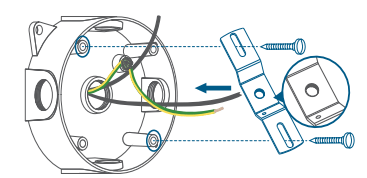
WARNING: The concaved side of the mounting plate must face outwards.
MOUNTING YOUR FLOODLIGHT CAMERA
To ensure the best motion detection range, we recommend installing the Floodlight Camera within 2-3 meters above the ground.
You can hang Floodlight Camera or install it vertically on the wall. Select the installation method that best suits the position of your junction box.

Mount Floodlight Camera onto a Wall
STEP 1. Before Mounting
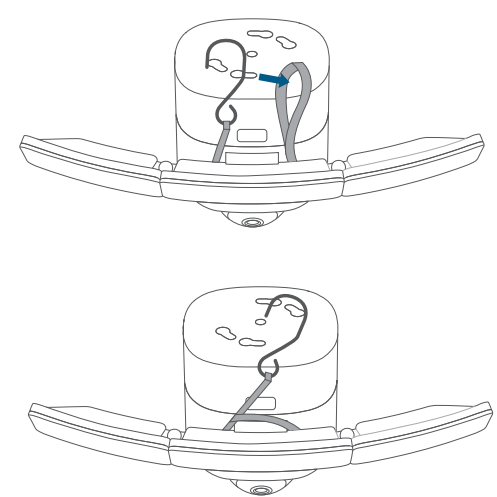
1. Pass the hook through the other end of the string as illustrated.
2. You need a ladder to mount your Floodlight Camera on the wall. Make sure you do not place your ladder right under the Floodlight Camera. Place it to the lower left or right of the Floodlight Camera as illustrated below to avoid obstructing your view while mounting.

3. Hang your Floodlight Camera on the junction box with the hook provided.
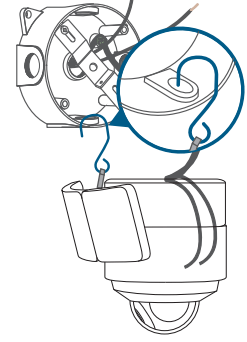
If the junction box has been installed in the wall, hang the Floodlight Camera on the mounting plate.
STEP 2. Connect Wires
1. Connect both ground wires (yellow or green) from the junction box and Floodlight Camera and join the wires by using a wire nut. If the existing ground wire has been connected to the junction box or there is no ground wire, connect the ground wire of the Floodlight Camera to the junction box or mounting plate directly.
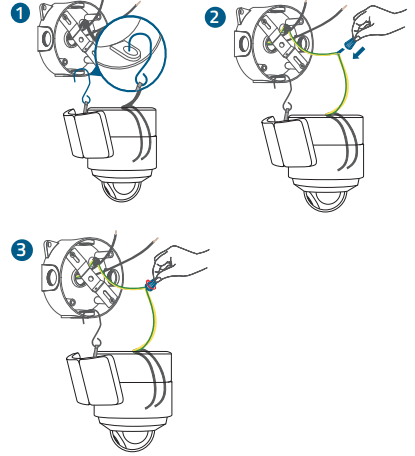
2. Use wire nuts to connect the Floodlight Camera wires to the rest of the wires from the junction box. Connect the white wire on the Floodlight Camera to the white wire (neutral) from the junction box. Connect the black wire on the Floodlight Camera to the black wire (hot) from the junction box.
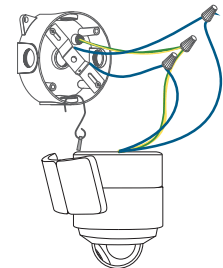
The GROUND wire is green and yellow in color. Make sure the GROUND wire on Floodlight Camera connects to the GROUND wire of the junction box. The other 2 wires on the Floodlight Camera do not require a specific connection order. Use the wire nuts to protect the joints of wires.
WARNING: To avoid risk of shock, injury or death, always be cautious when working with electricity. Remember, do hire a professional electrician if you’re uncomfortable working with electrical wiring.
STEP 3. Mount the Floodlight Camera
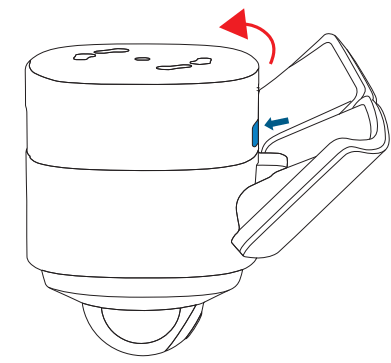
1. Remove the hook, and press the button to open the mounting base.
2. Hold the mounting base, and insert the central screw through the center of the mounting base and screw it tightly. Use the central screw cap to cover the central screw to prevent it from rusting.
3. Cover the central screw with the provided cap.
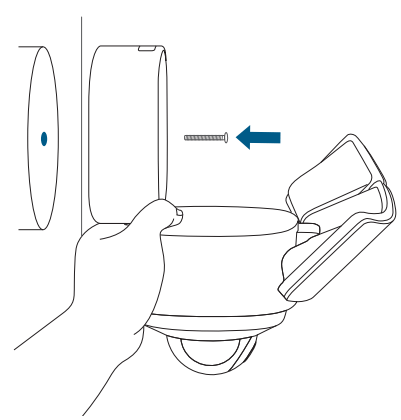
Side view makes it easier for you to align the screws.
4. Adjust the angle as mentioned in the section "Adjusting the Lighting Angle" to get the best view.
5. Remove the label and protective film on the Floodlight.
Mount Floodlight Camera on the Ceiling
1. Follow steps mentioned in the section “Mount Floodlight Camera onto a Wall” to choose the place for mounting and connect wires.
2. Insert the central screw through the center of the mounting base and screw it tightly.
3. Cover the central screw with the provided cap.
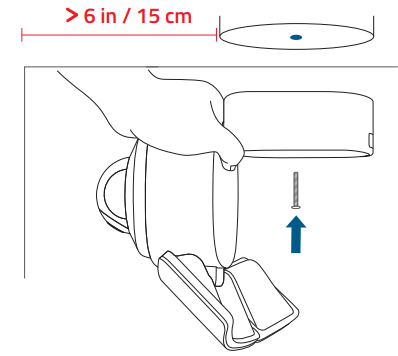
Make sure you place the Floodlight Camera more than 6 in / 15 cm away from a side wall.
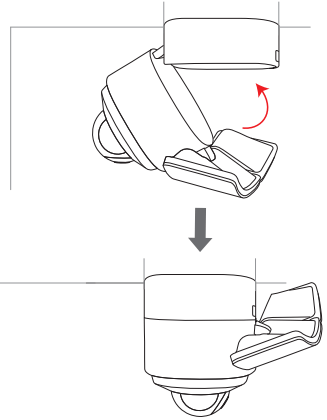
4. Snap the camera onto its base.
5. Adjust the angle as mentioned in the section “Adjusting the Lighting Angle” to get the best view.
6. Remove the label and protective film on the Floodlight.
7. Switch on the main circuit breaker in the house.
In case Floodlight Camera is not powered on, switch off the circuit breaker before checking the wiring of Floodlight Camera. To avoid risk of shock, injury or death, always be cautious when working with electricity. Remember, do hire a professional electrician if you’re uncomfortable working with electrical wiring.
ADJUSTING THE LIGHTING ANGLE
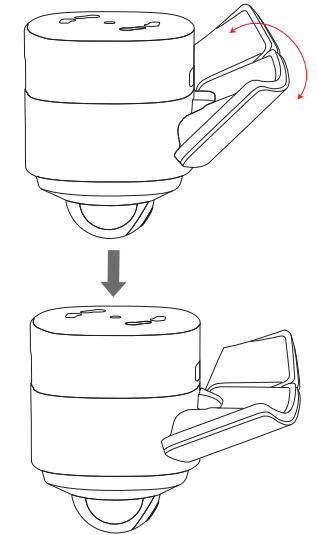
1. Turn the knobs counter-clockwise to extend the Floodlight. Adjust the Floodlight horizontally and then tighten the knobs by turning them clockwise.

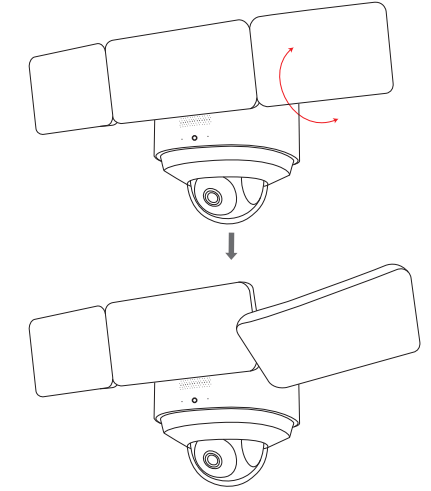
2. Manually pull down the Floodlight in the middle.
3. Manually pull down the Floodlight on the side.
To check whether Floodlight Camera is operating, confirm the LED indicator has turned solid white.
For troubleshooting, check the Help section in the eufy Security app. Refer to the app page for what the LED indicator status lights mean.