Loading ...
Loading ...
Loading ...
www.NutrichefKitchen.com
8
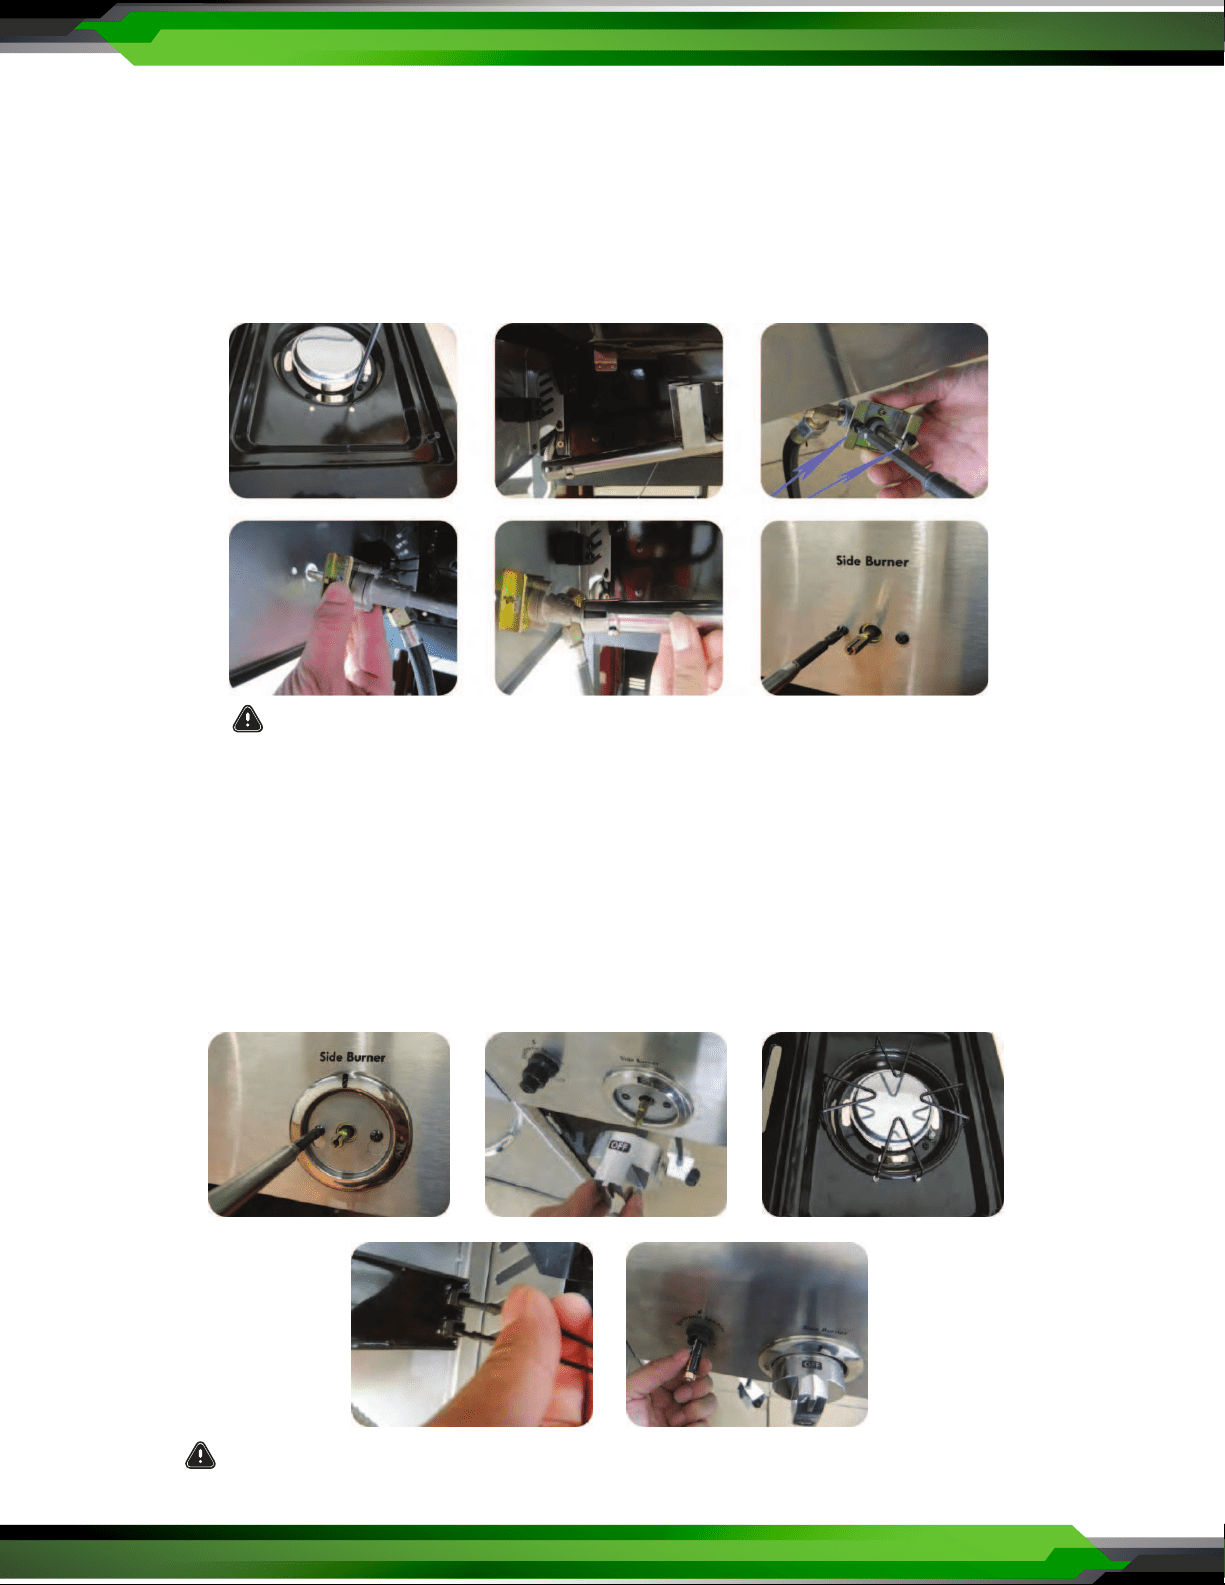
7-a. Fit the Side Burner and Hose Assembly (have someone to assist)
a. Unscrew and remove the two front bolts and washers holding the side burner in place.
Note: Do not loosen the electrode screw.
b. Loosen the side burner from the side shelf.
c. Unscrew the two screws on valve bracket and keep them aside.
d. Insert the valve stem through the hole in the fascia.
e. Place the side burner tube over the valve outlet, making sure that the valve is inside the side burner tube.
f. Fix the valve to the fascia with the two previously removed screws. Do not fully tighten yet.
Make Sure that the burner tube is engaged onto the valve outlet! See image (e).
7-b. Complete the Side Burner
g. Attach the bezel to the fascia via the keyholes onto the two exposed screws. Tighten the screws to secure the bezel.
h. Push the control knob back onto the side burner valve stem.
i. Re-attach the side burner to the side burner shelf with the two previously removed bolts and washers.
Fit the SIDE BURNER TRIVET into place as shown.
j. Attach the main burner igniter wire and the side burner igniter wire into the two module sockets.
It does not matter which way around.
k. Unscrew the igniter cap from the control panel. Insert one AAA battery (provided in the bolt pack) into the battery
slot with positive end (+) facing outward. Screw the igniter cap back onto the control panel.
Check again that the side burner tube is engaged onto the valve outlet! See image (e).
A B C
D E F
G H I
J K
Loading ...
Loading ...
Loading ...