Loading ...
Loading ...
Loading ...

- 18 -
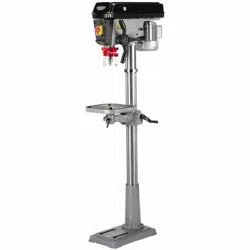
FIG.19
9. SETTING THE DRILL
9.5 GENERAL DRILLING - FIG. 19
For repeated drilling to a consistent depth, set the
depth stop facility (AE).
As a guide the depth is indicated on the scale.
NOTE: For accuracy, set up the depth using a steel
rule.
Lower the chuck and drill bit to the required position by
rotating the plunge handles (AF) anti-clockwise.
Set the position with nut (AG) against the stop (AH)
and lock with nut (AI).
Use a scrap piece of material to test before beginning
on the workpiece.
When drilling metal it is good practice to use a cutting
fluid to aid lubrication, swarf removal and as a coolant.
This will result in increased cutting performance and
help prolong the life of the bit. A few drops of oil will
suffice in the absence of a specific cutting fluid.
9.6 DUST AND SWARF
All wood dust (including dust from composites like
chipboards and fibre boards etc) is hazardous to
health: it can affect the nose, the respiratory system
and the skin. For example MDF (medium density
fibreboard) which contains formaldehyde is a
known carcinogen.
A correctly fitted dust mask, suitable for the activity
and in accordance to the relevant standard, must
be worn.
For work activities involving exposure to fine wood
dust a mask rated to at least FFP2 should be used.
Swarf produced by metal cutting is extremely sharp.
Take care when breaking the chips/clearing the bit.
(AF)
(AE)
(AI)
(AG)
(AH)
- 19 -
10. TROUBLESHOOTING
10.1 TROUBLESHOOTING
WARNING: For your safety always turn the main switch on the machine “off” and remove the plug
from the power supply before carrying out any maintenance or troubleshooting.
Machine will not
start.
1. Fuse.
2. Other.
1. Replace/reset time delay fuse
or circuit breaker.
2. Return to an authorised
service agent for diagnosis.
Noisy operation.
Problem Cause Remedy
1. Incorrect belt tension.
2. Dry spindle.
3. Loose spindle pulley or motor
pulley.
1. Adjust tension.
2. Lubricate spindle with grease.
3. Tighten set screws in pulleys.
1. Incorrect speed.
2. Swarf not coming out of hole.
3. Blunt bit.
4. Feeding too slow.
5. Not lubricated.
1. Change speed.
2. Retract bit frequency to clear
swarf.
3. Sharpen or replace bit.
4. Feed fast enough to allow drill
to cut.
5. Lubricate bit.
1. Bent bit.
2. Worn spindle bearings.
3. Bit not properly installed in chuck.
4. Chuck not properly installed.
1. Use a straight bit.
2. Return to an authorised service
agent.
3. Install bit centrally.
4. Refit chuck properly.
1. Workpiece pinching bit or
excessive feed pressure.
2. Improper belt tension.
1. Support or re-clamp workpiece.
2. Adjust tension.
Bit burns or smokes.
Excessive drill
run-out or wobble.
Drill binds in
workpiece.
Loading ...
Loading ...
Loading ...