Loading ...
Loading ...
Loading ...
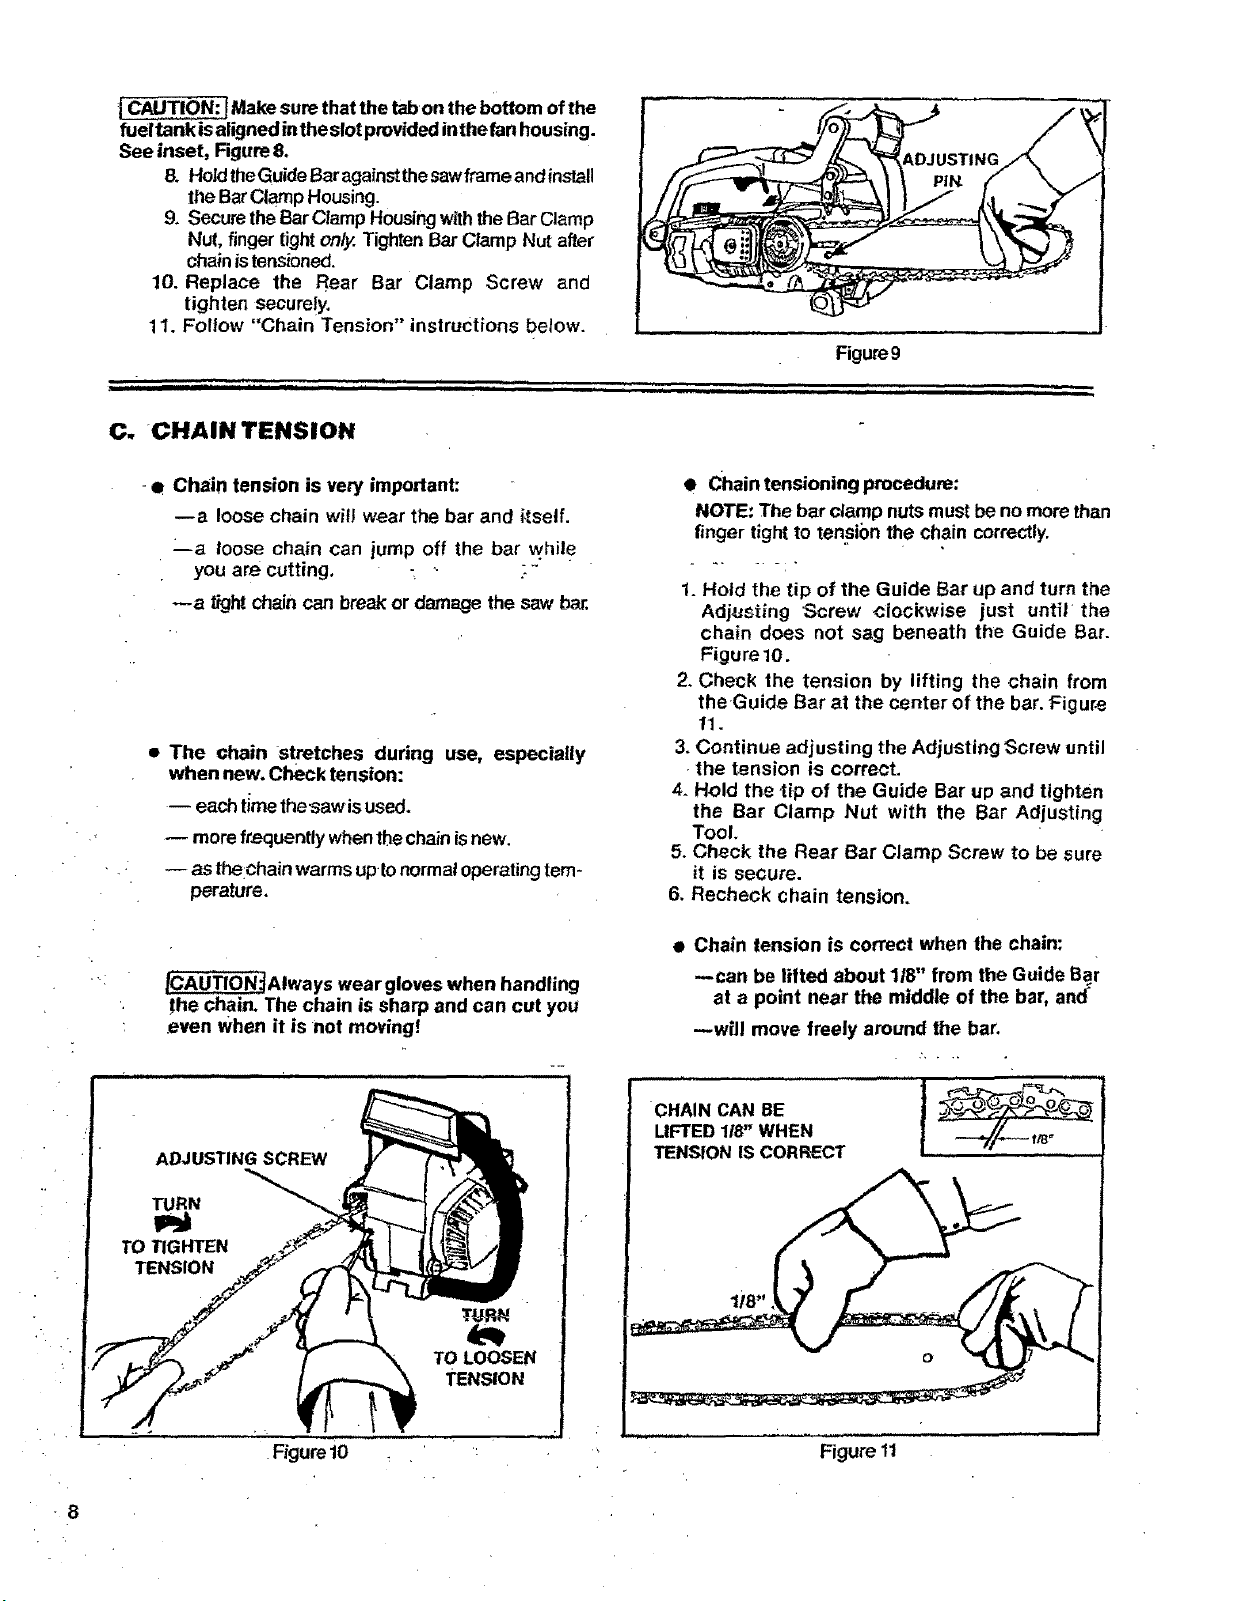
jCAUTION:JMakesure that the tabon thebottom ofthe
fuel tank isaligned inthe slotprovidedinthefan housing.
See inset, Figure8,
& HoldtheGuideBaragainstthesawframe andinstall
the BarClampHousing.
9. SecuretheBar ClampHousing withtheBar Clamp
Nut, finger tightonly.TightenBar Clamp Nut after
chainistensioned.
10. Replace the Rear Bar Clamp Screw and
tighten securely.
11. Follow "Chain Tension" instructions below.
• , ,=1¸ " iiiiiiii i i ii ¸ _'il i _ '" i
i i
Figure9
, iiii ii, i i,
C. CHAIN TENSION
-• Chain tension is very important:
--a loose chain wilt wear the bar and i_setf.
ma loose chain can jump off the bar while
you are cutting, : _ .:"
--a _ght chain can break or damage the saw b_
• The chain Stretches during use, especially
when new. Check tension:
-- each timethe_awis used.
more frequently whenthechainisnew•
as thelchainwarmsup tonormaloperatingtem-
perature.
• Chain tensioning procedure:
NOTE: The bar clamp nutsmustbe no more than
finger tight to tension the chain correctly.
1. Hold the tip of the Guide Bar up and turn the
Adjusting Screw clockwise just until the
chain does not sag beneath the Guide Bar.
Figure 10.
2. Check the tension by lifting the chain from
the Guide Bar at the center of the bar. Figure
11.
3. Continue adjusting the Adjusting Screw until
•the tension is correct.
4. Hold the tip of the Guide Bar up and tighten
the Bar Clamp Nut with the Bar Adjusting
Tool.
5. Check the Rear Bar Clamp Screw to be sure
it is secure.
6, Recheck chain tension.
ICAUTION_Always wear gloves when handling
the chain. The chain is sharp and can cut you
.even When it is not moving!
TURN
TO LOOSEN
TENSION
.Figurei0
Chain tension is correct when the chain:
--can be lifted about 118"from the Guide Bar
at a point near the middle of the bar, and"
_will move freely around the bar,
CHAIN CAN BE
LIFTED 118" WHEN
TENSION IS CORRECT
Figure 11
-8
Loading ...
Loading ...
Loading ...