Loading ...
Loading ...
Loading ...
40
Disassembly of the Tubes
1. Place the hedge cutter on a clean flat surface and
loosen the screw of the connection piece. Pull the latch
protection from the notch.
2. Push the latch down. This releases the lock of the
connecting piece. See A41.
3. Pull the upper tube out of the connection piece.
Mounting of the cutting attachment
Warning!
The blades are very sharp. Do not handle the blades,
if the blade cover is not covered. Always wear gloves
when you work with or in the vicinity of the blade.
1. Make sure that the cutting attachment in the storage/
transport position is locked (folded back) and the blade
cover is pulled over the blade.
2. Push the outer tube up to the limiting stop in the
clamping of the transmission housing.
The outer tube must be fully pushed into the
transmission housing. If you feel a resistance before
the limiting stop, turn the outer tube until the splines of
the inner main shaft (drive shaft) snaps into place in the
transmission housing and push the outer tube up to the
limiting stop.
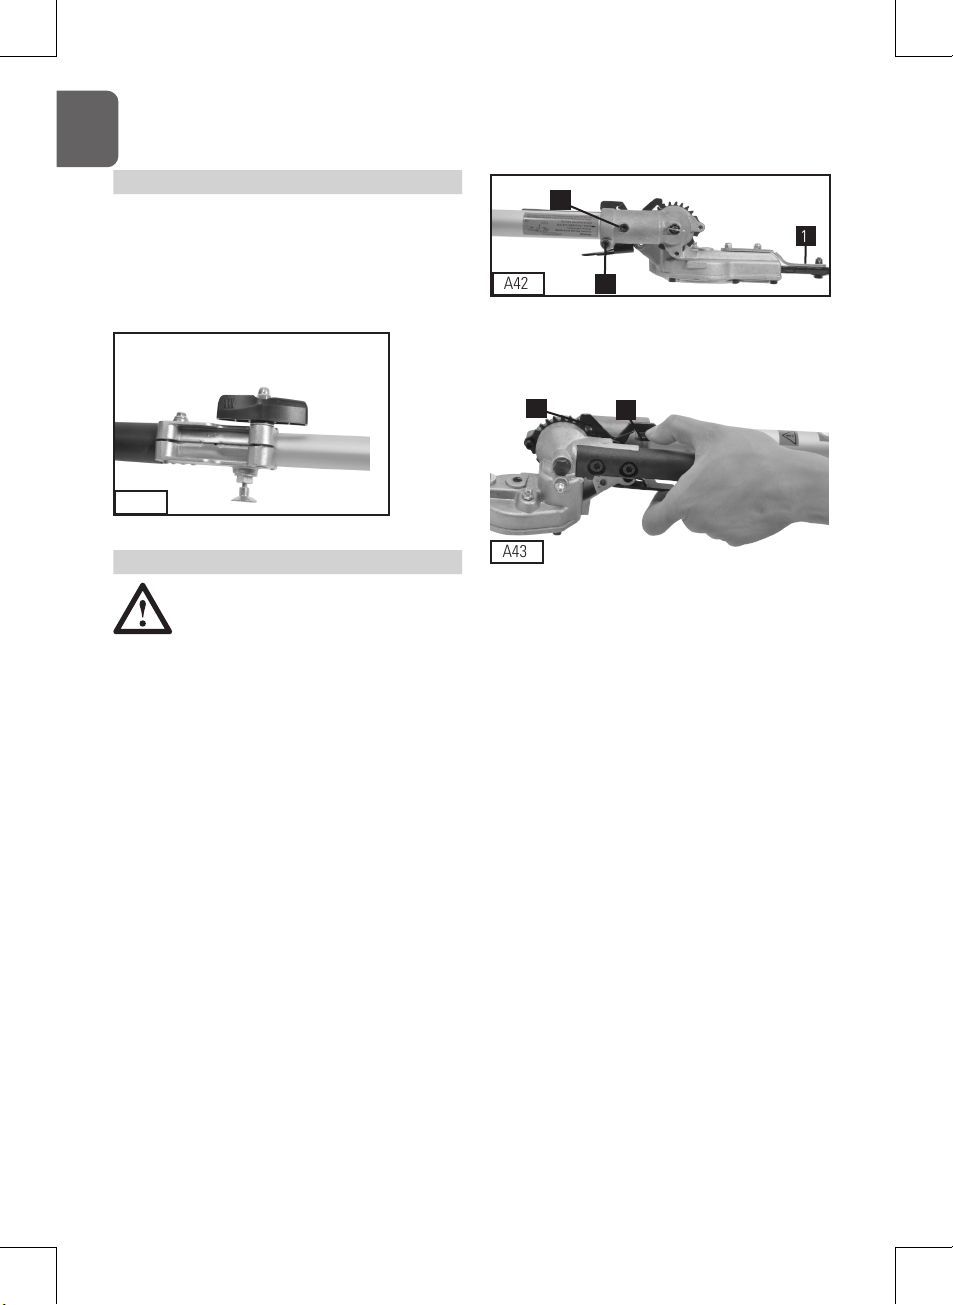
3. Turn the gearbox housing/Cutting attachment so that
the index bolt is aligned in an upright position over the
hole
. The cutting attachment is located in the reverse
position (in the bearing position/transport position).
A42
1
2
3
1). Blade cover
2). Align with hole in outer tube and tighten the index
screw
3). Tighten the clamping screw finally
A43
2
1
1). Place the hand protection so that the tip of the
cutting attachment in the recess (if the hedge cutter is in
the warehouse/transport position).
2). Tighten clamping
4. Use an Allen key (4 mm), to first tighten the index bolt
on the gearbox housing and then the clamping screw.
5. Align the hand protection in such a way that the tip
of the cutting attachment is lying correctly in the recess.
Make sure that the cutting attachment is not jammed in
the slot. Then tighten the screw of hand protection with
a screwdriver.
A41
G
B
Loading ...
Loading ...
Loading ...