Loading ...
Loading ...
Loading ...
• Checkthat the wood is not touching the blade.
Insert switch key and lift switch to ON position. See
Figures 58 and 59.
• Let blade obtain full speed before feeding
workpiece into the blade with the miter gage.
• Hold work firmly against miter gage and push miter
gage to feed work into the blade.
• When work is completed, press switch off and
remove switch key. See Figure 60.
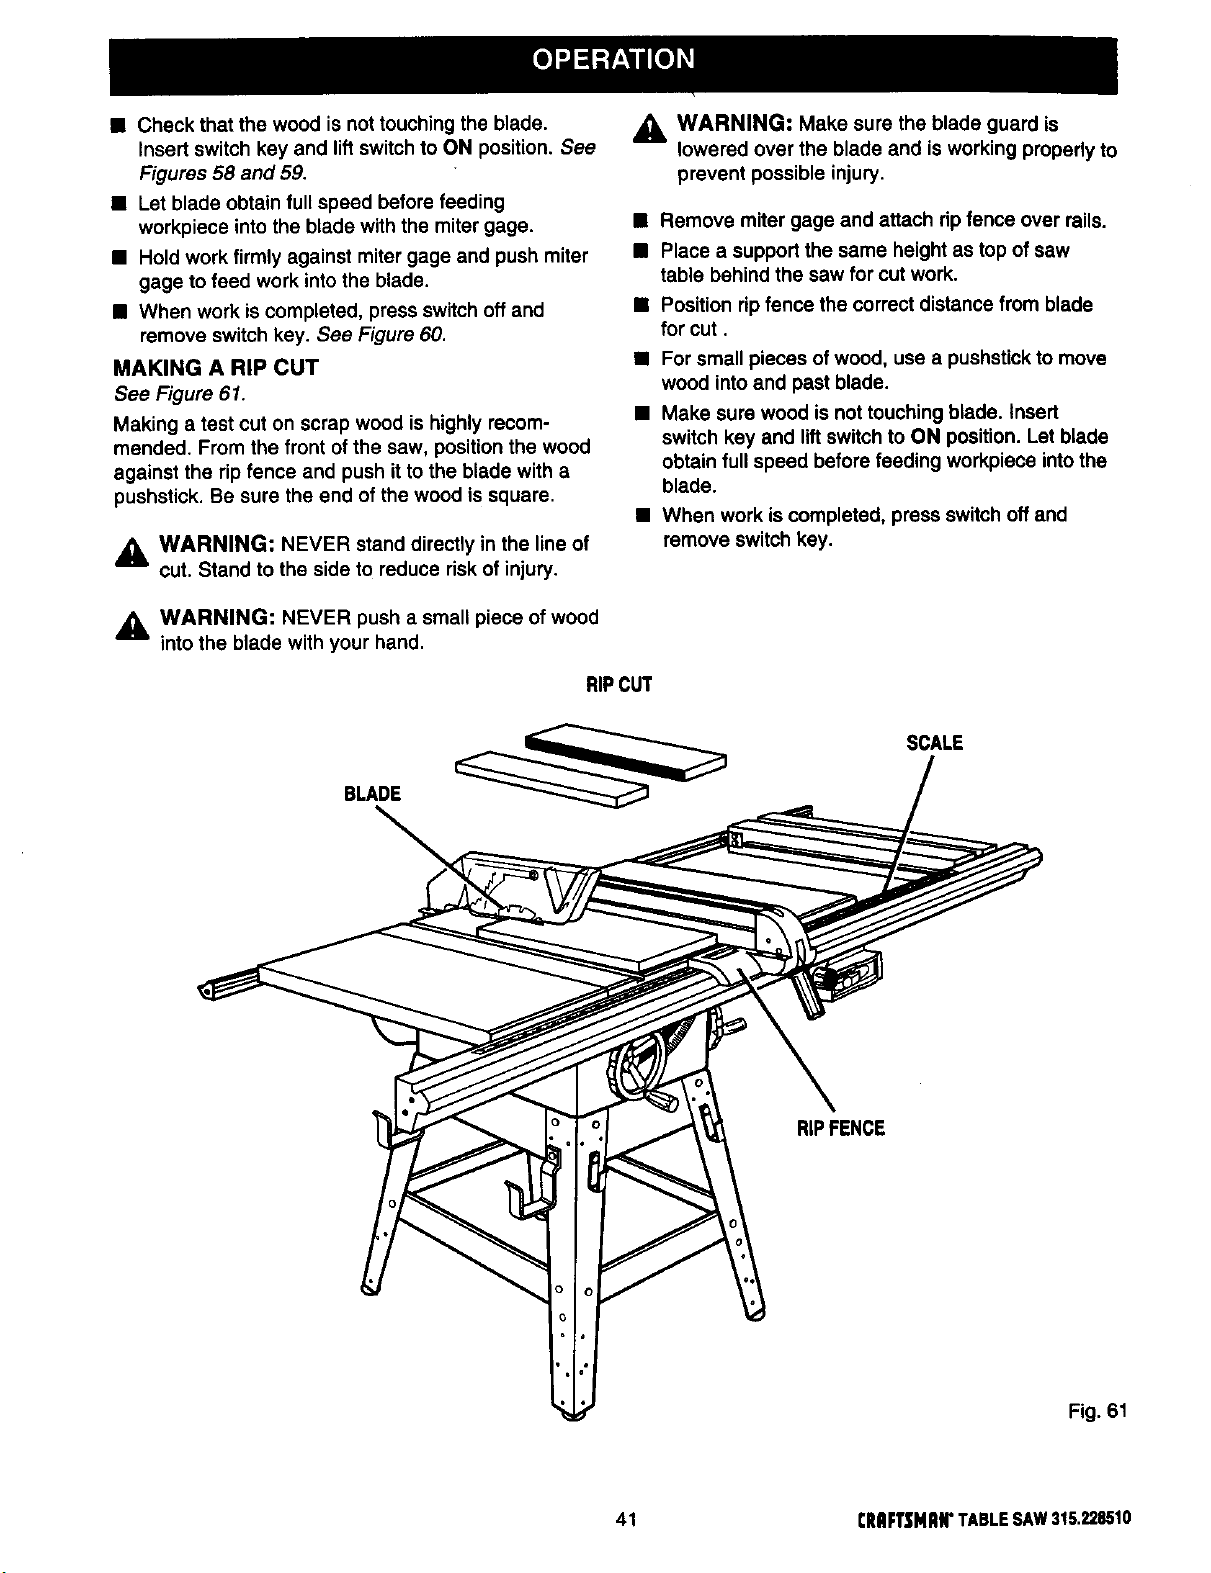
MAKING A RIP CUT
See Figure 61.
Making a test cut on scrap wood is highly recom-
mended. From the front of the saw, position the wood
against the rip fence and push it to the blade with a
pushstick. Be sure the end of the wood is square.
_1= WARNING: NEVER stand directly in the line of
n
cut. Stand to the side to reduce dsk of injury.
,_ WARNING: Make sure the blade guard is
lowered over the blade and is working properly to
prevent possible injury.
• Remove miter gage and attach rip fence over roils.
• Place a support the same height as top of saw
table behind the saw for cut work.
• Position rip fence the correct distance from blade
for cut.
• For small pieces of wood, use a pushstick to move
wood into and past blade.
• Make sure wood is not touching blade. Insert
switch key and lift switch to ON position. Let blade
obtain full speed before feeding workpiece into the
blade.
• When work iscompleted, press switch off and
remove switch key.
WARNING: NEVER push a small piece of wood
n
into the blade with your hand.
RIPCUT
BLADE
SCALE
RIPFENCE
Fig. 61
41 CRIIFTSMRN"TABLESAW315.228510
Loading ...
Loading ...
Loading ...