Loading ...
Loading ...
Loading ...
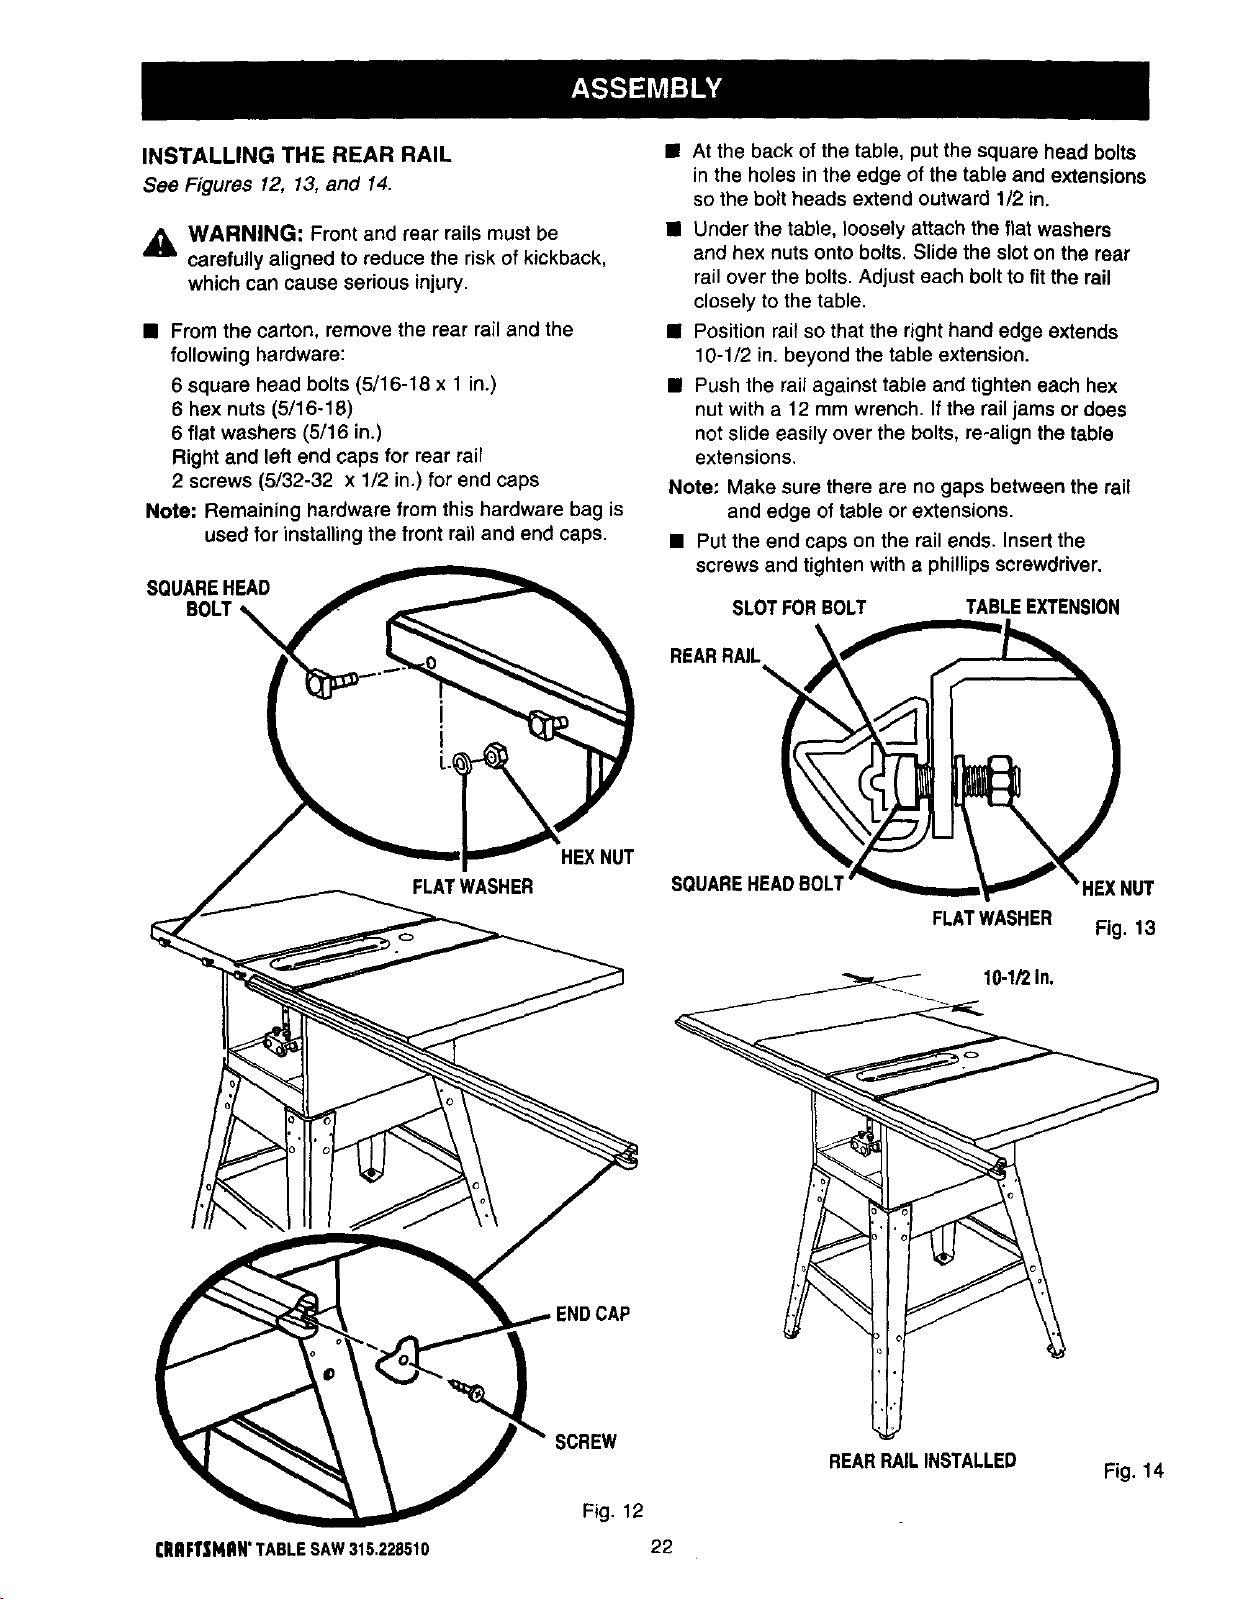
INSTALLING THE REAR RAIL
See Figures 12, 13, and 14.
,_ WARNING: Front and rear rails must be
carefully aligned to reduce the risk of kickback,
which can cause serious injury.
• From the carton, remove the rear rail and the
following hardware:
6 square head bolts (5/16-18 x 1 in.)
6 hex nuts (5/16-18)
6 flat washers (5/16 in.)
Right and left end caps for rear rail
2 screws (5/32-32 x 1/2 in.) for end caps
Note: Remaining hardware from this hardware bag is
used for installing the front rail and end caps.
SQUAREHEAD
HEXNUT
FLATWASHER
!NDCAP
SCREW
Fig. 12
• At the back of the table, put the square head bolts
in the holes in the edge of the table and extensions
so the bolt heads extend outward 1/2 in.
• Under the table, loosely attach the flat washers
and hex nuts onto bolts. Slide the slot on the rear
rail over the bolts. Adjust each bolt to fit the rail
closely to the table.
• Position rail so that the right hand edge extends
10-1/2 in. beyond the table extension.
• Push the rail against table and tighten each hex
nut with a 12 mm wrench. If the rail jams or does
not slide easily over the bolts, re-align the table
extensions.
Note: Make sure there are no gaps between the rail
and edge of table or extensions.
• Put the end caps on the rail ends. Insert the
screws and tighten with a phillips screwdriver.
SLOTFOR BOLT
TABLEEXTENSION
REARRAIL
\
SQUAREHEADBOLT
FLATWASHER
1_1_1n.
HEXNUT
Fig. 13
REARRAILINSTALLED
Fig. 14
CRAFTSNAN'TABLESAW315.228510 22
Loading ...
Loading ...
Loading ...