Loading ...
Loading ...
Loading ...
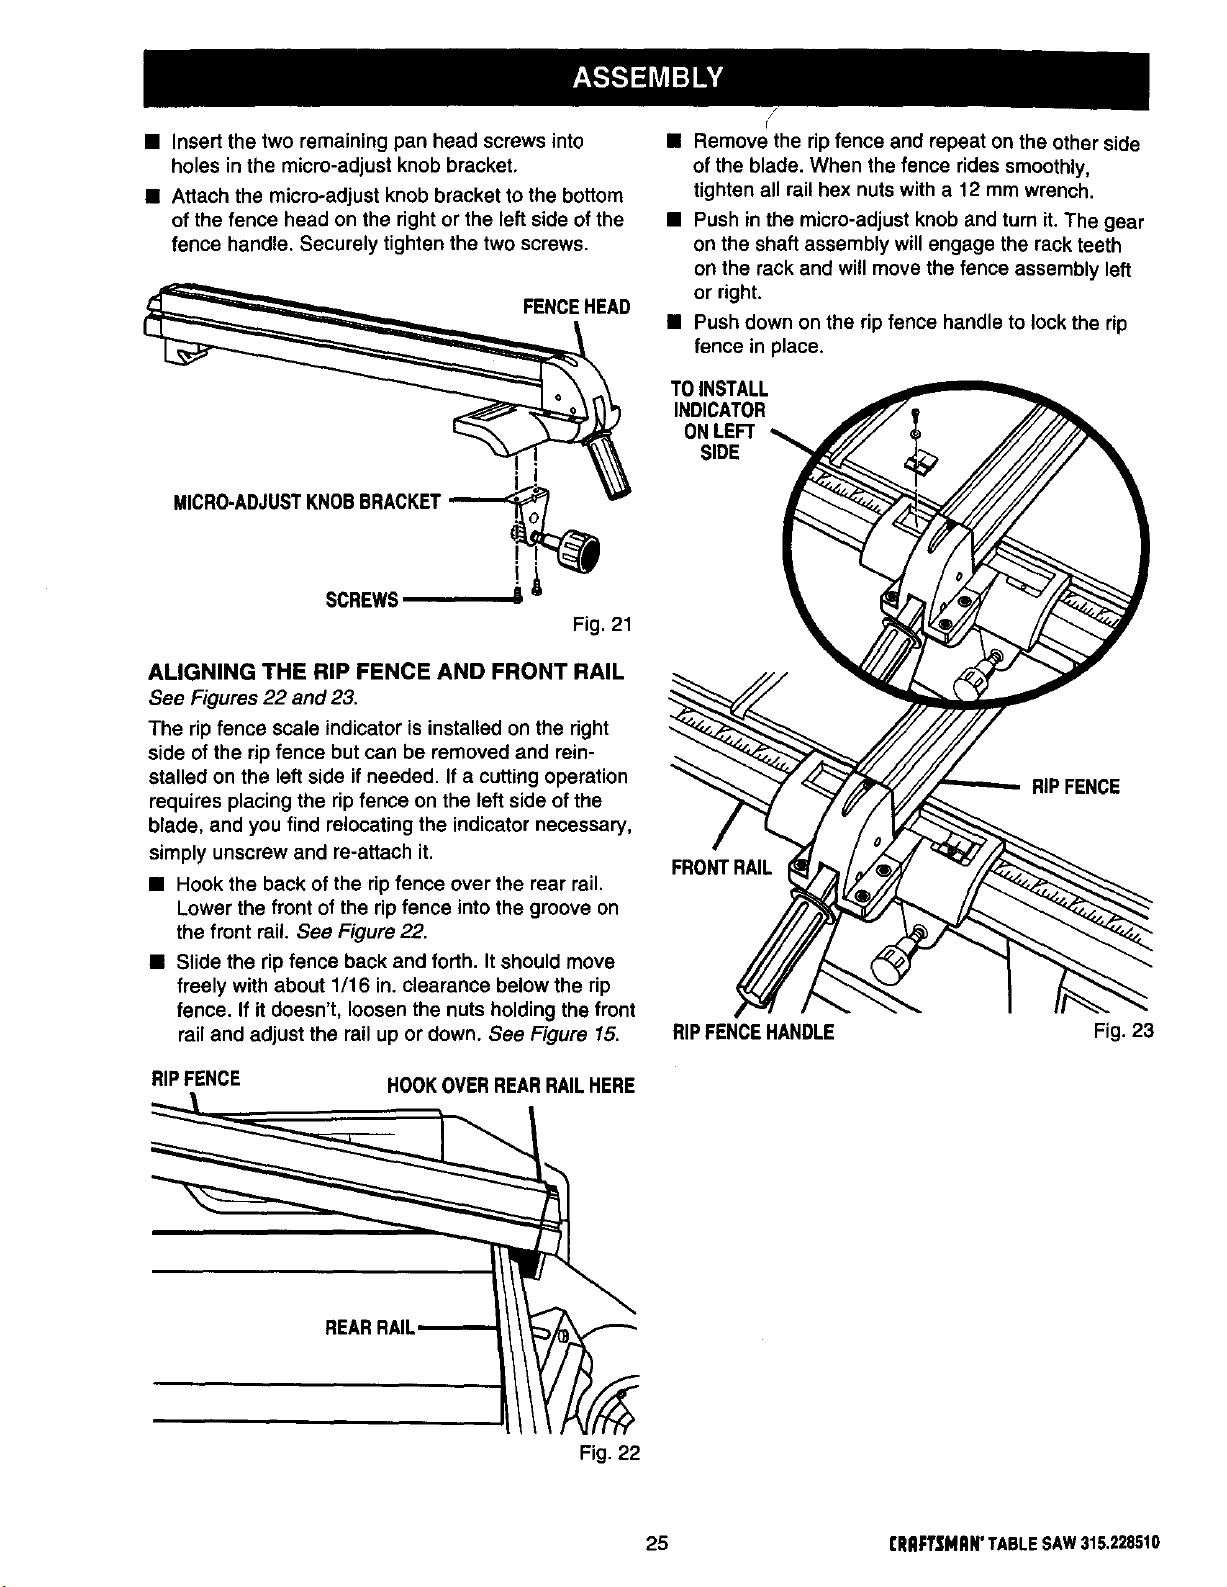
• Insert the two remaining pan head screws into
holes in the micro-adjust knob bracket,
• Attach the micro*adjust knob bracket to the bottom
of the fence head on the right or the left side of the
fence handle. Securely tighten the two screws.
FENCEHEAD
MICRO-ADJUSTKNOBBRACKET'__
SCREWS -"
Fig, 21
ALIGNING THE RIP FENCE AND FRONT RAIL
See Figures 22 and 23.
The rip fence scale indicator is installed on the right
side of the rip fence but can be removed and rein-
stalled on the left side if needed. If a cutting operation
requires placing the rip fence on the left side of the
blade, and you find relocating the indicator necessary,
simply unscrew and re-attach it.
• Hook the back of the rip fence over the rear rail.
Lower the front of the ripfence into the groove on
the front rail. See Figure 22.
• Slide the rip fence back and forth. It should move
freely with about 1/16 in. clearance below the rip
fence. If it doesn't, loosen the nuts holding the front
rail and adjust the rail up or down, See Figure 15.
RIP FENCE
HOOKOVERREARRAILHERE
/
f
• Remove the ripfence and repeat on the other side
of the blade. When the fence rides smoothly,
tighten all rail hex nuts with a 12 mm wrench.
• Push in the micro-adjust knob and turn it. The gear
on the shaft assembly will engage the rack teeth
on the rack and will move the fence assembly left
or right.
• Push down on the rip fence handle to lock the rip
fence in place.
TOINSTALL
INDICATOR
ONLEFT
SIDE
RIPFENCE
FRONTRAIL
RIPFENCEHANDLE Fig. 23
REARRAIL
Fig. 22
25 CRAFrSMAN'TABLESAW315.228510
Loading ...
Loading ...
Loading ...