Loading ...
Loading ...
Loading ...
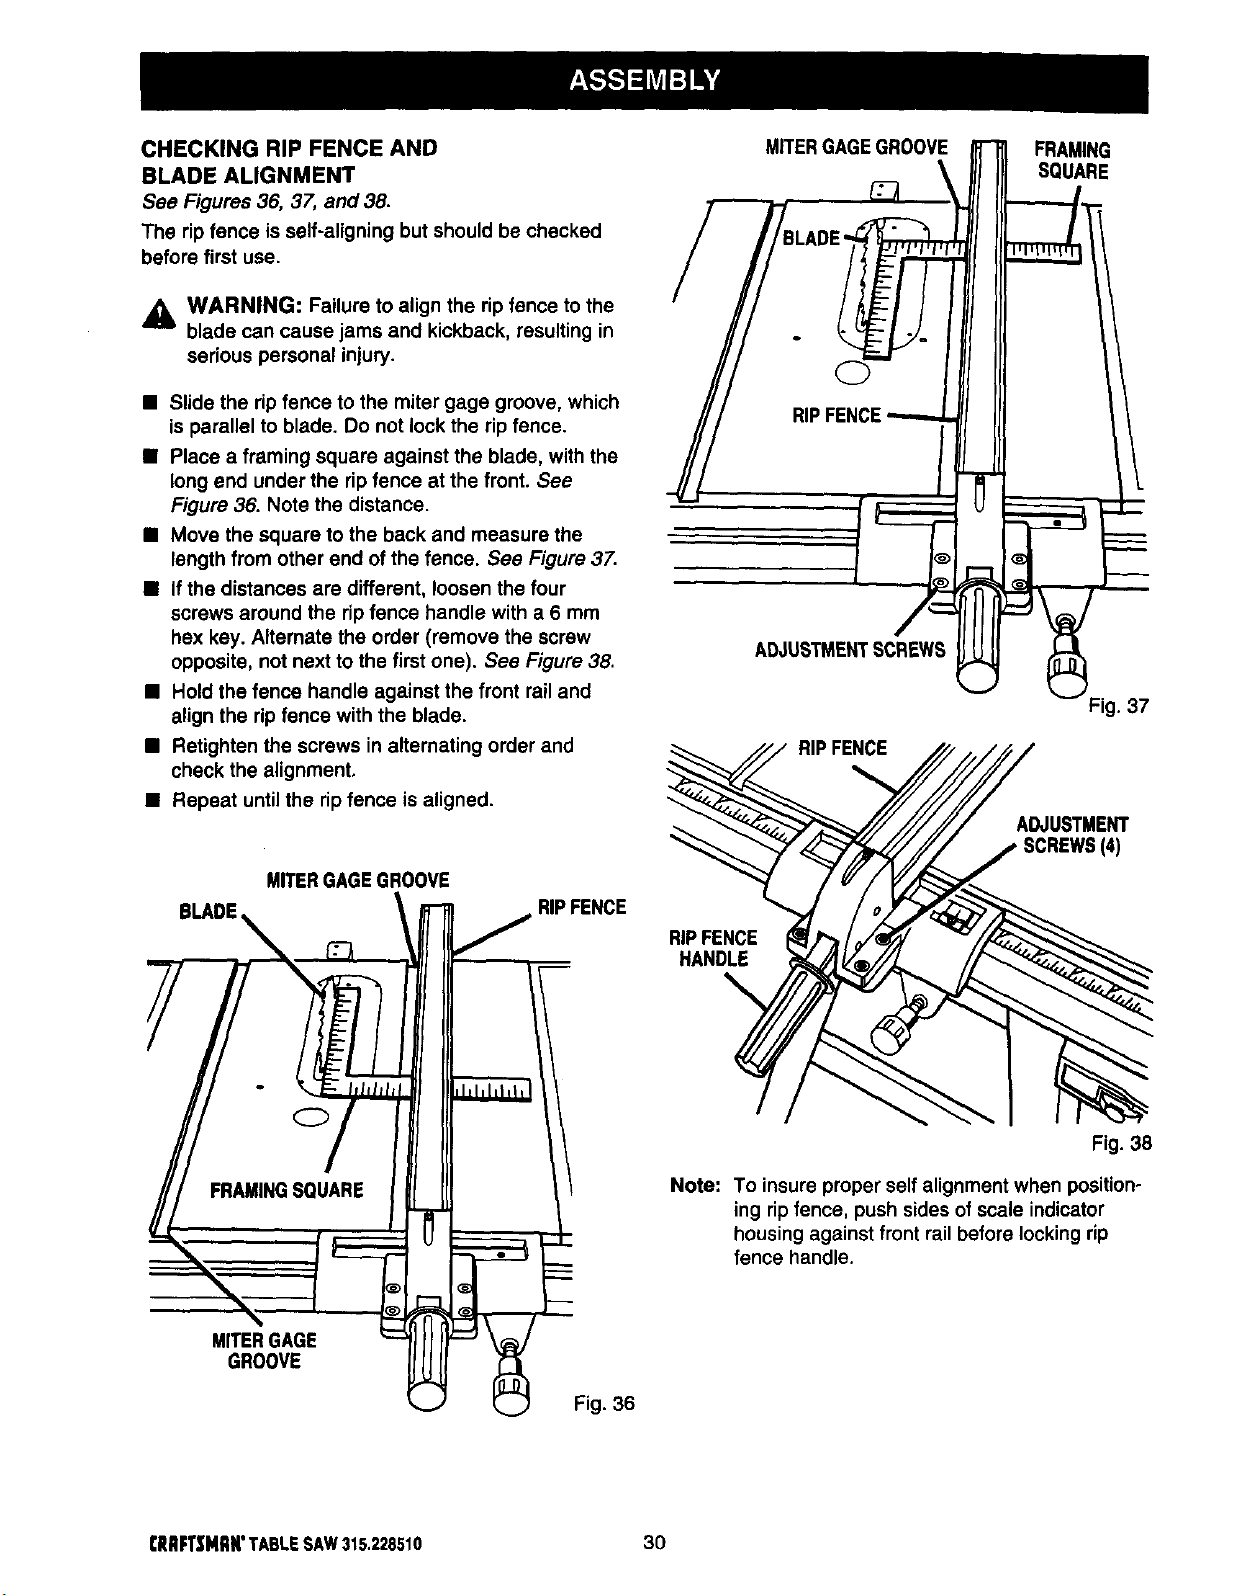
CHECKING RIP FENCE AND
BLADE ALIGNMENT
See Figures 36, 37, and 38.
The ripfence is self-aligning but should be checked
before first use.
WARNING: Failure to align the rip fence to the
blade can cause jams and kickback, resulting in
serious personal injury.
• Slide the rip fence to the miter gage groove, which
is parallel to blade. Do not lock the rip fence.
• Place a framing square against the blade, with the
long end under the rip fence at the front. See
Figure 36. Note the distance.
• Move the square to the back and measure the
length from other end of the fence. See Figure 37.
• If the distances are different, loosen the four
screws around the ripfence handle with a 6 mm
hex key. Alternate the order (remove the screw
opposite, not next to the first one). See Figure 38.
• Hold the fence handle against the front rail and
align the ripfence with the blade.
• Retighten the screws in alternating order and
check the alignment.
• Repeat until the ripfence is aligned.
MITERGAGEGROOVE
BLADE, RIPFENCE
RIP FENCE
HANDLE
MITERGAGEGROOVE
ADJUSTMENTSCREWS
RIP FENCE
FRAMING
SQUARE
Fig. 37
ADJUSTMENT
(4)
Fig. 38
Note: To insure proper self alignment when position-
ing rip fence, push sides of scale indicator
housing against front rail before locking rip
fence handle.
MITERGAGE
GROOVE
Fig. 36
(RRFTSNRN°TABLESAW315,228510 30
Loading ...
Loading ...
Loading ...