Loading ...
Loading ...
Loading ...
CHECKING THE THROAT PLATE BLADEGUARD
See Figure 32.
,_ CAUTION: The throat plate must beeven with the
table sutrace. Ifitistoohighortoolow,theworkpiece
can catch on uneven edges and cause kickback.
• Make sure the throat plate isflush with the table top.
To change the height of the throat plate, loosen the flat
head screw that secures the throat plate and adjust
the four setscrews on the throat plate with a 2 mm hex
key. Do not allow the throat plate to bow up above the
table surface.
BLADE
2 mm SETSCREWS(4)
HEXKEY FRAMINGSQUARE
THROATPLATE
HEADSCREW
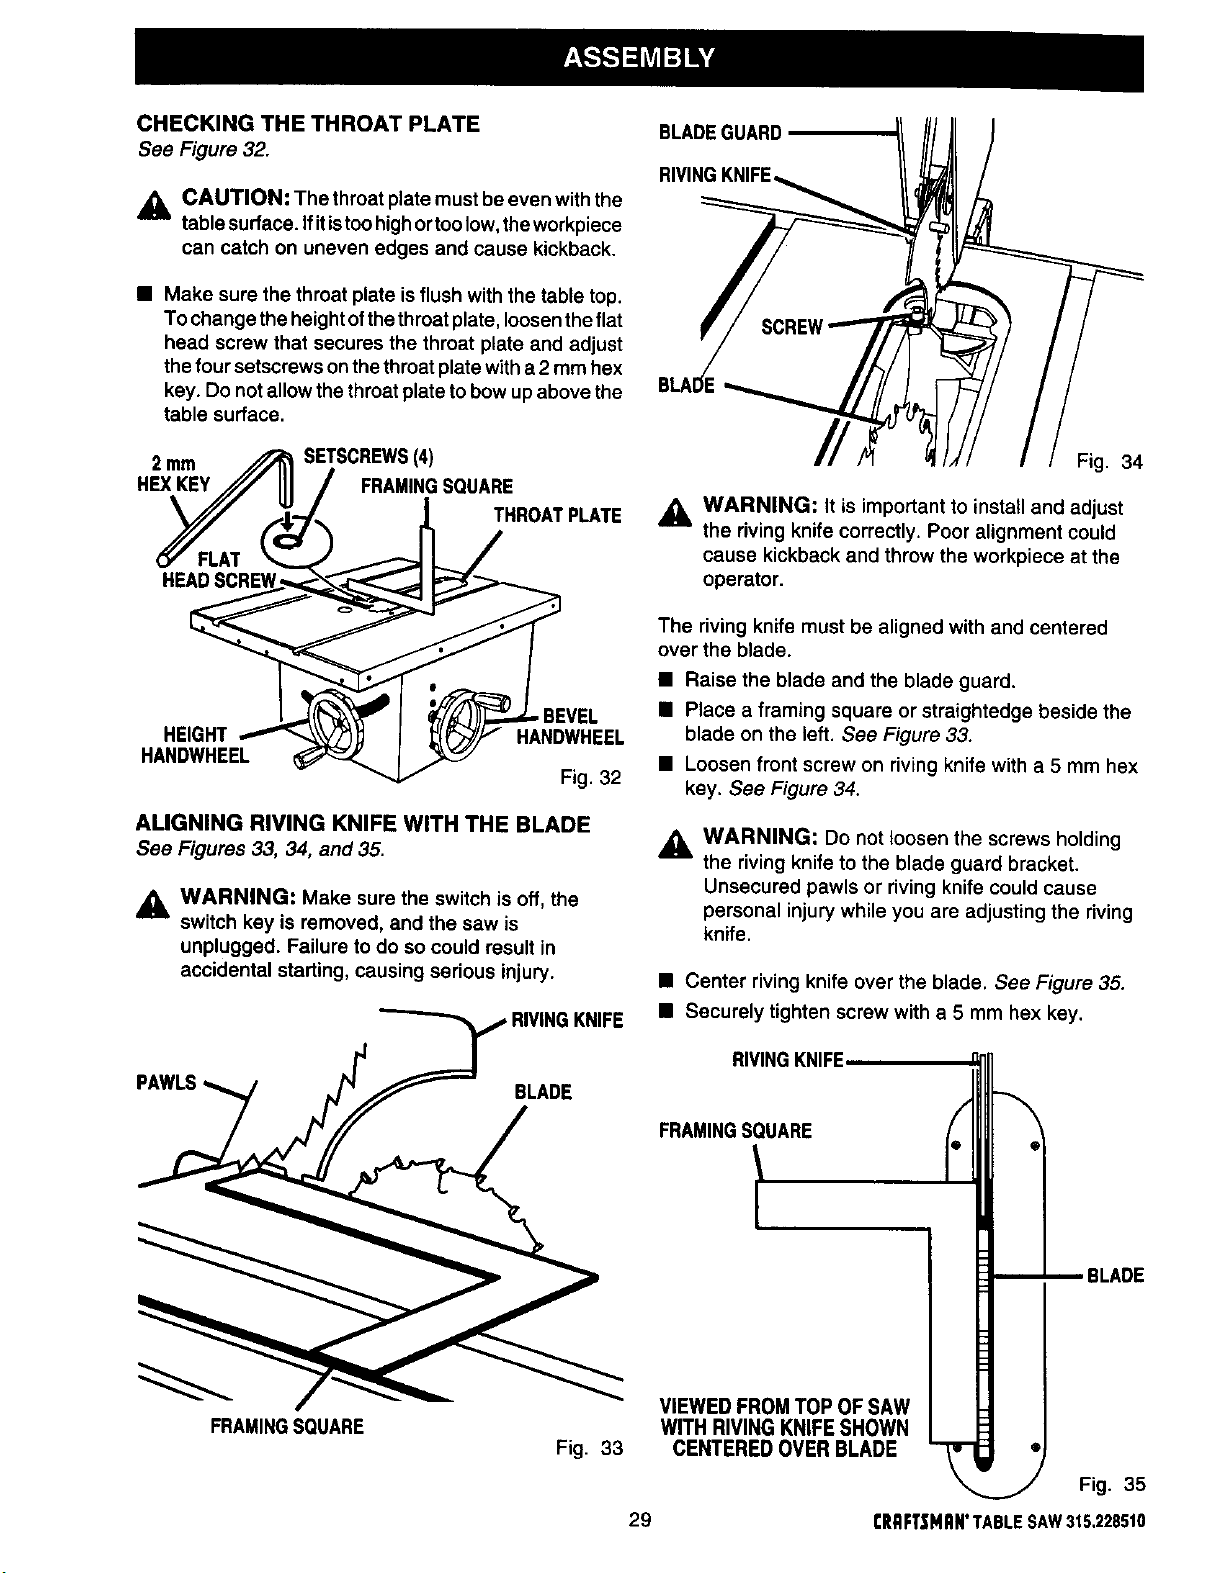
Fig. 34
_1_ WARNING: It is important to install and adjust
the riving knife correctly. Poor alignment could
cause kickback and throw the workpiece at the
operator.
HEIGHT
HANDWHEEL
,BEVEL
HANDWHEEL
Fig. 32
ALIGNING RIVINGKNIFEWITH THE BLADE
See Figures33,34, and35.
_. WARNING: Make sure the switch is off, the
switch key is removed, and the saw is
unplugged. Failure to do so could result in
accidental starting, causing serious injury.
FRAMINGSQUARE
Fig. 33
29
The riving knife must be aligned with and centered
over the blade.
• Raise the blade and the blade guard.
• Place a framing square or straightedge beside the
blade on the left. See Figure 33.
• Loosen front screw on riving knife with a 5 mm hex
key. See Figure 34.
,_ WARNING: Do not loosen the screws holding
the riving knife to the blade guard bracket.
Unsecured pawls or riving knife could cause
personal injury while you are adjusting the riving
knife.
• Center riving knife over the blade. See Figure 35.
• Securely tighten screw with a 5 mm hex key.
RIVINGKNIFE,
FRAMINGSQUARE
VIEWED FROM TOP OF SAW
WITH RIVING KNIFE SHOWN
CENTERED OVER BLADE
BLADE
CRRFTSMRN"TABLESAW315.228510
9 Fig. 35
Loading ...
Loading ...
Loading ...