Loading ...
Loading ...
Loading ...
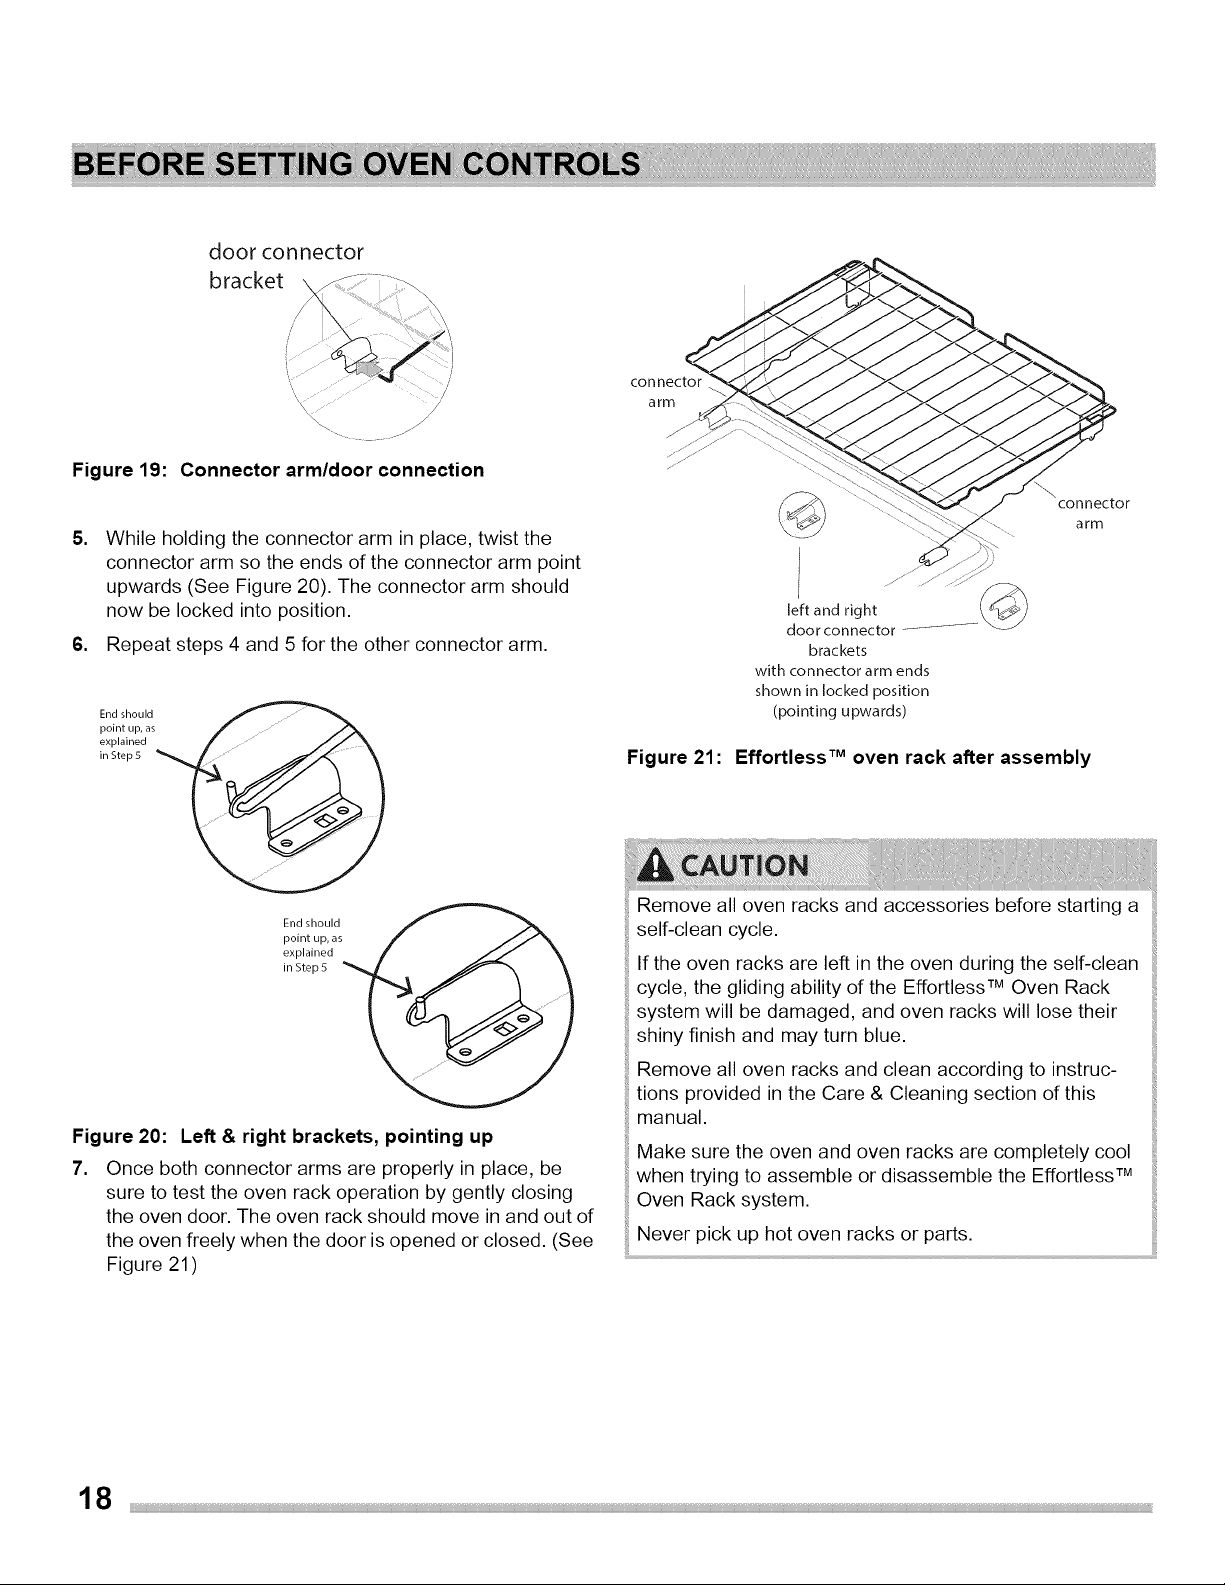
door connector
bracket \
Figure 19:
Connector arm/door connection
,
While holding the connector arm in place, twist the
connector arm so the ends of the connector arm point
upwards (See Figure 20). The connector arm should
now be locked into position.
6. Repeat steps 4 and 5 for the other connector arm.
End should
point up, as _"
explained _" //
End should
point up, as
explained
in Step5
Figure 20: Left & right brackets, pointing up
7. Once both connector arms are properly in place, be
sure to test the oven rack operation by gently closing
the oven door. The oven rack should move in and out of
the oven freely when the door is opened or closed. (See
Figure 21)
connector
arm
connector
arm
Figure 21:
left and right
door connector
brackets
with connector arm ends
shown in locked position
(pointing upwards)
Effortless TMoven rack after assembly
Remove all oven racks and accessories before starting a
self-clean cycle.
If the oven racks are left in the oven during the self-clean
cycle, the gliding ability of the Effortless Tu Oven Rack
system will be damaged, and oven racks will lose their
shiny finish and may turn blue.
Remove all oven racks and clean according to instruc-
tions provided in the Care & Cleaning section of this
manual.
Make sure the oven and oven racks are completely cool
when trying to assemble or disassemble the Effortless Tu
Oven Rack system.
Never pick up hot oven racks or parts.
iiiii
Loading ...
Loading ...
Loading ...