Loading ...
Loading ...
Loading ...
, ,,,,, ,,,,_L,I,J,,_,,,, ,,,,,,,,,,,_u , ,, : ¸:¸¸¸7¸¸¸ = = .___.M:: ......
...... r r,
C, ST_E ROPE
Never start the engine with the clutch shroud removed. The
clutch will fly apart and cause serious injury.
_kW_G
Do not remove the retaining tab and screw to remove
pulley. The spring beneath the pulley is under tension
and can fly out causing serious injury. If any part of the
pulley housing assembly is damaged other than the rope,
do not use the tool. Take it to your Sears Service Center.
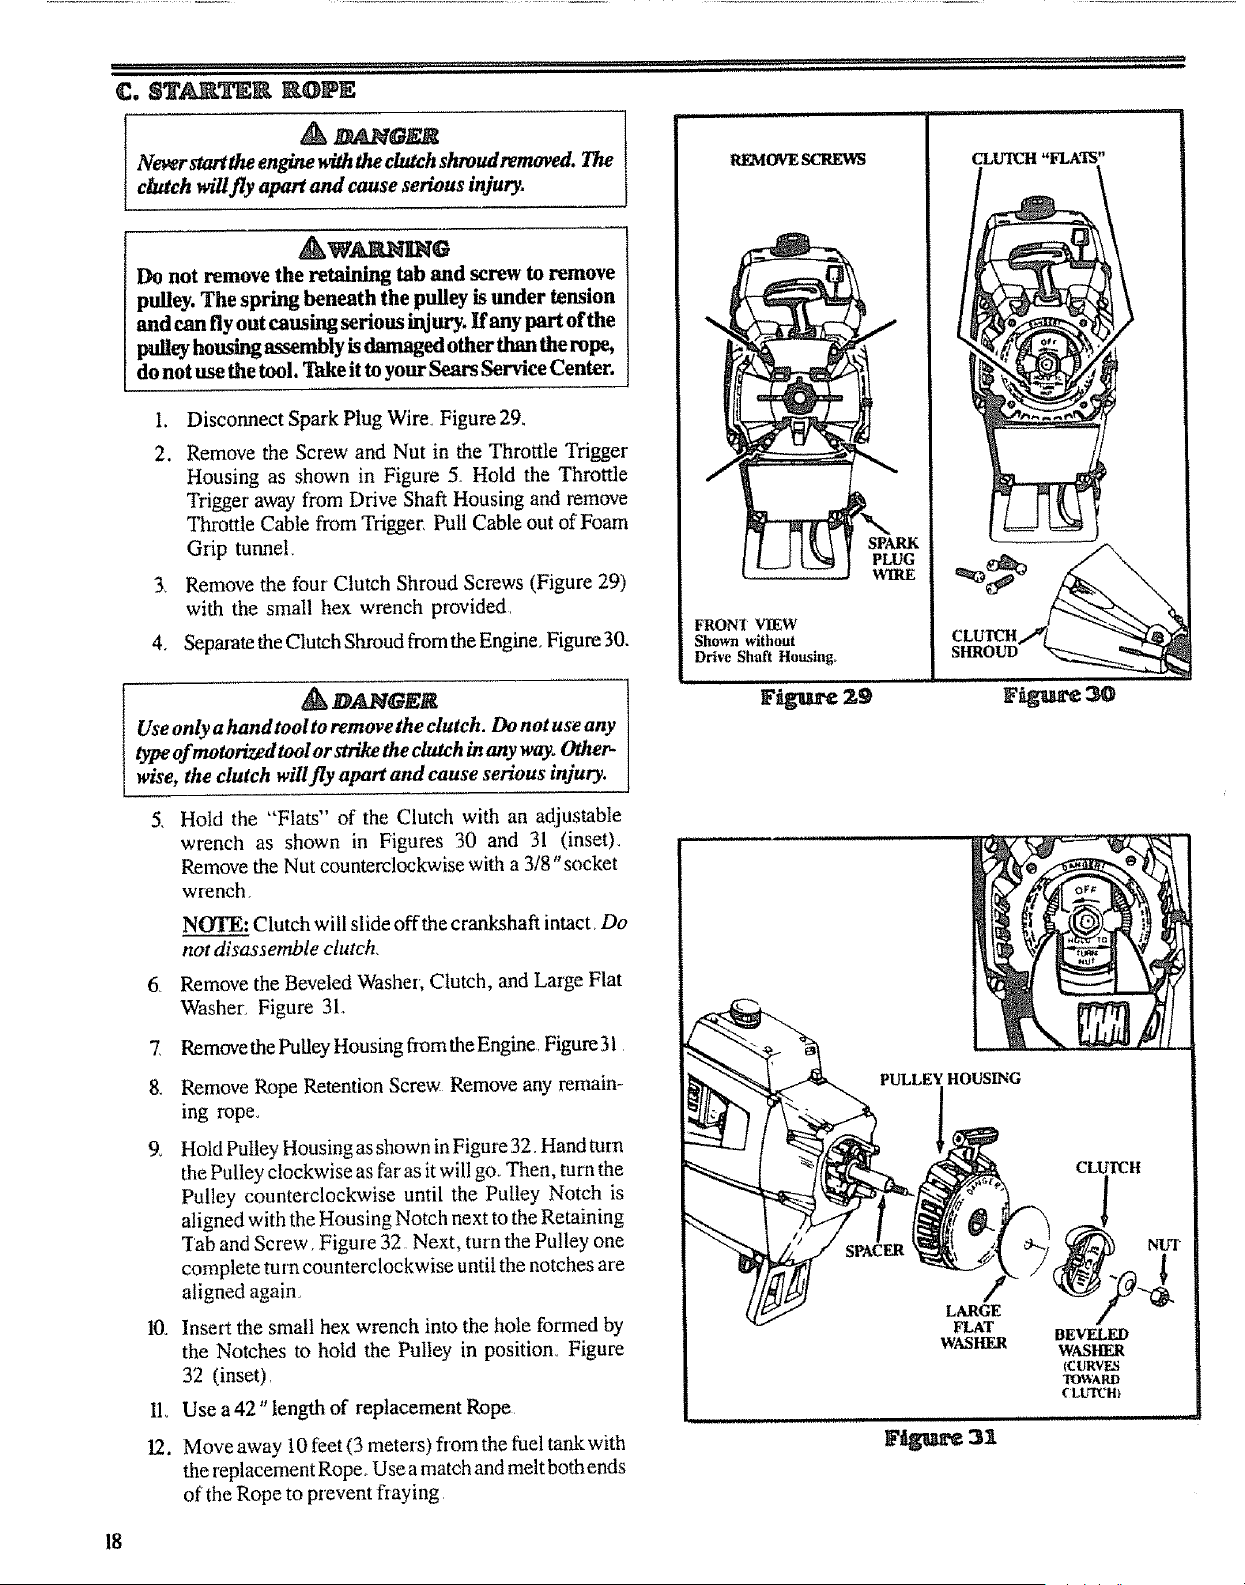
i. Disconnect Spark Plug Wire_ Figure 29.
2. Remove the Screw and Nut in the Throttle Trigger
Housing as shown in Figure 5. Hold the Throttle
Trigger away from Drive Shaft Housing and remove
Throttle Cable from Trigger, Pull Cable out of Foam
Grip tunnel
3_ Remove the four Clutch Shroud Screws (Figure 29)
with the small hex wrench provided,
4. Separate the Clutch Shroud from the Engine, Figure 30.
D_d_'GEBI
Use only ahand tool to remove the clutch. Do not use any
type of motorized tool or std.ke the clutch in any way° Other-
wise, the clutch will fly apart and cause serious injury.
5_
.
7_
8.
9.
10°
II,
12.
Hold the "Flats" of the Clutch with an adjustable
wrench as shown in Figures 30 and 3! (insetL
Remove the Nut counterclockwise with a 3/8"socket
wrench,
NOTE: Clutch will slide offthe crankshaft intact, Do
not disassemble clutch
Remove the Beveled Washer, Clutch, and Large Flat
Washer_ Figure 3L
Remove the Pulley Housing from the Engine, Figure 31
Remove Rope Retention Screw Remove any remain-
ing rope.
Hold Pulley Housing as shown in Figure 32. Hand turn
the Pulley c!ockwise as far as it will go. Then, turn the
Pulley counterclockwise until the Pulley Notch is
aligned with the Housing Notch next to the Retaining
"rab and Screw. Figure 32 Next, turn the Pulley one
complete turn counterclockwise until the notches are
aligned again_
Insert the small hex wrench into the hole formed by
the Notches to hold the Pulley in position. Figure
32 (inset).
Use a 42" length of replacement Rope
Move away !0 feet (3 meters) from the fuel tank with
the replacement Rope, Use a match andmelt both ends
of' the Rope to prevent fraying
REblOVESCliEWS
FRONI VIEW
Shown without
Drive Shaft tlousingo
CLUTCH "FLAq[S"
F_re _9
PULLEY HOUSING
CLUI'CH
LARGE
FLAT
WASHER
F_ 3X
BEVELED
WASHER
_CURVES
"I't')WARD
CLUTCH_
18
Loading ...
Loading ...
Loading ...