Loading ...
Loading ...
Loading ...
GENERAl,
,, ,,r ,,,,
A. MAINTENANCE SAFETY
L Maintain the toolaccording to recommended pro-
cedures. Keepthetrimmerlineat the proper length
6_ Be sure the trimmer head stops turning when
engine idles, See "Carburetor Adjustments."
2, Never start the engine with the clutch shroud
removed. The clutch can fly apart and cause serious
injury,
7, Use only .080" diameter Sears Laser Line, Never'
use wire, rope, string, etc
34
4_
5.
Disconnect the spark plug before performing
maintenance except for carburetor adjustments.
Make carburetor adjustments with the drive shaft
housing supported to prevent the trimmer line
from contacting any object, Hold the tool with your
hand, Do not use the optional shoulder strap for
support,
Keep others away when making carburetor
adjustments.
8_ Replace trimmer head parts that are cracked,
chipped, broken, or damaged in any other way
before using the tool.
9. Use only genuine replacement parts as recom-
mended by Sears.
10 Inspect entire tool. Replace damaged parts, Check for
fuel leaks, Make sure all fasteners are in place and
securely fastened
B. Alg_aL'g'_g
A dirty air filter decreases the life and performance of the
engine and increases fue! consumption
Clean the Air Filter:
0 Always after 5 tanks of fuel or 5 hours of operation,
whichever is less.
o More frequently in dusty conditions,
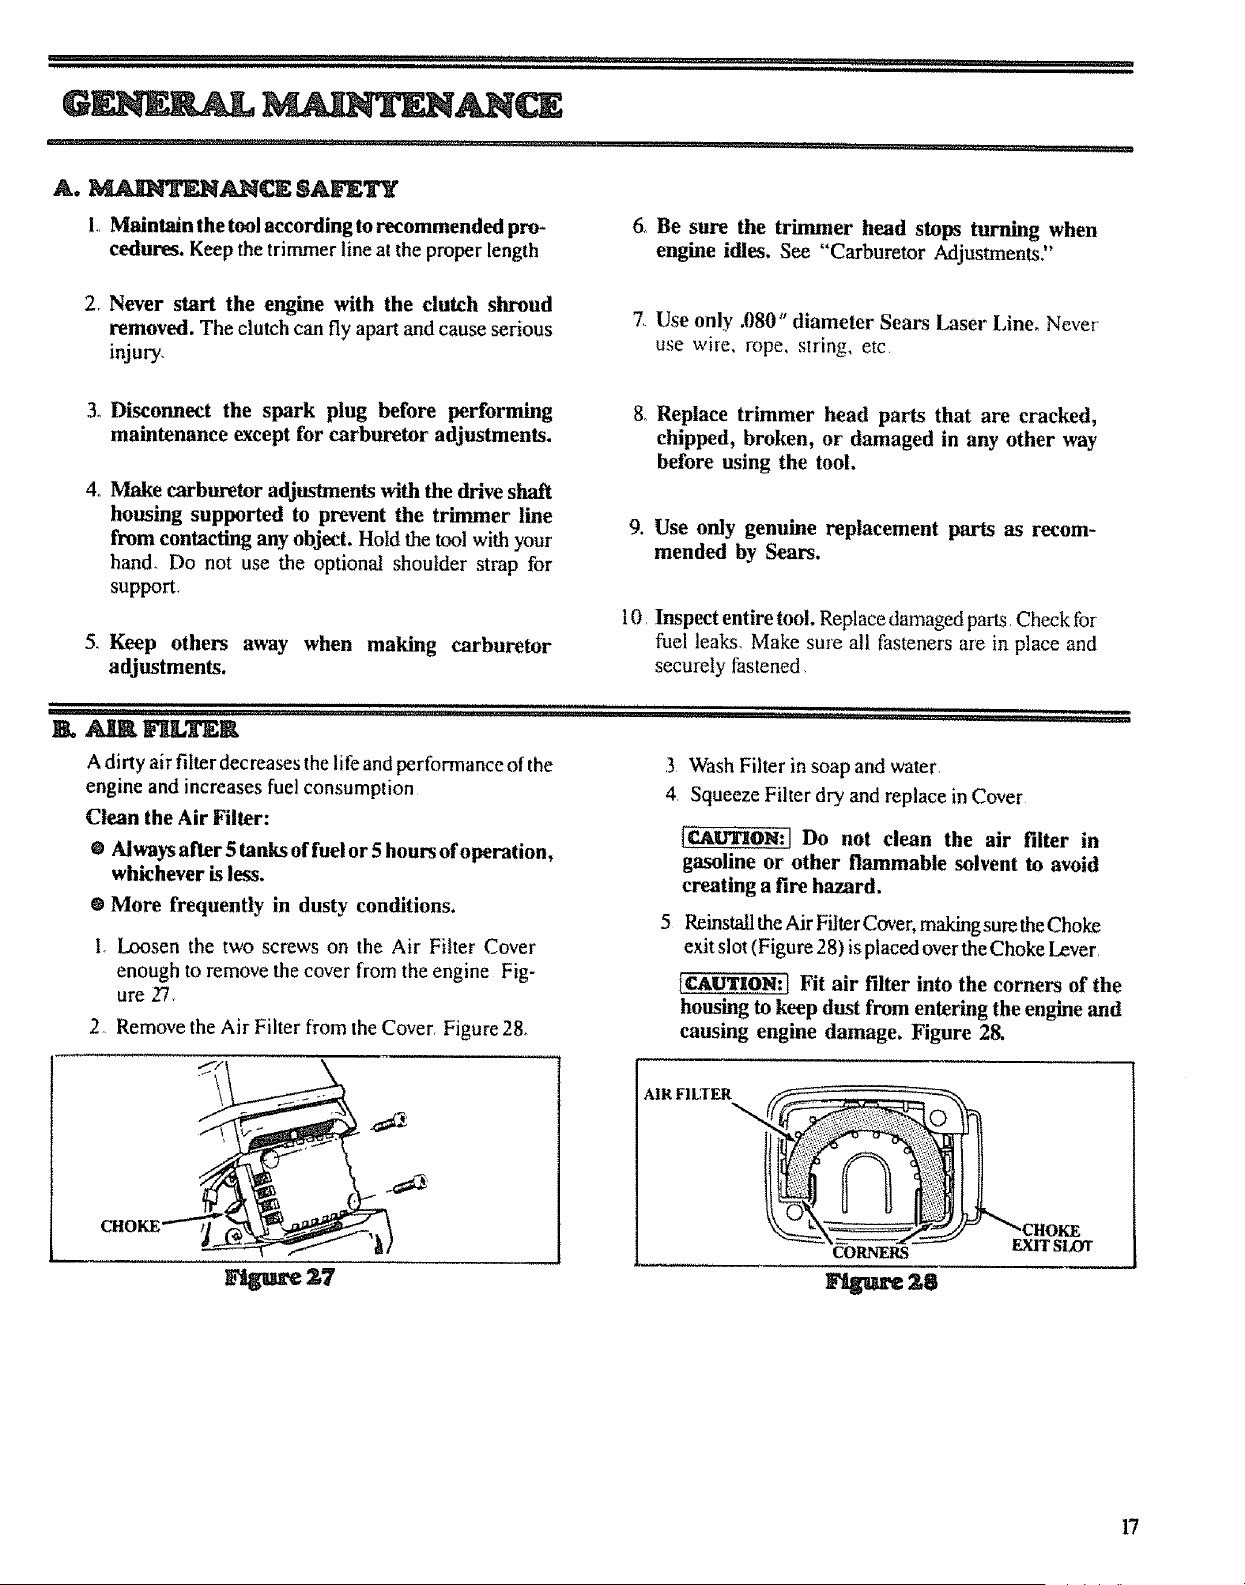
t, Loosen the two screws on the Air Filter Cover
enough to remove the cover from the engine Fig-
ure 2'7,
2 Remove the Air Filter fi'om the Cover, Figure 28_
,i,,,,ii Ill'
,3 Wash Filter in soap and water
4 Squeeze Filter dry and replace in Cover
ICAUTION:] Do not clean the air filter in
gasoline or other flammable solvent to avoid
creating a fire hazard.
5 Reinstall the Air Filter Cover, making sure the Choke
exit slot (Figure 28) is placed over the Choke Lever
[_.UTION:] Fit air filter into the corners of the
housing to keep dust from entering the engine and
causing engine damage, Figure 28.
AIRFILffER
CORNERS
E.,'cJTSl£ff
17
Loading ...
Loading ...
Loading ...