Loading ...
Loading ...
Loading ...
Surface elements
Both the oven and the surface heating elements clean themselves
when they are turned on. Food spilled on a hot unit will burn off.
Food spilled on a cool unit may be cleaned with a damp cloth--any
remaining soil will burn off the next time the element is used.
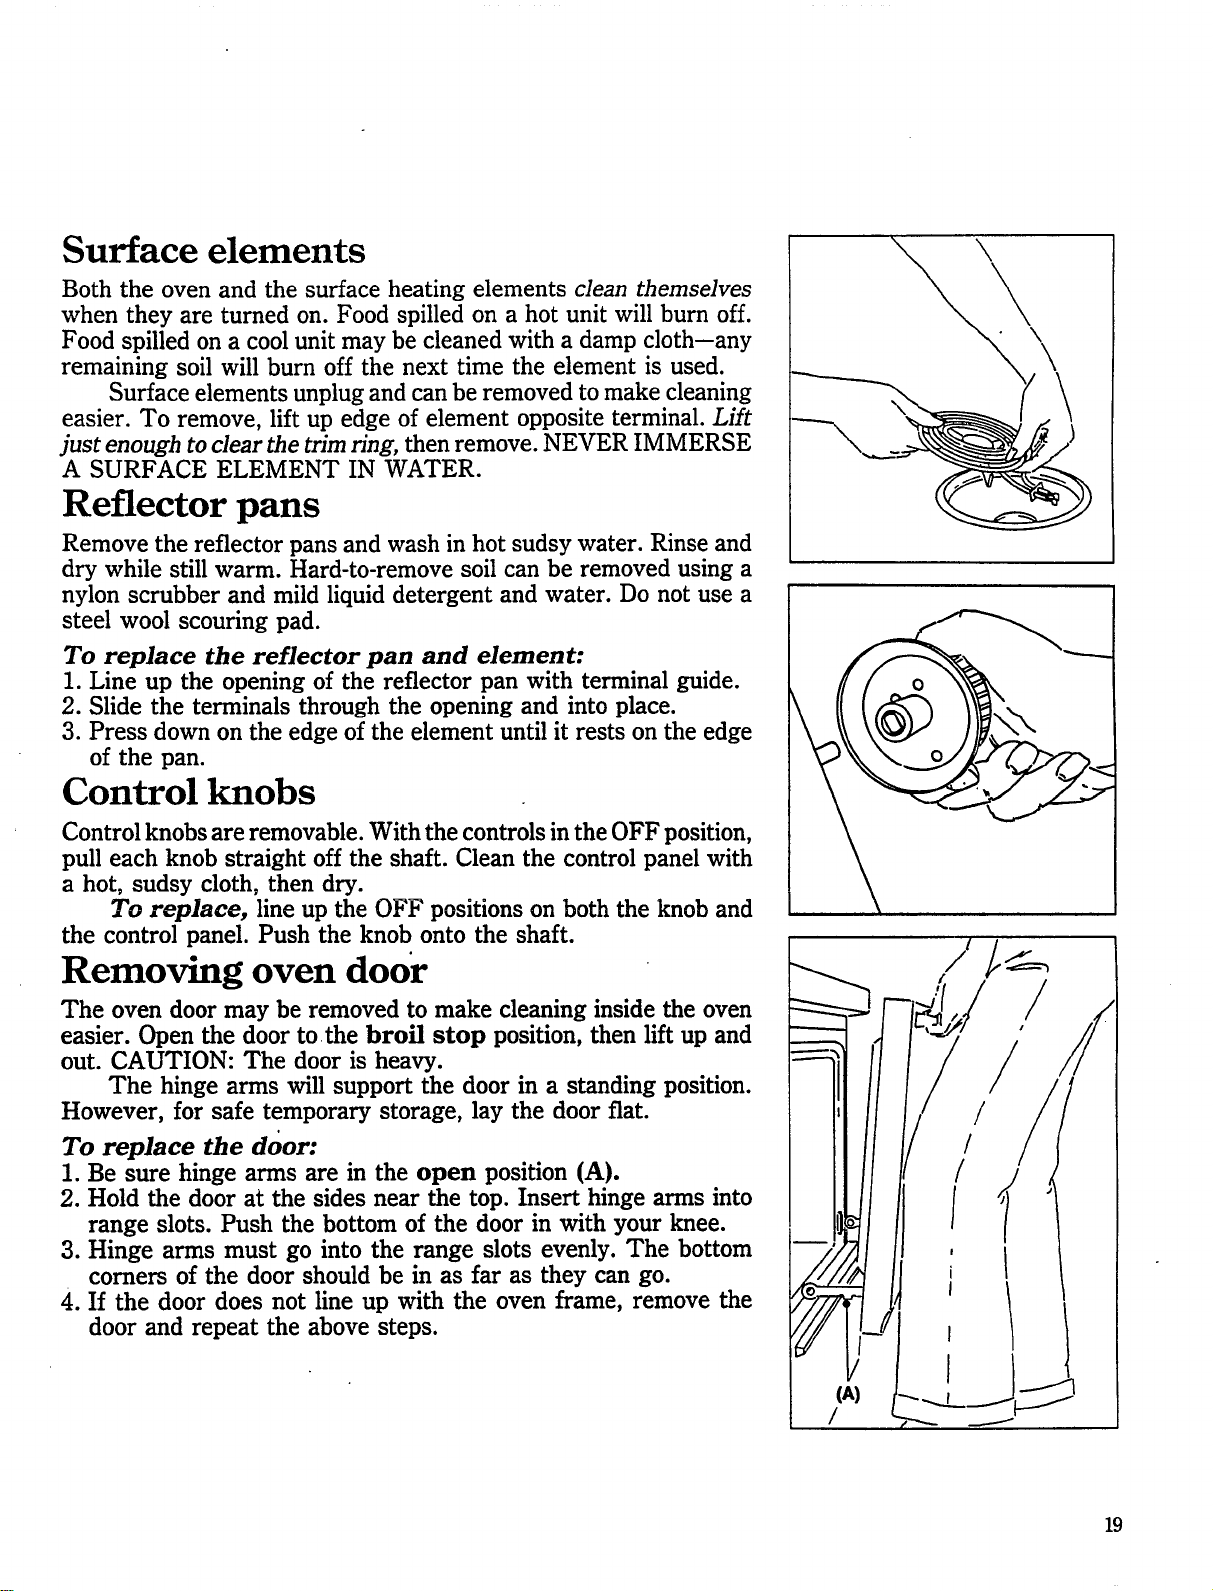
Surface elements unplug and can be removed to make cleaning
easier. To remove, lift up edge of element opposite terminal. Lift
just enough to clear the trim ring, then remove. NEVER IMMERSE
A SURFACE ELEMENT IN WATER.
Reflector pans
Remove the reflector pans and wash in hot sudsy water. Rinse and
dry while still warm. Hard-to-remove soil can be removed using a
nylon scrubber and mild liquid detergent and water. Do not use a
steel wool scouring pad.
To replace the reflector pan and element:
1. Line up the opening of the reflector pan with terminal guide.
2. Slide the terminals through the opening and into place.
3. Press down on the edge of the element until it rests on the edge
of the pan.
Control knobs
Control knobs are removable. With the controls in the OFF position,
pull each knob straight off the shaft. Clean the control panel with
a hot, sudsy cloth, then dry.
To replace, line up the OFF positions on both the knob and
the control panel. Push the knob onto the shaft.
Removing oven door
The oven door may be removed to make cleaning inside the oven
easier. Open the door tothe broil stop position, then lift up and
out. CAUTION: The door is heavy.
The hinge arms will support the door in a standing position.
However, for safe temporary storage, lay the door flat.
To replace the door:
1. Be sure hinge arms are in the open position (A).
2. Hold the door at the sides near the top. Insert hinge arms into
range slots. Push the bottom of the door in with your knee.
3. Hinge arms must go into the range slots evenly. The bottom
comers of the door should be in as far as they can go.
4. If the door does not line up with the oven frame, remove the
door and repeat the above steps.
(A)
/
/
/
/
J
i
I
19
Loading ...
Loading ...
Loading ...