
Loading ...
Loading ...
Loading ...
EN
W415-1676 / E / 05.17.21
21
installation
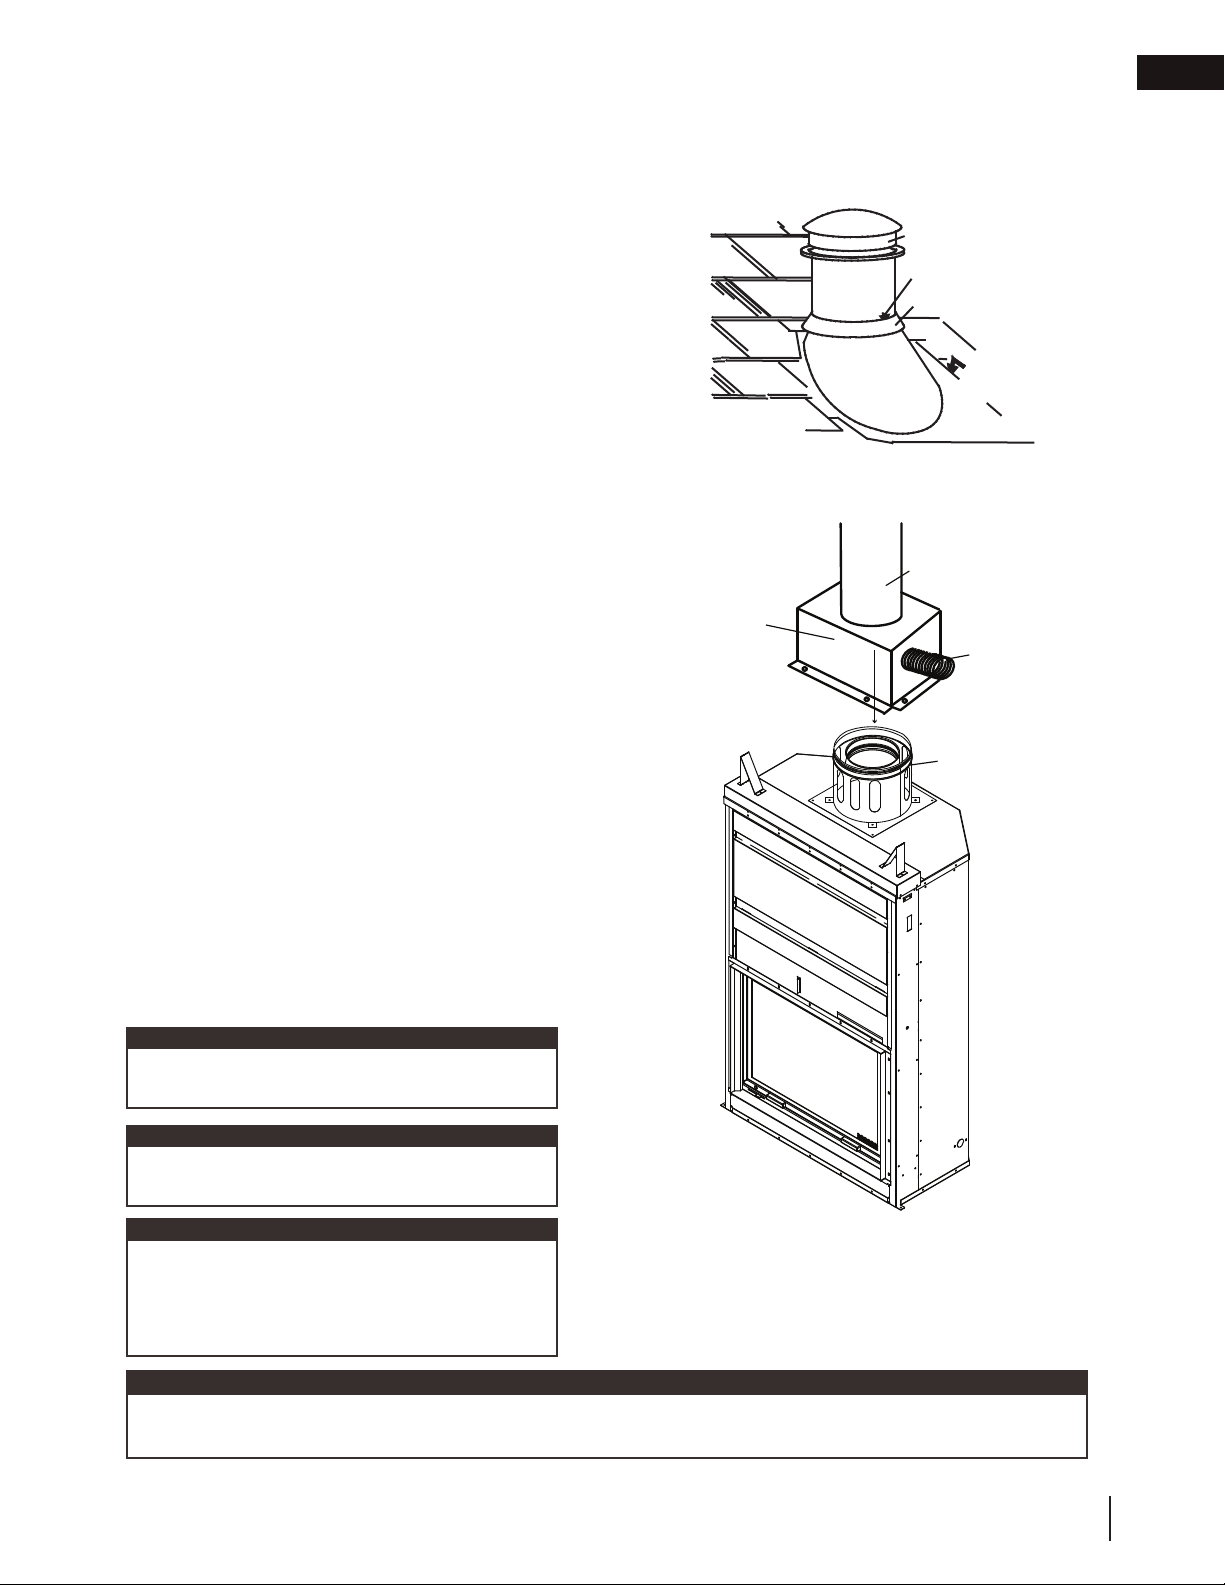
4.5 installing fl ashing and storm collar
4.6 air cooled chimney installation
Any air cooled chimney 10" (254mm) or 12" (30.5cm)
in diameter listed to CAN/ULC-S604 for Canada or
UL-103 for the United States may be installed. Any air
cooled chimney selected for use MUST have provisions
to directly feed outside air to the corresponding anchor
plate via sealed housing; for example, the NZAC10KT
that has been developed specifi cally for the use with
10" DuraVent DuraChimney II.
(NZAC10KT)
1. Install the start collar using the gasket provided
over the fl ue and fasten to the top of the fi replace.
2. Slide the air housing onto the fi rst section of the
chimney and secure the chimney to the starter
collar.
3. Slide the air housing down the chimney section
and secure housing to the top of the appliance.
4. Connect the outside air connection for the chim-
ney.
RAIN CAP
CAULKING
STORM COLLAR
WEATHER
SEALANT
FLASHING
The following are generic installation instructions for installing the flashing around a chimney. Installation of all
types of factory-built chimney systems is to be in accordance with the chimney manufacturer’s installation
instructions. Remove the nails from the shingles above and to the sides of the chimney. Place the flashing over
the chimney pipe and slide underneath the sides and upper edge
of the shingles. Ensure that the chimney pipe is properly
centered within the flashing, giving a 3/4” (19.1mm) margin all
around. Fasten to the roof on the top and sides. DO NOT NAIL
through the lower portion of the flashing. Make weather-tight by
sealing with caulking. Where possible, cover the sides and top
edges of the flashing with roofing material. Apply waterproof
caulking, provided with the flashing, around the chimney, 1”
(25.4mm) above the top of the flashing and push the storm collar
down into the caulking. Insert a rain cap onto the top of the last
chimney section.
Follow the chimney manufacturer’s instructions
for installing the chimney.
note:
Use 111KT outside air kit to connect to air
housing. Maximum length of 4” (101.5mm) liner
is 20’ (6m). If greater length is required then
increase the liner diameter to 6” (154.4mm).
note:
Air slots in the starter collar are to be completely
covered by the air housing
note:
An air cooled chimney requires its own dedicated outside air supply with a minimum of 4” liner diameter. (Not
to be shared with appliance outside air).
note:
AIR HOUSING
2
DURA CHIMNEY II SECTION
4” (102mm) LINER
DURAVENT 8 DCA - AP
STARTER COLLAR
DURAVENT 10DCA-
AP 10"/12" STARTER
COLLAR
Loading ...
Loading ...
Loading ...