Loading ...
Loading ...
Loading ...
62
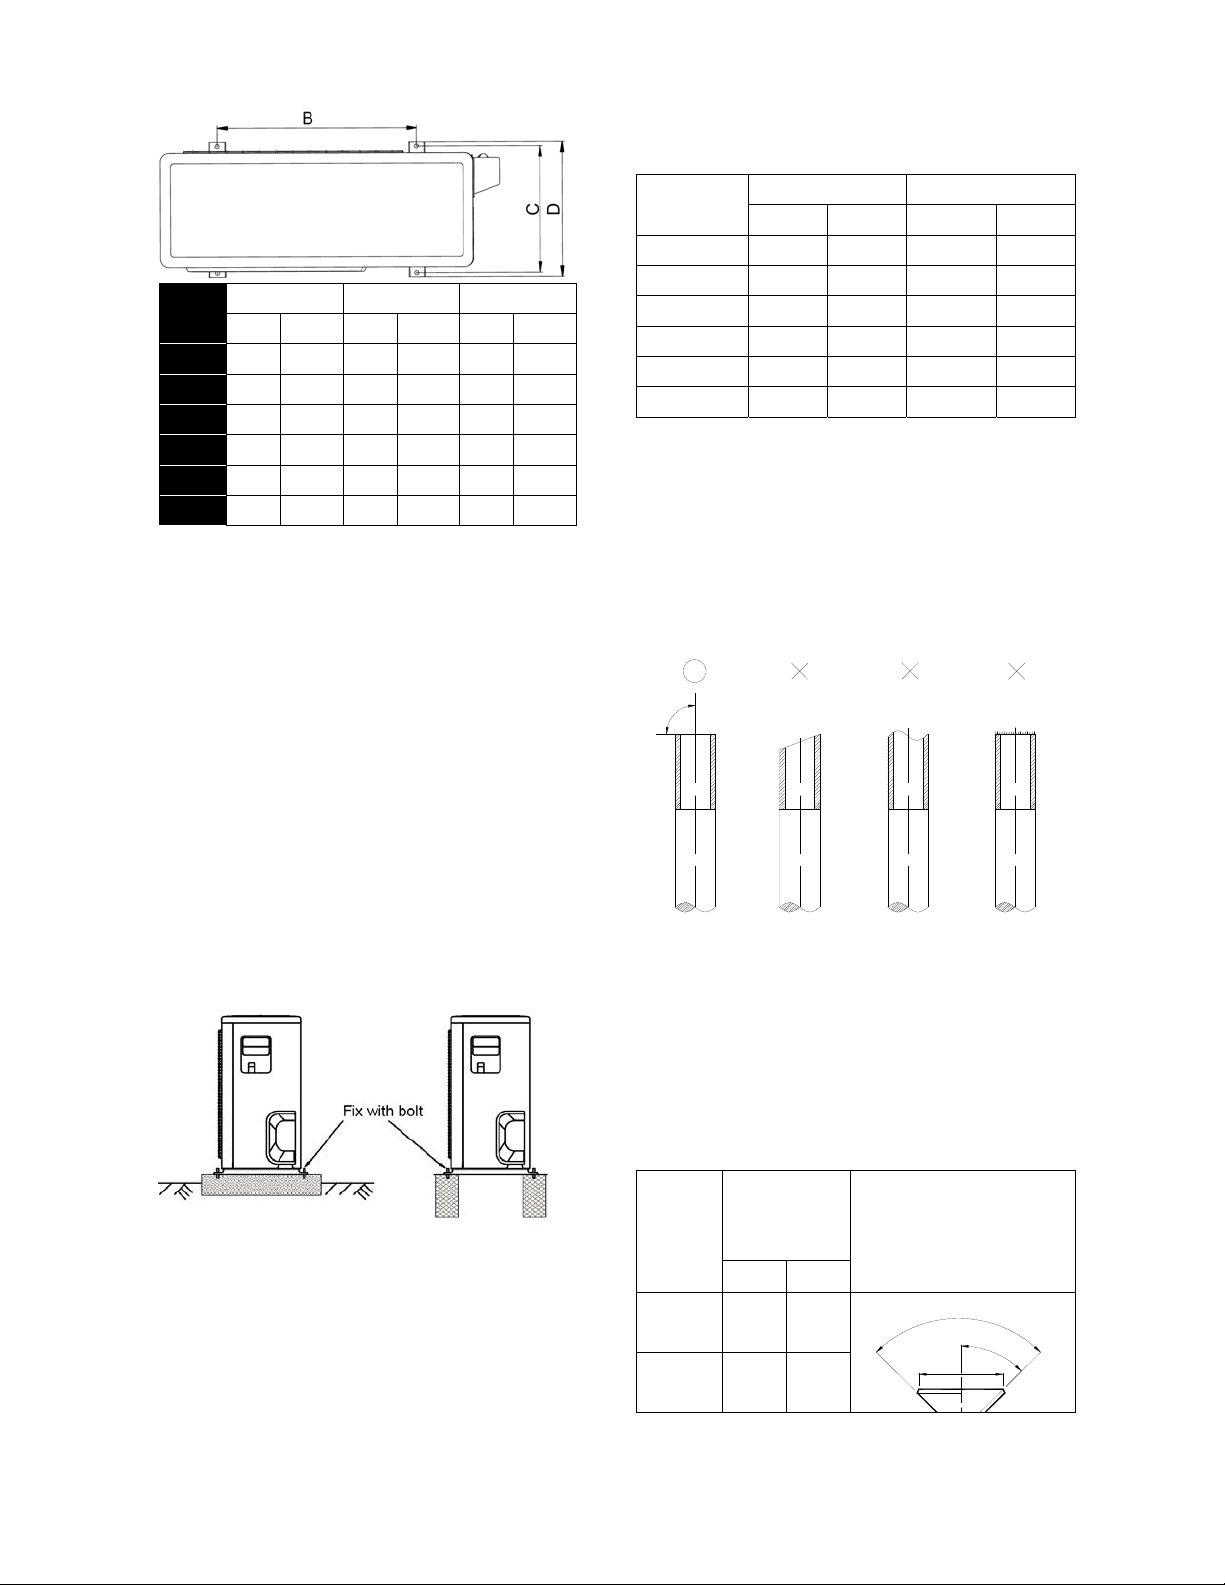
Model
B C D
mm inch mm inch mm inch
9K 549 21.61 325 12.80 350 13.78
12K 549 21.61 325 12.80 350 13.78
18K 560 22.05 335 13.19 360 14.17
24K 640 25.20 405 15.94 448 17.64
36K 640 25.20 405 15.94 448 17.64
48K 634 24.96 404 15.91 448 17.64
14.3.3 Install the Unit
Since the gravity center of the unit is not at its
physical center, so please be careful when
lifting it with a sling.
Never hold the inlet of the outdoor unit to
prevent it from deforming.
Do not touch the fan with hands or other
objects.
Do not lean it more than 45, and do not lay it
sidelong.
Make concrete foundation according to the
specifications of the outdoor units.
Fasten the feet of this unit with bolts firmly to
prevent it from collapsing in case of earthquake
or strong wind.
12.4 Refrigerant pipe installation
12.4.1 Maximum pipe length and height
drop
Considering the allowable pipe length and
height drop to decide the installation position.
Make sure the distance and height drop
between indoor and outdoor unit not exceeded
the date in the following table.
Model
Max. Length Max. Elevation
m Ft. m Ft.
9,000Btu/h 25 82.2 10 32.9
12,000Btu/h 25 82.2 10 32.9
18,000Btu/h 30 98.7 20 65.8
24,000Btu/h 50 164.5 25 82.2
36,000Btu/h 65 213.8 30 98.7
48,000Btu/h 65 213.8 30 98.7
12.4.2 The procedure of connecting pipes
1. Choose the pipe size according to the
specification table.
2. Confirm the cross way of the pipes.
3. Measure the necessary pipe length.
4. Cut the selected pipe with pipe cutter
Make the section flat and smooth.
90
Lean
Crude
Burr
o
5. Insulate the copper pipe
Before test operation, the joint parts should
not be heat insulated.
6. Flare the pipe
Insert a flare nut into the pipe before flaring
the pipe
According to the following table to flare the
pipe
Pipe
diameter
Flare
dimension A
(mm)
Flare shape
Min Max
1/4"
(6.35)
8.3 8.7
A
4
5
¡
ã
90°
4
-
+
3/8"
(9.52)
12.0 12.4
Loading ...
Loading ...
Loading ...