Loading ...
Loading ...
Loading ...
ORIFICE
LOCATION
BURNER
ASSEMBLY
r
solution.
n
es have
li
w
these instructions.
e
four screws
s
assemble the
protect with
W
olf Steel
e
” products.
taken
GASKET
GLASS LENS
GASKET
SHEILD
RAIL
RAIL
WIRE NUT
COVER PLATE
RELIEF
DOOR
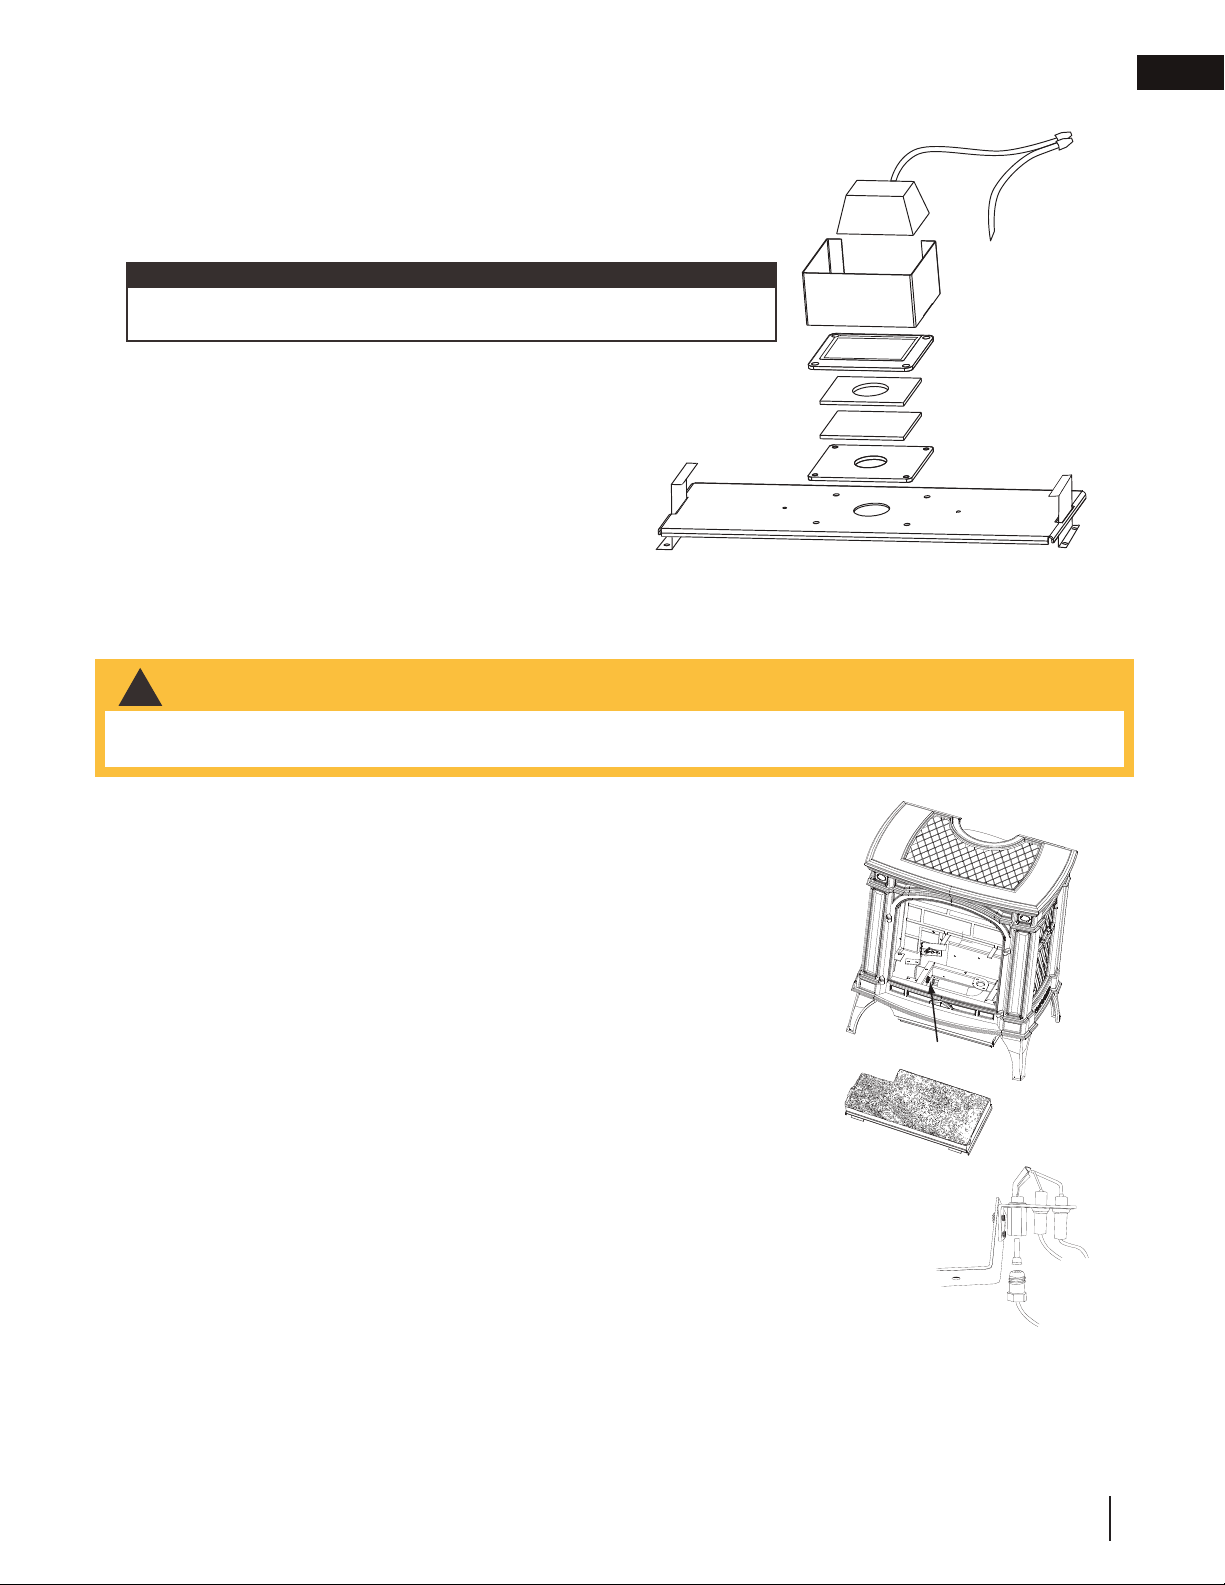
9.2 night light replacement
9.3 pilot injector and orifi ce replacement
This appliance comes equipped with our “Night Light”.
If in the event the lamp or lens needs to be replaced, follow these instructions.
Disconnect the two wire leads at the wire nut. Remove the four screws
securing the accent light assembly from the relief door. Disassemble the
light and the lamp now can be accessed
The lamp will pull straight out of the socket. Replace with Wolf Steel
parts only, as lamp and lens are special “high temperature” products.
When re-installing, ensure integrity of gasket seal.
THE FIREBOX MUST BE SEALED.
When re-assembling the light assembly, care must be
taken with all gaskets.
“Light Leakage” from above the cast doors may be noticed. The holes in the lamp housing are
necessary for ventilation and must not be covered.
This must be carried out by an AUTHORIZED REPRESENTATIVE OF WOLF STEEL
LTD. or a QUALIFIED GAS INSTALLER in accordance with local codes or in the
absence of local codes with the requirements of the provincial / state authorities having
jurisdiction and in accordance with the requirements of the CAN1-B149 Installation Code
in Canada and the ANSI Z223.1 National Fuel Gas Code in the United States.
A. Turn off the electrical and gas supply to the appliance.
B. Remove the cast front, glass viewing door and log set.
C. Remove the 2 securing screws. Slide the burner assembly to the right and lift out.
D. Using a deep socket wrench, remove the main burner orifi ce. A back-up wrench
must be used on themanifold, located below the housing to ensure that the
aluminum tubing does not twist or kink. Replace the correct burner orifi ce using
pipe thread compound.
E. Loosen nut and replace with appropriate injector
F. Reinstall the burner ensuring that the Venturi tube fi ts over the orifi ce.
G. Turn on the gas supply and check for gas leaks by brushing on a soap and water
solution. Do not use open fl ame.
H. Replace the log set. Then light the pilot and main burner to ensure that the gas
lines have been purged.
I. Replace the glass viewing door and cast front. Turn on the electrical supply to the
appliance.
SHIELD
Do not handle the lamp (bulb) with bare fi ngers. Protect with a clean, dry
cloth.
note:
• Always light the pilot whether for the fi rst time or if the gas supply has run out with the glass door open or
removed.
!
WARNING
EN
W415-2347 / C / 09.21.20
39
maintenance
Loading ...
Loading ...
Loading ...