Loading ...
Loading ...
Loading ...
WaterBoss Softener Two-Button Owner’s Manual 8/1/2018 7
Installation Steps and Start-Up Procedures
The water softener is capable of treating a combination of undesirable constituents (such as iron, dirt, sediment, chlorine,
and/or lead) in water. See Specifications for the capabilities of your appliance. Install, set up, and use the appliance within
the operating limits outlined in this manual. Failure to comply with these specifications may decrease the effectiveness of
the backwash and cause control valve malfunction. The water softener, like any other appliance, requires correct
installation and setting for optimum performance.
Each water treatment appliance includes water test strips and 15 feet (4.6 m) of drain line.
Step 1
Prepare the Placement Area
A. Make sure the placement area is clean.
B. Turn off the electricity and water supply to the water heater. For gas water heaters, turn the gas cock
to “Pilot.”
C. Examine the inlet plumbing to ensure that the pipe is not plugged with lime, iron, or any other
substance. Clean or replace plugged plumbing.
Note: A pipe with a minimum of 3/4-inch I.D. is required between the pressure tank and the appliance
for the appliance to function properly.
D. Make sure the inlet/outlet and drain connections meet the applicable state and local codes.
E. Check the arrows on the bypass valve to ensure that the water flows in the proper direction.
See Bypass Valve.
Caution: Do not plumb the appliance in backward.
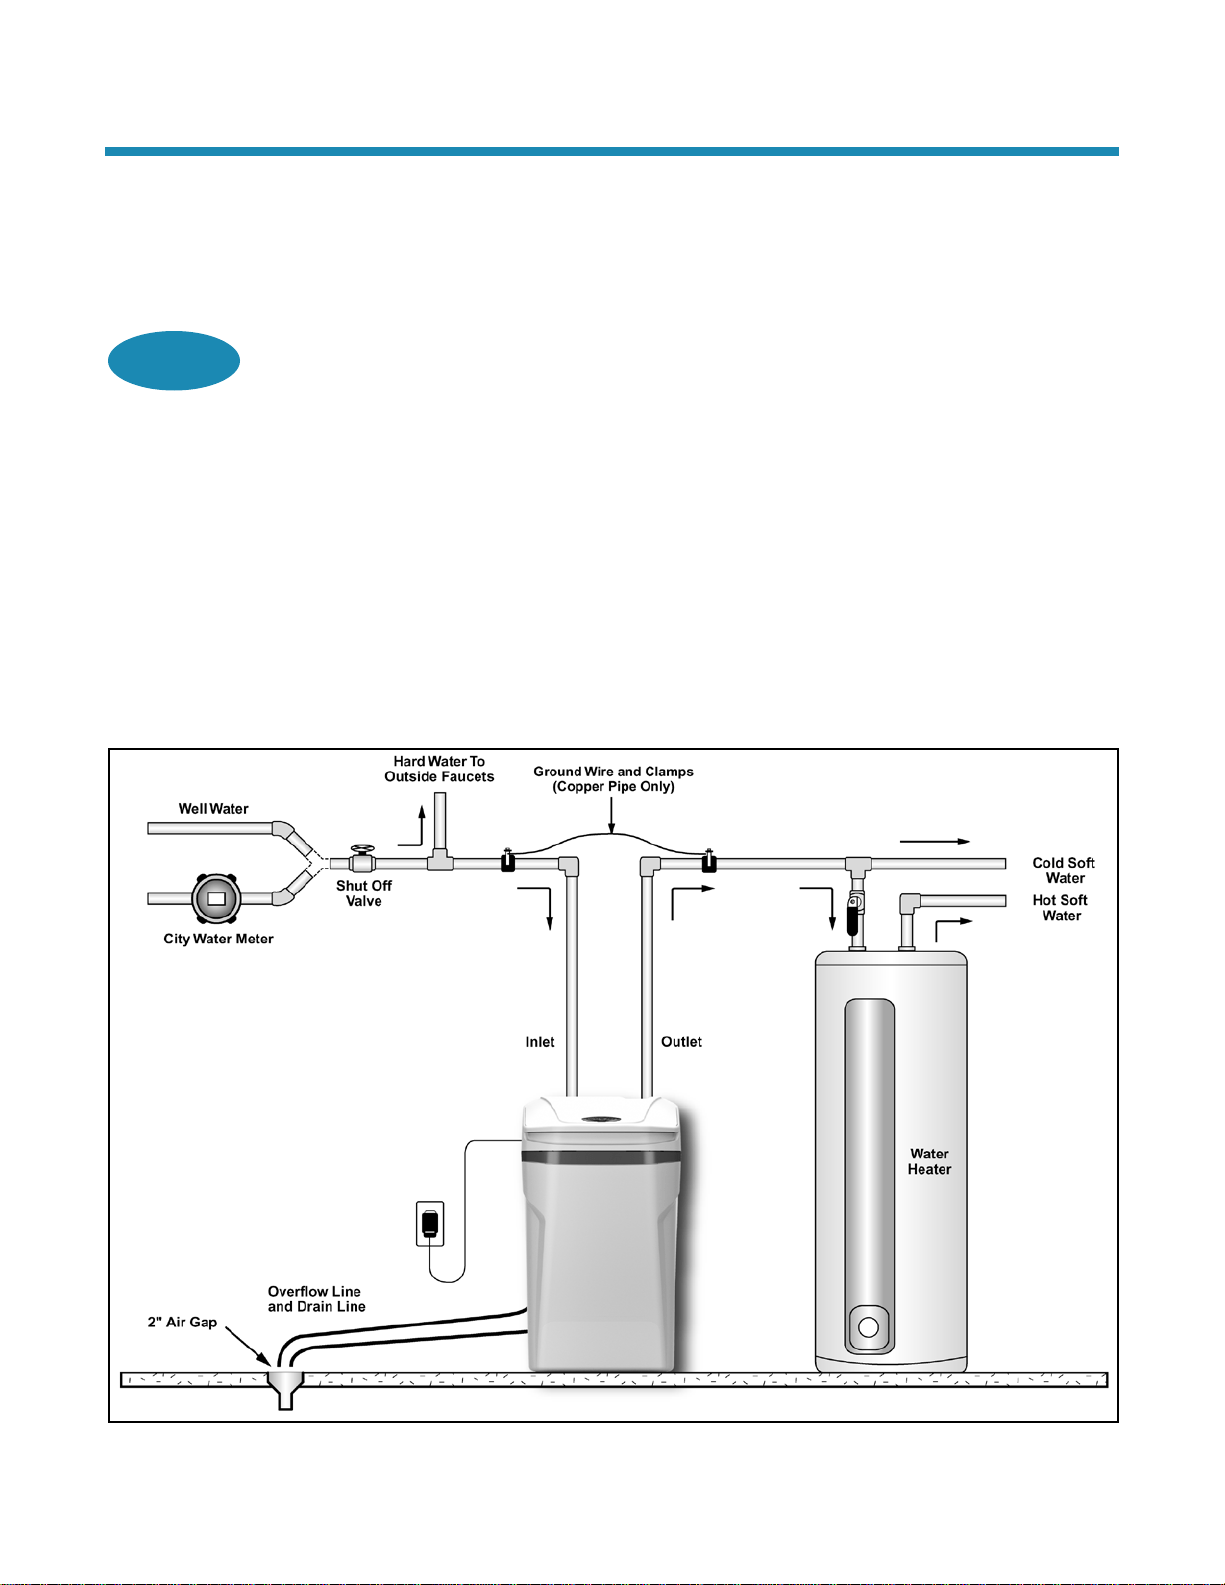
F. Place the appliance in the desired location using Figure 1 as a guide. The diagram in Figure 1 applies
to basement, slab, crawl space, and outside installations.
Figure 1: Appliance Placement
Loading ...
Loading ...
Loading ...