Loading ...
Loading ...
Loading ...
-
ASSEMBLY INSTRUCTIONS
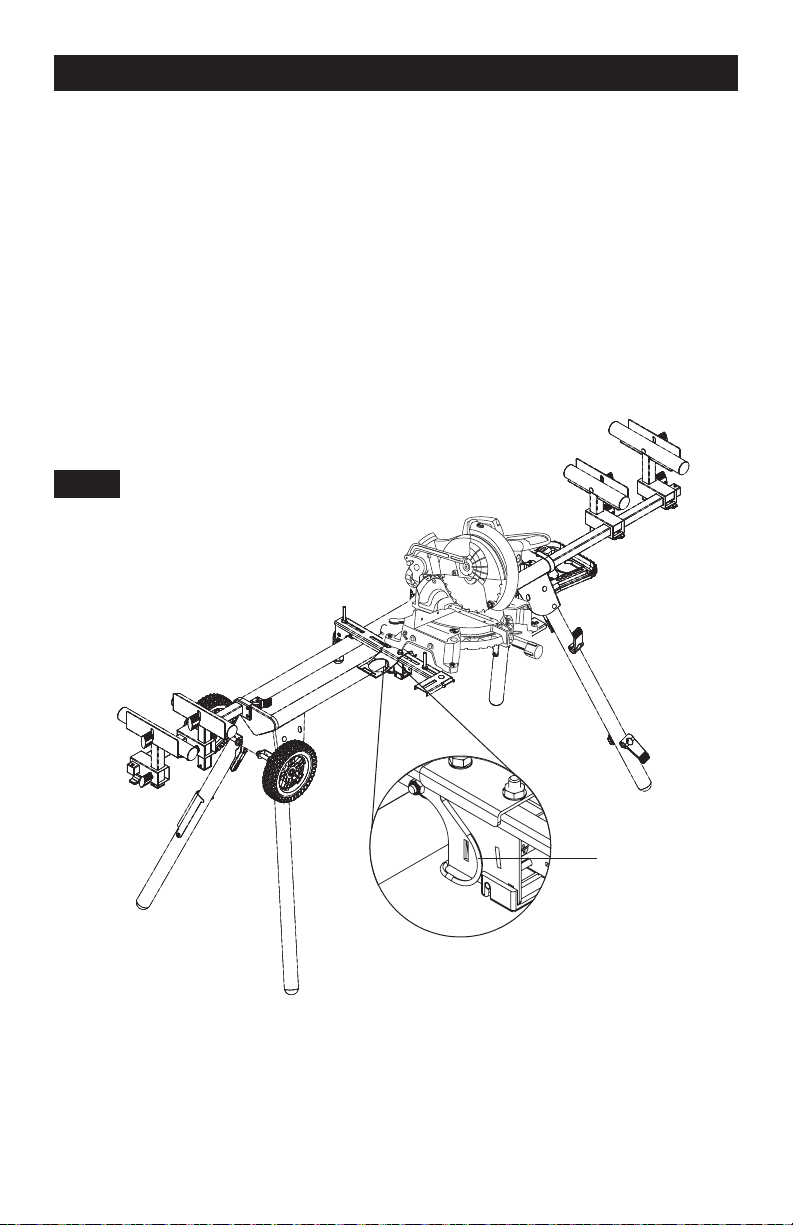
MOUNTING THE MITER SAW TO THE STAND
Figure 11
Use the handles located at the rear of the tool mounts to aid in installing or removing saw and
tool mount assembly.
1. Lift the saw and tool mount assembly, allowing the assembly to tilt slightly toward
your body.
2. While still tilted toward you, hook the front edge of the tool mount assembly onto the front
rail of the stand.
3. Lower the tool mount assembly to allow the rear edge of the tool mount to seat fully over the
rear rail.
4. Lock the tool mounts in position by lowering the locking levers.
5. Snap the J-Lock
™
clip closed (around the beams) to prevent your mounted tool from
detaching from the MASTERFORCE® Miter Saw Workstation.
FIG 11
A
J-Lock
™
Clip
NOTE: Continue to hold the tool mount assembly with one hand until both levers are
securely locked.
6. Check position and adjust if necessary to make sure the weight of the saw is evenly
balanced over the rails.
7. Ensure the saw is seated and locked in position, then securely tighten the four nuts holding
the saw to the tool mounts.
Page 11
Loading ...
Loading ...
Loading ...