Loading ...
Loading ...
Loading ...
2. Press the nonworking bulb gently into the
socket, turn counterclockwise and remove.
3. Install the new bulb and cover in reverse
order of removal.
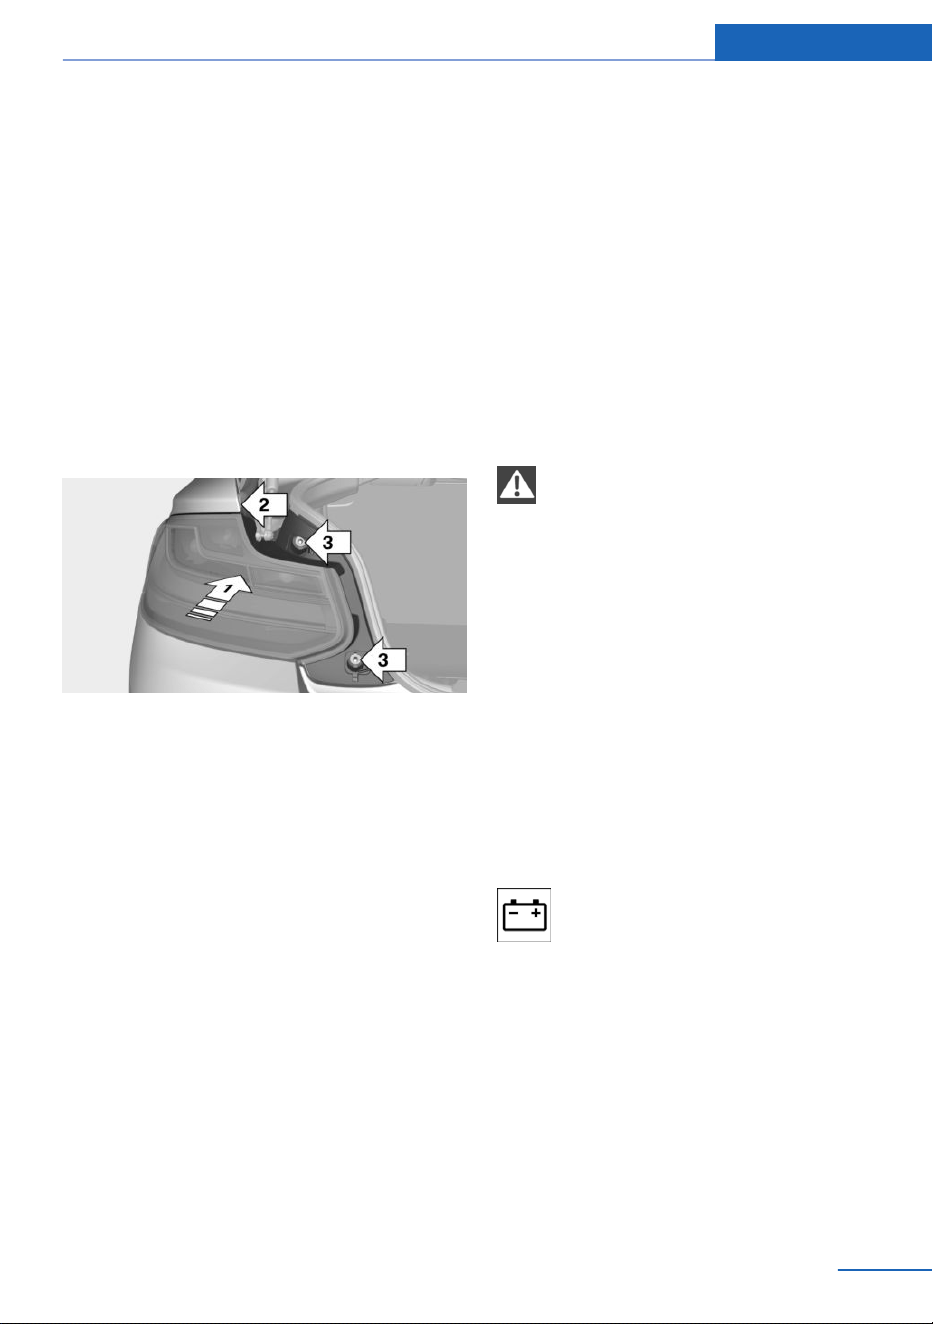
Installing the tail lamp
1. Connect the plug to the bulb holder.
2. Insert the tail lamp straight in and press it
in, arrow 1, until the rubber mount latches
in the inner fastener. Make sure when in‐
serting the tail lamp that the rubber lip, ar‐
row 2, on the top side of the tail lamp does
not fold over. Screw on the two nuts, ar‐
row 3, and close covers.
Central brake lamp and license plate
lamp
Observe the safety information, refer to
page 243.
These lights are made using LED technology.
In the case of a malfunction, contact a dealer’s
service center or another qualified service cen‐
ter or repair shop.
Vehicle battery
Maintenance
The battery is maintenance-free.
The added amount of acid is sufficient for the
service life of the battery.
More information about the battery can be re‐
quested from a dealer’s service center or an‐
other qualified service center or repair shop.
Replacing the vehicle battery
General information
The manufacturer of your vehicle recommends
that you have a dealer’s service center or an‐
other qualified service center or repair shop
register the vehicle battery to the vehicle after
the battery has been replaced. Once the bat‐
tery has been registered again, all comfort fea‐
tures will be available without restriction and
any Check Control messages displayed which
relate to comfort features will disappear.
Safety information
NOTE
Vehicle batteries that are not compatible
can damage vehicle systems and impair vehi‐
cle functions. There is a risk of personal and
property damage. Only vehicle batteries that
are compatible with your vehicle type should
be installed in your vehicle. Information on
compatible vehicle batteries is available at your
dealer’s service center.◀
Charging the battery
General information
Make sure that the battery is always suffi‐
ciently charged to guarantee that the battery
remains usable for its full service life.
A discharged battery is indicated by a
red indicator light.
The battery may need to be charged in the fol‐
lowing cases:
▷ When making frequent short-distance
drives.
▷ If the vehicle is not used for more than a
month.
Seite 245
Replacing components Mobility
245
Online Edition for Part no. 01402981298 - VI/17
Loading ...
Loading ...
Loading ...