Loading ...
Loading ...
Loading ...
English - 23
02 INSTALLING YOUR DRYER
FINAL INSTALLATION CHECKLIST
• the dryer is plugged into an electrical outlet and is properly grounded.
• The exhaust ductwork is hooked up and the joints are taped.
• A plastic fl exible duct is NOT used.
• Use rigid or sti -walled fl exible metal vent material.
• The dryer is level and is sitting fi rmly on the fl oor.
• Gas models – the gas is turned on with no gas leaks.
• Start your dryer to confi rm that it runs, heats, and shuts o .
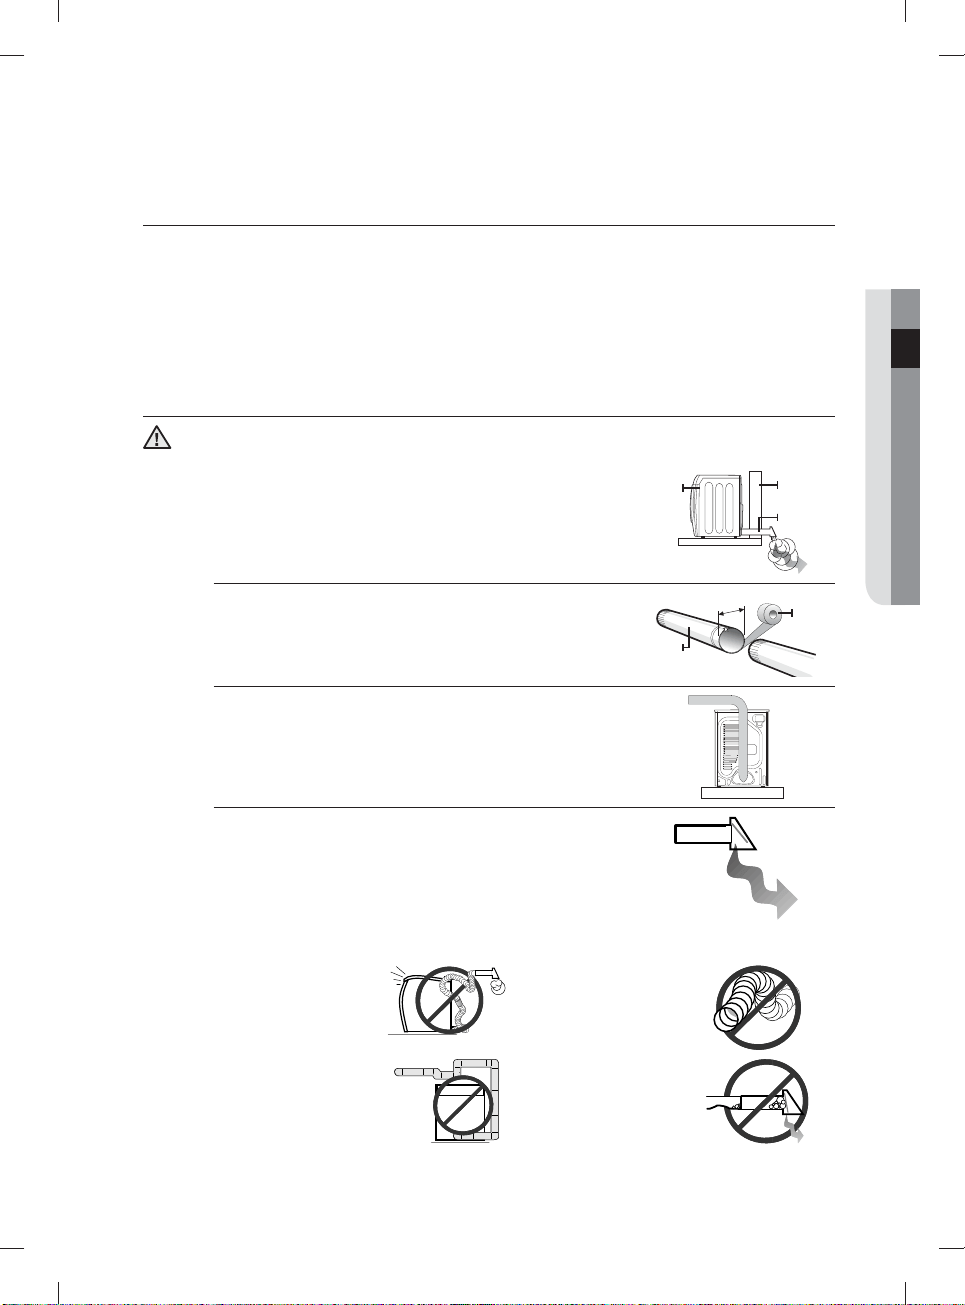
DRYER EXHAUST TIPS
A plastic or non-metal fl exible duct presents a potential fi re hazard.
1. Make sure your dryer is installed properly so it exhausts air
easily.
Wall
Duct
Exhaust
Dryer
2. Use a 4” diameter rigid metal duct. Tape all joints, including
at the dryer. Never use lint-trapping screws.
Duct
Tape
4”
3. Keep ducts as straight as possible.
4. Clean all old ducts before installing your new dryer. Be sure
the vent fl ap opens and closes freely. Inspect and clean the
exhaust system annually.
Don’t let a poor exhaust system slow the drying process by:
• Restricting your
dryer with a poor
exhaust system.
• Using a plastic, thin
foil, or non-metal
fl exible duct.
• Unnecessarily using
long ducts that have
many elbows.
• Allowing dented or
clogged ducts and
vent.
WARNING
DV457E1_02836J-06_EN_140428.indd 23DV457E1_02836J-06_EN_140428.indd 23 2014-04-28 5:30:052014-04-28 5:30:05
Loading ...
Loading ...
Loading ...