Loading ...
Loading ...
Loading ...
Appendix
-95
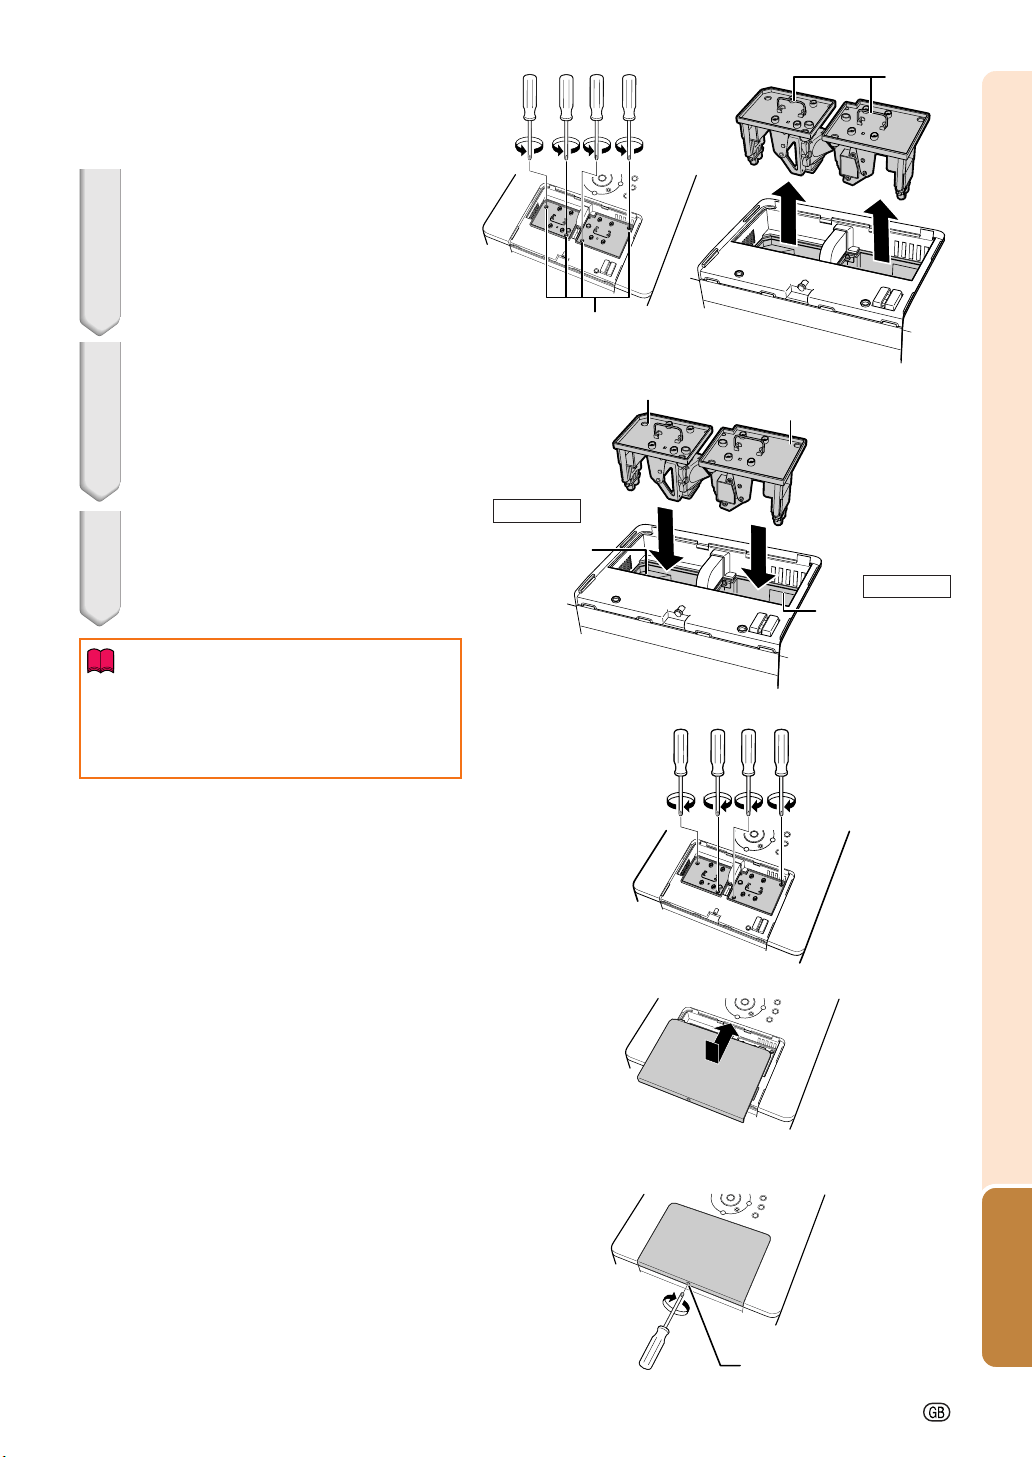
4 Remove the lamp unit.
• Loosen the securing screws (two for
each lamp) from the lamp unit. Hold the
lamp unit by the handle and pull it in the
direction of the arrow. At this time, keep
the lamp unit horizontal and do not tilt it.
5 Insert the new lamp unit.
• Press the lamp unit firmly into the lamp
unit compartment. Fasten the securing
screws.
• Be sure that AN-PH50LP1 and AN-
PH50LP2 are respective type.
6 Replace the lamp unit cover.
• Align the lamp unit cover and slide it to
close. Then tighten the user service
screw to secure the lamp unit cover.
Info
• If the lamp unit and lamp unit cover are not
correctly installed, the power will not turn
on, even if the power cord is connected to
the projector.
Securing screws
Handle
Compartment for
AN-PH50LP1
Compartment for
AN-PH50LP2
AN-PH50LP2
AN-PH50LP1
For Lamp 1
For Lamp 2
User service screw
Loading ...
Loading ...
Loading ...