Loading ...
Loading ...
Loading ...
-94
Regarding the Lamp
Optional
accessories
Lamp unit 1
AN-PH50LP1
Removing and Installing
the Lamp Unit
Info
• Ensure the lamp unit is removed using the
handle. Ensure the glass surface of the
lamp unit or the inside of the projector are
not touched.
• To avoid injury to yourself and damage to
the lamp, ensure to carefully follow the
steps below.
• Do not loosen other screws except for the
lamp unit cover and lamp unit.
(Only the silver screws are loosened.)
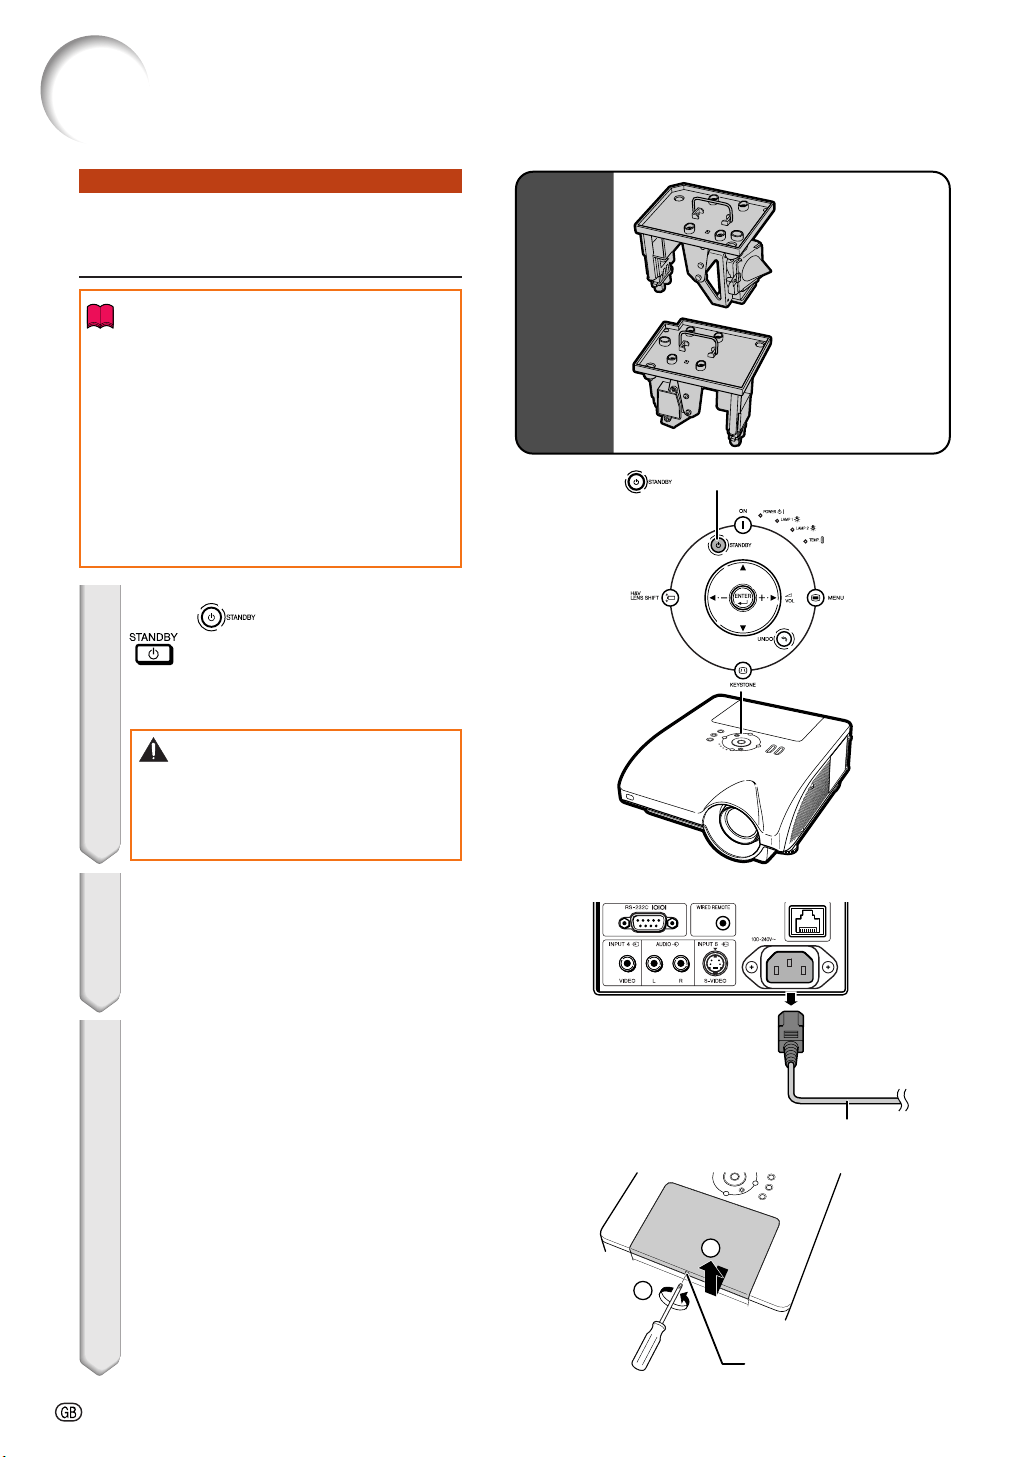
1 Press on the projector or
on the remote control to put
the projector into standby mode.
• Wait until the cooling fan stops.
Warning!
• Do not remove the lamp unit from the
projector right after use. The lamp and
parts around the lamp will be very hot
and may cause burn or injury.
2 Disconnect the power cord.
• Unplug the power cord from the AC
socket.
• Leave the lamp until it has fully cooled
down (about 1 hour).
3 Remove the lamp unit cover.
• Loosen the user service screw (1) that
secures the lamp unit cover. Remove the
lamp unit cover (2).
STANDBY button
Power cord
1
2
User service screw
Lamp unit 2
AN-PH50LP2
Loading ...
Loading ...
Loading ...