Loading ...
Loading ...
Loading ...
FINAL INSTALLATION INSTRUCTIONS
14
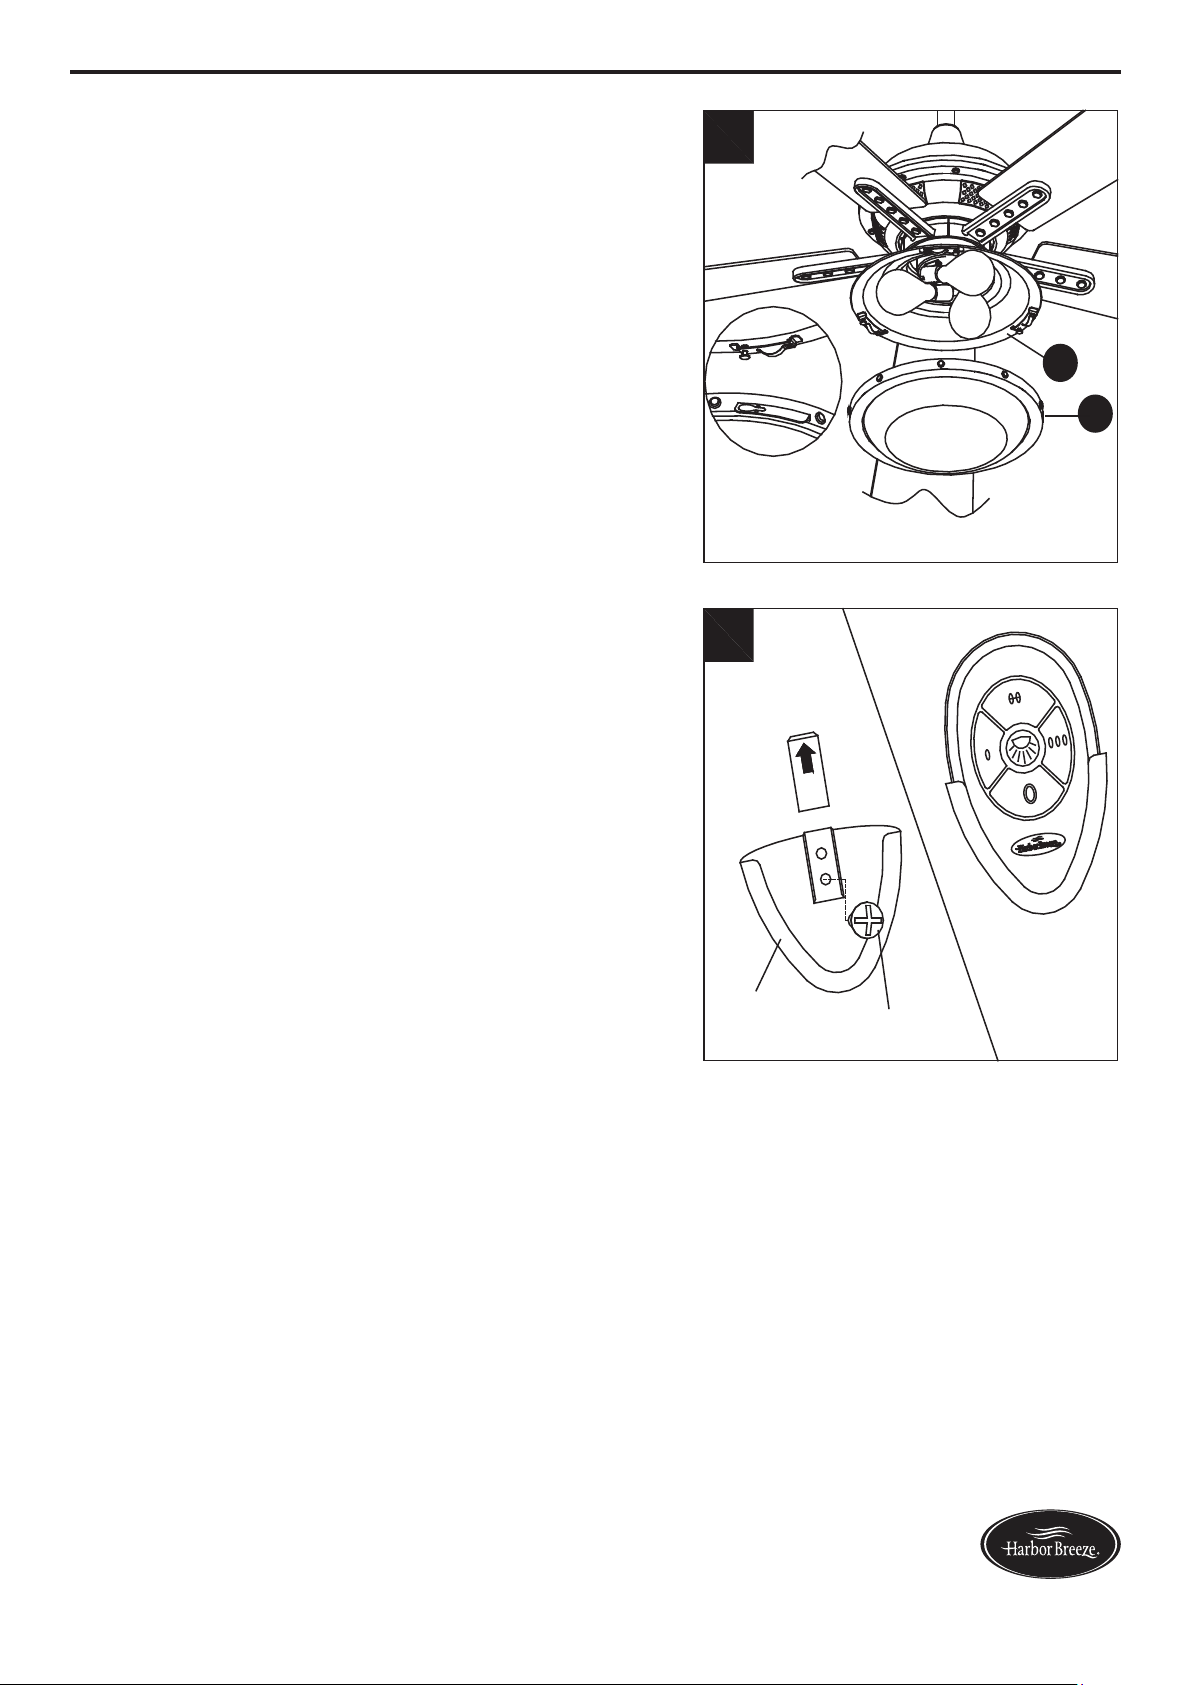
7.
Raise the glass assembly (K) up to the switch housing
(I), aligning the keyholes on glass assembly (K) with the
3 pressembled screws on the switch housing (I). Rotate
the glass assembly (K) clockwise until the screws drop
into the slot recesses.
Lowes.com/harborbreeze
7
K
I
8.
OPTIONAL: A wall bracket for the remote is included
with power kit (M). Use the screws provided in the
power kit (M) to attach the wall bracket to the desired
installation site. Once secure, store the remote inside
the wall bracket.
8
R
Wall bracket
Screw
Loading ...
Loading ...
Loading ...