Loading ...
Loading ...
Loading ...
7
IMPORTANT SAFETY INSTRUCTIONS
For USA, please go to www.sharpusa.com/
trimkits to access the list of approved trim
kits with these ovens. For Canada, please visit
relevant product’s page on www.sharp.ca for
information on installation options and the list
of approved trim kits.
20 Do not mount unit over or near any portion of a
heating or cooking appliance, except a properly
INSTALLATION INSTRUCTIONS
UNPACKING AND EXAMINING
YOUR MICROWAVE OVEN
1 Remove all packing materials from inside the oven
cavity. Read enclosures and SAVE the Operation
Manual. DO NOT REMOVE AND THROW OUT
THE WAVEGUIDE COVER.
2 Remove the feature sticker, if there is one.
Check the oven for any damage, such as misaligned or
bent door, damaged door seals and sealing surfaces,
broken or loose door hinges and latches and dents inside
the cavity or on the door. If there is any damage, do not
operate the oven and contact your dealer or SHARP
AUTHORIZED SERVICER.
Oven Cavity
Hinges
Waveguide cover
Latches
Door Seals and
Sealing Surfaces
CHOOSING A LOCATION FOR
YOUR OVEN
You will use your oven frequently so plan its location
for ease of use. The oven must be placed on a countertop
which is a minimum of 36 inches from the oor. Allow
at least 2 inches on the sides, top and at the rear of the
oven for air circulation. Be sure to position oven so that
the rear cannot be touched inadvertently.
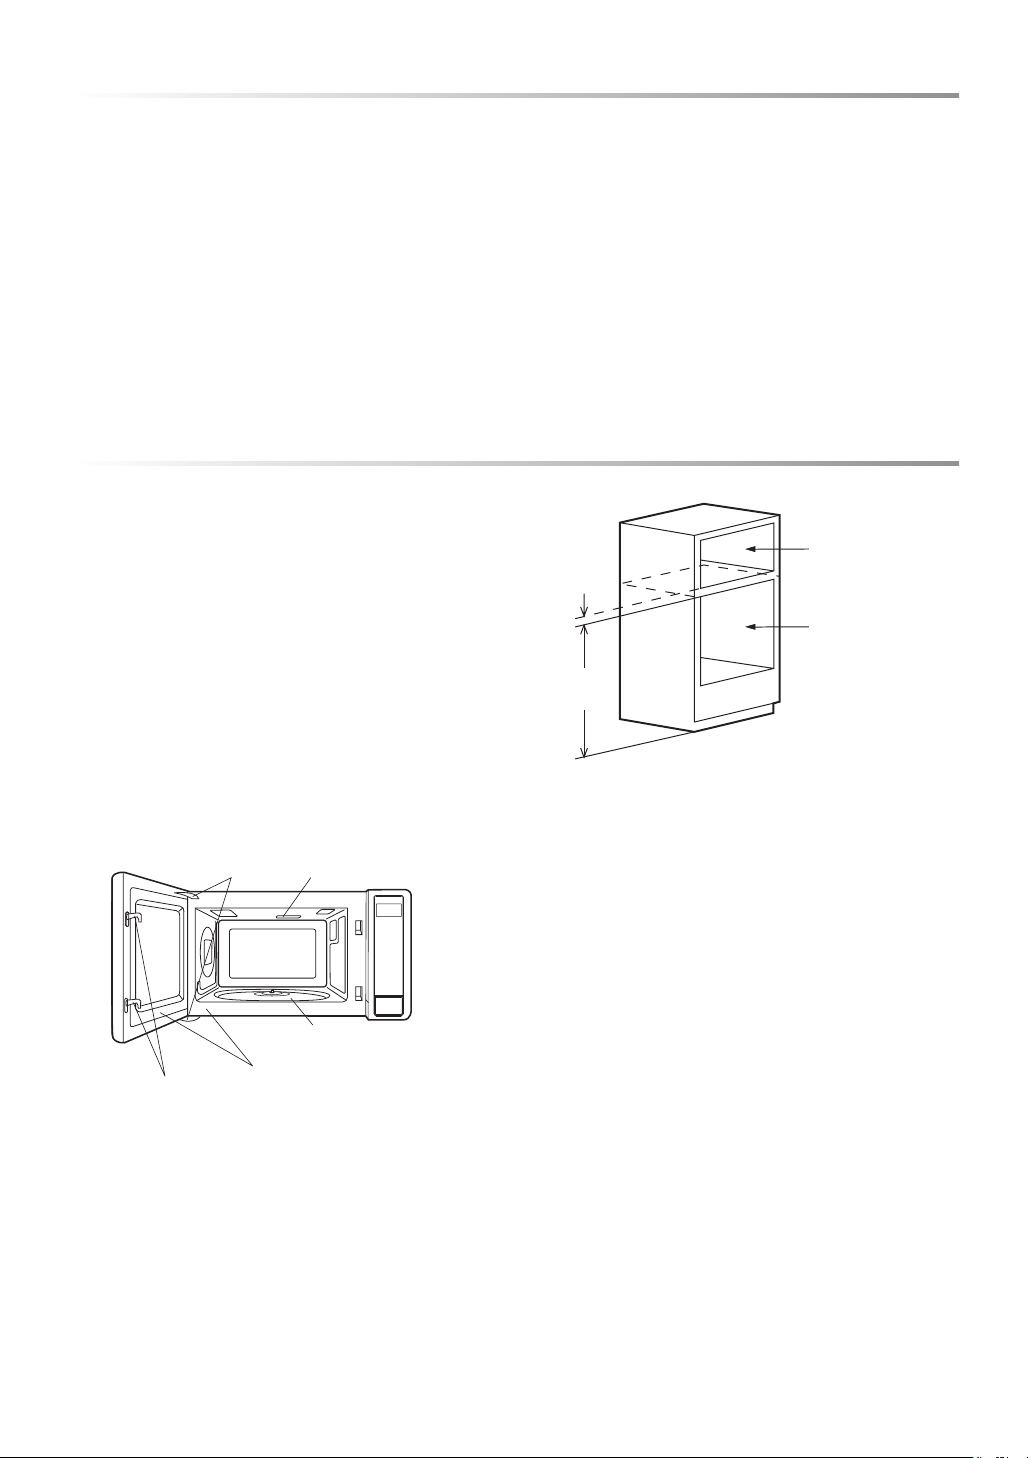
Microwave
cutout
Electric wall oven/
Warming drawer
cutout
Min.
1
1
/
2
"
Min.
36"
SKETCH 1
Your convection microwave oven can be built into a
cabinet or wall by itself or above any electric wall oven
or warming drawer. Go to www.sharpusa.com/trimkits
(US customers only) to access the list of approved trim
kits with these ovens.
Please visit relevant product’s page on www.sharp.ca
(Canada) for information on installation options and
the list of approved trim kits.
See Sketch 1 for proper location when building in above
an electric wall oven or a warming drawer. Carefully
follow both the electric wall oven/warming drawer
installation instructions and Sharp’s Built-in Kit instruc-
tions. Be sure that the clearance of the oor between the
electric wall oven/warming drawer and the microwave
oven is minimum of 1
1
/2
inches. The kit includes ducts
and nish trim strips and easy-to-follow instructions for
installation as well as the location of the power supply.
SAVE THESE INSTRUCTIONS
installed electric wall oven or warming drawer.
Go to www.sharpusa.com/trimkits to access the
list of approved trim kits with these ovens.
21 Do not mount over a sink.
22 Do not store anything directly on top of the
appliance surface when the appliance is in
operation.
E
Loading ...
Loading ...
Loading ...