Loading ...
Loading ...
Loading ...
61
P Mode
Tv, Av, M, and C Mode
Playback Mode
Wireless Features
Setting Menu
Accessories
Appendix
Before Use
Index
Basic Guide
Advanced Guide
Camera Basics
Auto Mode /
Hybrid Auto Mode
Other Shooting Modes
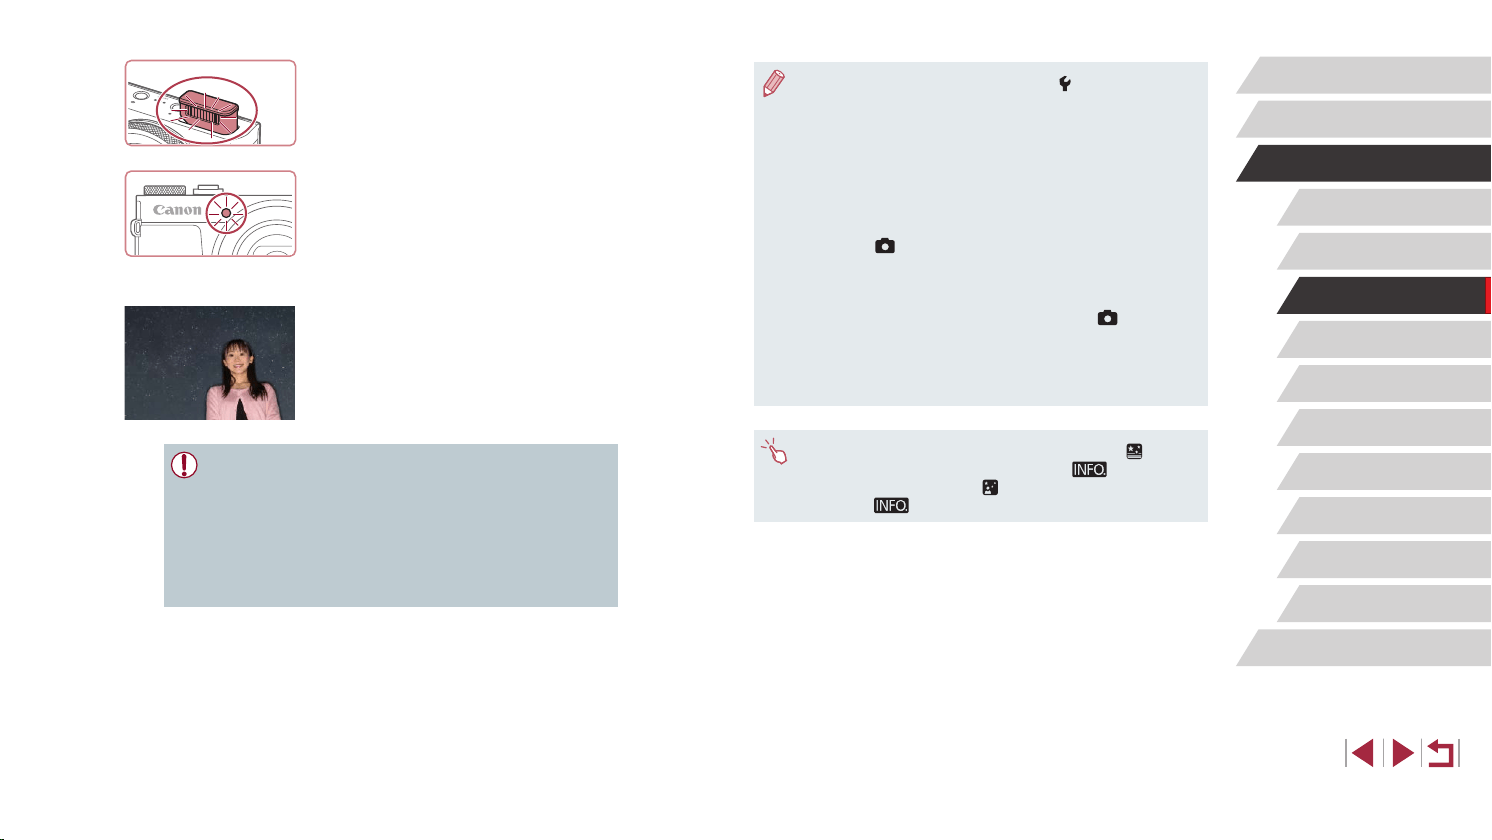
● For easier viewing, try choosing MENU > [ 2] tab > [Night
Display] > [On] (
=
163) before shooting.
● To adjust subject brightness, try changing the ash exposure
compensation (
=
90).
● To adjust background brightness, try changing the exposure
compensation (
=
73). However, images may not look as
expected under some shooting conditions, and the person should
stay still in steps 4 – 5, which may take up to about 15 seconds.
● To capture more stars and brighter starlight, choose MENU
(
=
29) > [ 6] tab > [Star Portrait Settings] > [Star Visibility]
> [Prominent]. However, images may not look as expected under
some shooting conditions, and the person should stay still in
steps 4 – 5, which may take up to about 8 seconds.
● To make stars brighter, choose MENU (
=
29) > [ 6] tab >
[Star Emphasis] > [Sharp]. To emphasize the bright stars in a
starry sky, set [Star Emphasis] to [Soft]. This setting can produce
eye-catching shots by enlarging bright stars while de-emphasizing
dimmer stars. To disable starlight processing, select [Off].
● You can also choose the shooting mode by choosing [ ] in steps
1 – 2 of “Specic Scenes” (
=
53), touching [ ] to access
the setting screen, touching [
], and then touching the same
option or [
].
4
Shoot.
z Press the shutter button. The ash res
as the camera takes the rst shot.
z The second and third shots are now
taken, without ring the ash.
5
Have the person stay still until the
lamp blinks.
z The person you are shooting should stay
still until the lamp blinks three times after
the third shot, which may take up to about
two seconds.
z All the shots are combined to create a
single image.
● Under some shooting conditions, images may not look as
expected.
● For better shots, have the person stand away from illumination
such as street lights, and make sure the ash is raised.
● There will be a delay before you can shoot again, as the camera
processes the images.
● To avoid blurry shots, make sure the person you shoot in steps
4 – 5 stays still.
Loading ...
Loading ...
Loading ...