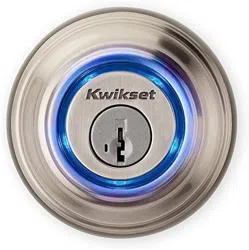
ENGLISH
61063 / 01
Installation and User Guide
Required Tools
Additional Accessories
(depending on application)
Ruler
Hammer Wood block
Phillips Head Screwdriver
You can view the
Kevo installation video
online by scanning
the code to the right
or by visiting
www.kwikset.com/
kevo/support
A
A2
E
F
G
H
J
K
L
M
N
P
Kevo Fob
Q
R
S
C
D
B
Parts in the Box
Latch and Strike Exterior Assembly Interior Assembly
1
2
Prepare door and check dimensions
Install latch and strike
If drilling a new door, use the supplied template and the complete
door drilling instructions available at www.kwikset.com/doorprep.
Note: Additional door preparation may be
required for doors with 1-1/2" (38 mm) holes.
Consult the deadbolt drilling instructions at
www.kwikset.com/doorprep.
Measure to con rm that the hole in the door
is either 2-1/8" (54 mm) or 1-1/2" (38 mm).
Is the door edge chiseled?
Are the latch holes centered in the door hole?
Which latch are you installing?
Install strike on the door frame.
Hold the latch in front of the door hole, with the latch face ush
against the door edge.
A
A
C
D
E
B
2-1/8"
54 mm
1-1/2"
38 mm
or
Measure to con rm that the backset is either
2-3/8" or 2-3/4" (60 or 70 mm).
B
2-3/8" or 2-3/4"
60 or 70 mm
Measure to con rm that the hole in the door
edge is 1" (25 mm).
C
1"
25 mm
Measure to con rm that the door is either
1-3/8" or 1-3/4" (35 mm or 44 mm) thick.
D
1-3/8" or 1-3/4"
35 mm or 44 mm
A A2
Use latch “A”. Extend
the latch bolt as shown.
Use latch “A2”. Extend
the latch bolt as shown.
or
YES NO
chiseled
not
chiseled
A2A
180°
A2
180°
A
No adjustment is required.
Proceed to next step.
Rotate latch face as
shown to extend latch.
or
YES NO
A
A2
A2
C (2x)
wood
block
or
Latch “A” Latch “A2”
B
D (2x)
door frame
Loading ...
Loading ...
Loading ...
