Loading ...
Loading ...
Loading ...
16
BEFORE SETTING OVEN CONTROLS
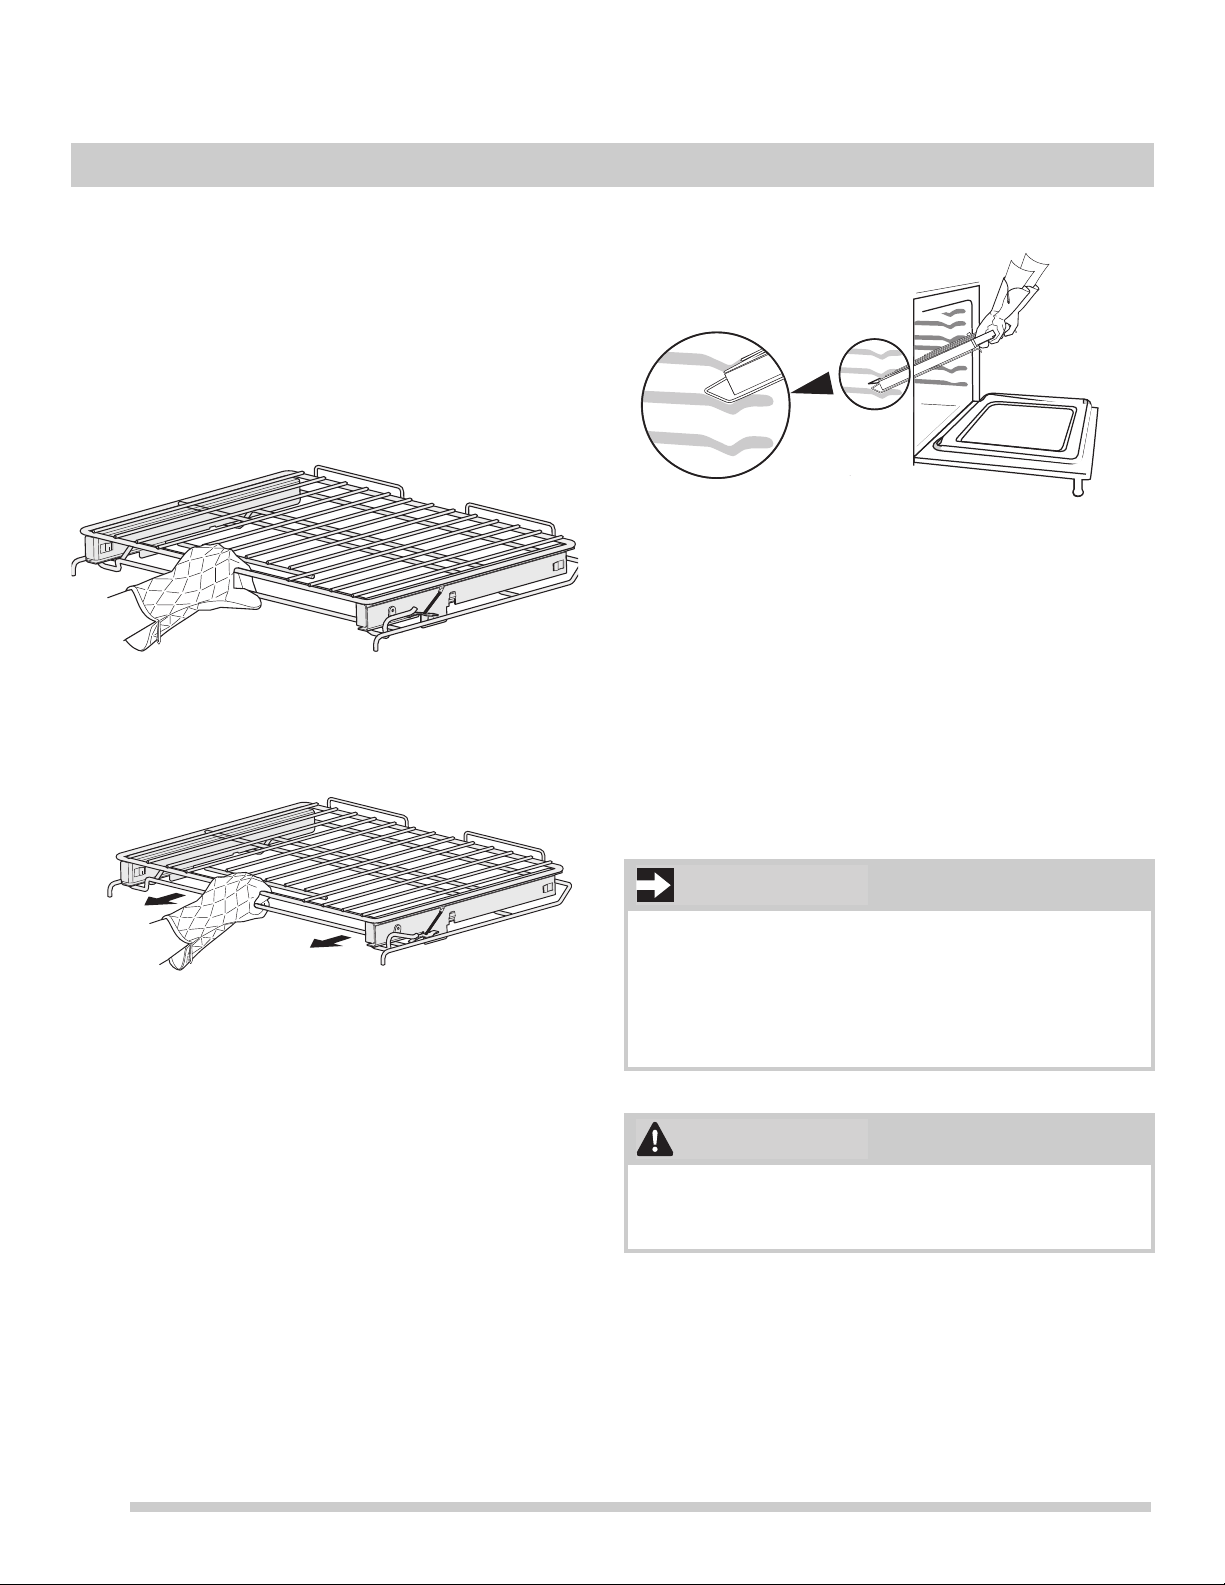
Removing and Replacing the Glide Racks
The fully extendable Glide rack makes food preparation
easier. This oven rack has glide tracks that allow the rack to
be pulled away from the oven without rubbing the sides of
the oven wall.
To remove - Make sure the baking rack is in the closed
position. Using one hand, reach through handle opening
and grasp both the upper and lower portions of the glide
rack as shown in
Figure 3.
While holding both sections, pull the glide rack out of the
oven until the stop position is reached (
Figure 4).
Using both hands, lift up the front of the rack slightly and
continue to pull the rack away from the oven (
Figure 5). Be
sure to grasp both upper and lower rack portions together
when removing or handling the glide rack.
The rack portions move independently and are difficult to
handle unless held together.
To replace - Make sure the baking rack is in the closed
position. Grasp both upper and lower portions of glide rack.
Lift and hold the rack level between the oven cavity walls.
Tilt the front of the rack upward slightly and slide the rack
completely into position.
Important: To prevent possible damage to the oven, do not
attempt to close the oven door until all the oven racks are
fully positioned back inside the oven cavity.
Figure 3: Grasp both rack sections
Figure 4: Pull rack to stop position
Figure 5: Remove and replace using both hands
Do not line the oven walls, racks, bottom or any other
parts of the oven with aluminum foil or with any other
materials or oven liners. Doing so will alter heat distribu
-
tion and may cause permanent damage to the oven
interior. During clean the oven temperatures will be hot
enough to melt foil.
Remove all oven racks and clean according to instruc-
tions provided in the Care & Cleaning section of this
manual. Never pick up hot oven racks or parts.
IMPORTANT
CAUTION
Loading ...
Loading ...
Loading ...