Loading ...
Loading ...
Loading ...
Installation
This appliance is always supplied with a set of
a
d
j
u
s
table feet and, depending on the model, with a
splash guard.
The appliance may also be used without the splash
guard.
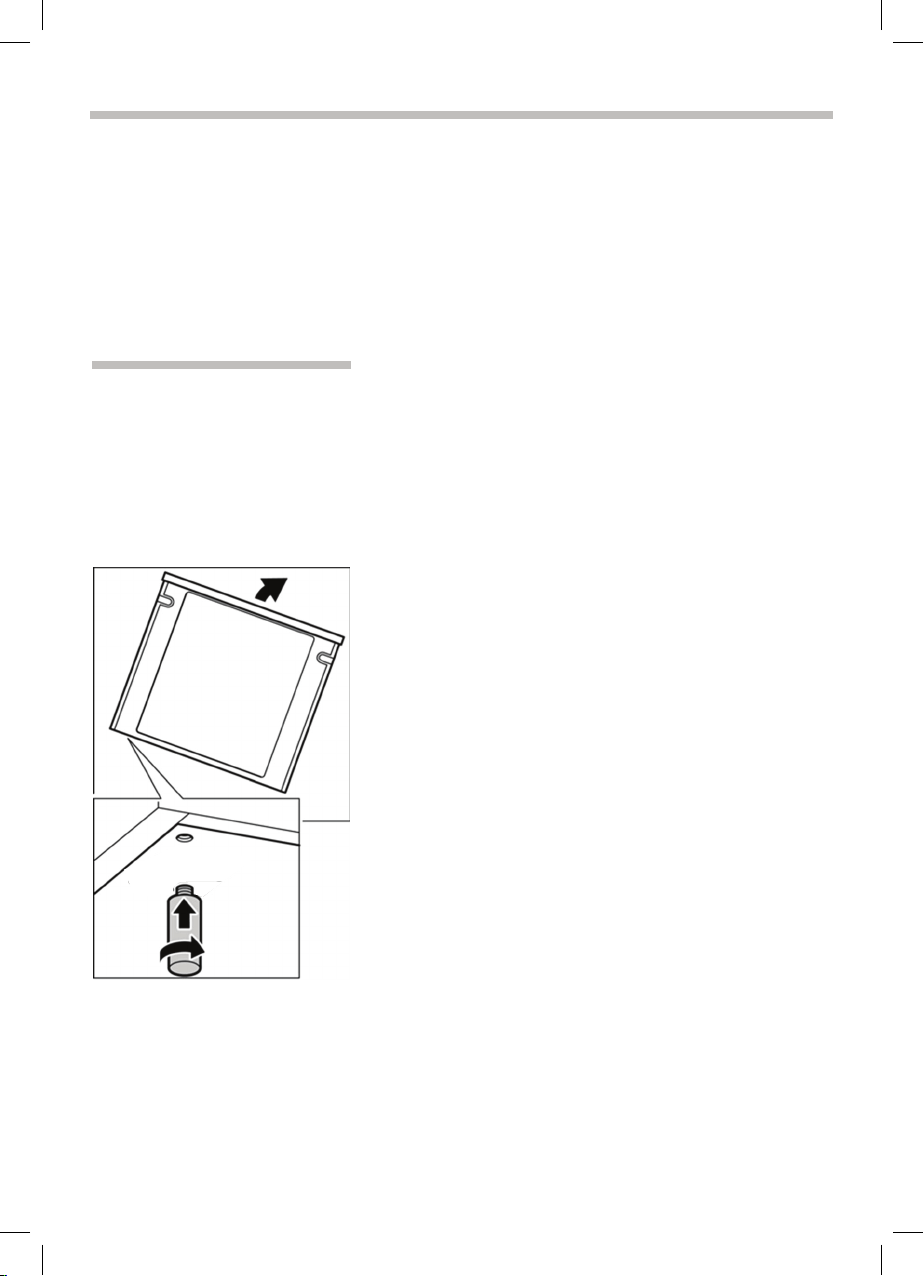
Fitting the adjustable feet
Beforehand:
•
Remove all parts that are not permanently fixed,
especially the pan supports and burners.
•
Remove the accessories from the oven.
Pro
ce
e
d
as follows:
•
Tilt the appliance by raising one side slightly from
t
h
e
f
loor.
•
With the plates in position, screw the adjustable
feet into the mounting holes on the underneath of
the appliance.
•
Repeat the process on the other side.
You can make the final adjustments to the feet in
order to level the appliance once the gas and
electricity supply have been connected.
If it is necessary to pull the appliance, screw the
adjustable feet in fully. Make the final settings only
when the other installation tasks have been
completed.
8
Positioning and levelling
Positioning the appliance
When installing the appliance, make sure that there
is enough space in the final installation location to
pull
the appliance forwards for cleaning and
maintenance
work.
The ground underneath must be hard and stable.
The wall immediately behind the appliance must be
made from non-flammable material, e.g. tiles.
If you need to pull the appliance in order to position
it,
make sure that the adjustable feet are screwed
in
fully.
Levelling the appliance
Level the appliance once all other work has been
completed.
To do this, turn the adjustable feet.
9
Loading ...
Loading ...
Loading ...