Loading ...
Loading ...
Loading ...
179
Completing Computer Settings
Installation and Maintenance Connecting to a Network
■ Windows Vista
1 From the PC [Start] menu, select [Control Panel].
2 Click on [View network status and tasks].
3 From the menu on the left side of the window, click on [Manage network
connections].
4 Right-click [Local Area Connection], and open [Properties].
5 Select [Internet Protocol Version 4 (TCP/IPv4)] and click the [Properties]
button. Make a note of the original network settings (IP address, subnet
mask, default gateway, etc).
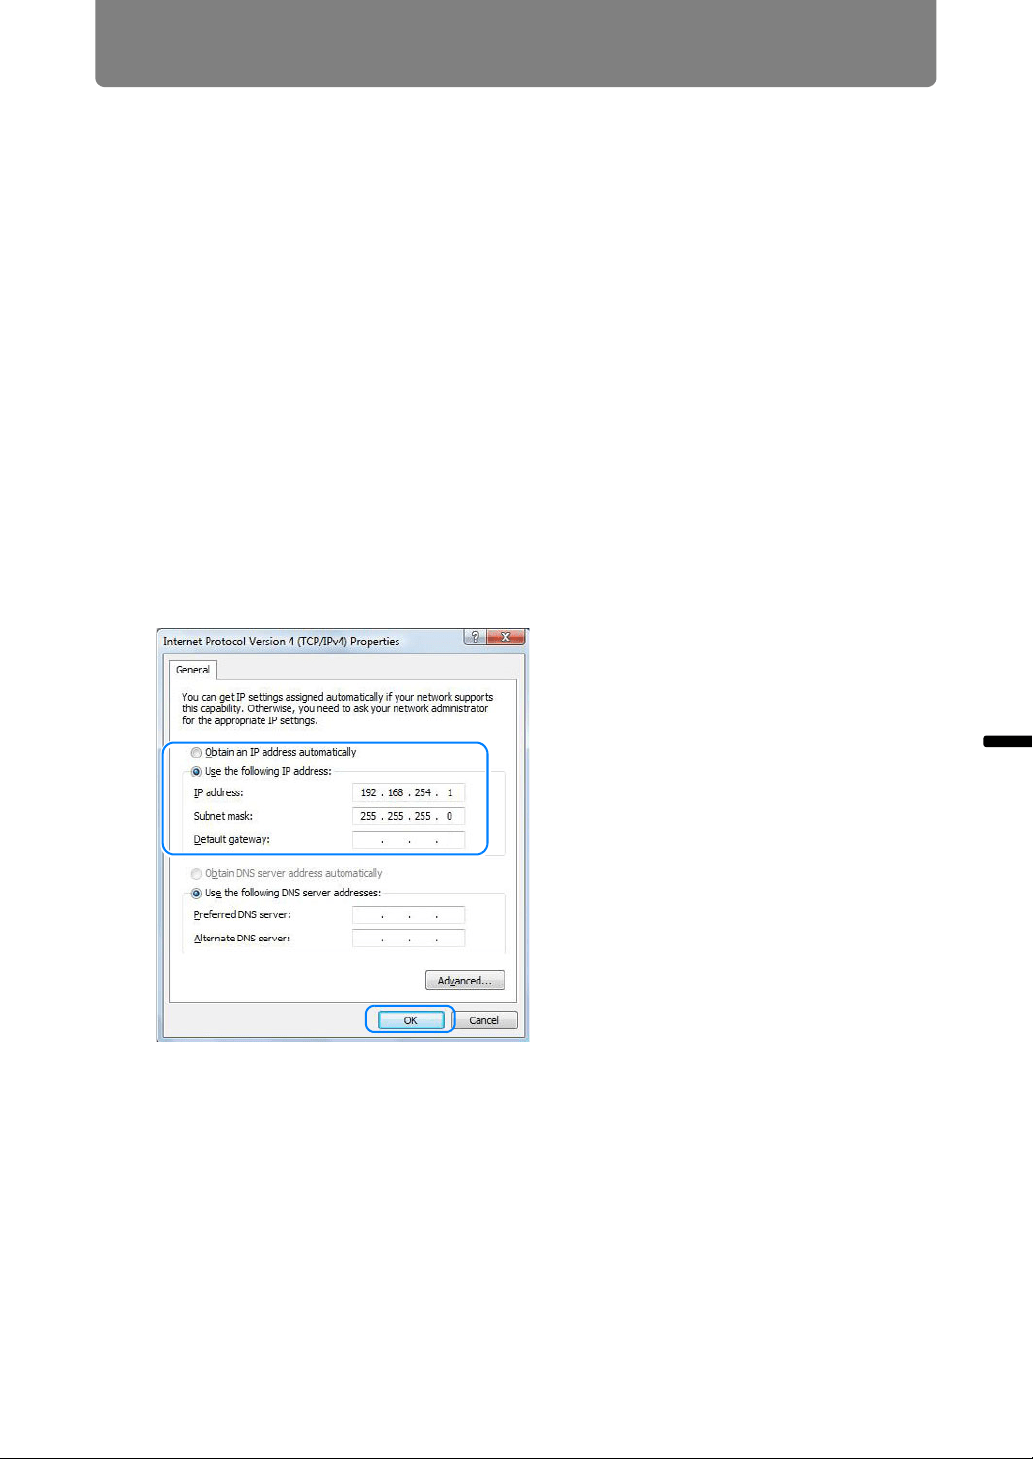
6 Select [Use the following IP address] and set the IP address and subnet
mask.
The factory default IP address for the projector is “192.168.254.254”. Set an IP
address which is different from this.
Example
IP address: 192.168.254.1
Subnet mask: 255.255.255.0
7 When the settings are completed, click the [OK] button and then click the
[OK] button on the [Local Area Connection Properties] window to close it.
Loading ...
Loading ...
Loading ...