Loading ...
Loading ...
Loading ...
Steam en
21
1. Touch the v field.
The control panel is pushed forwards automatically.
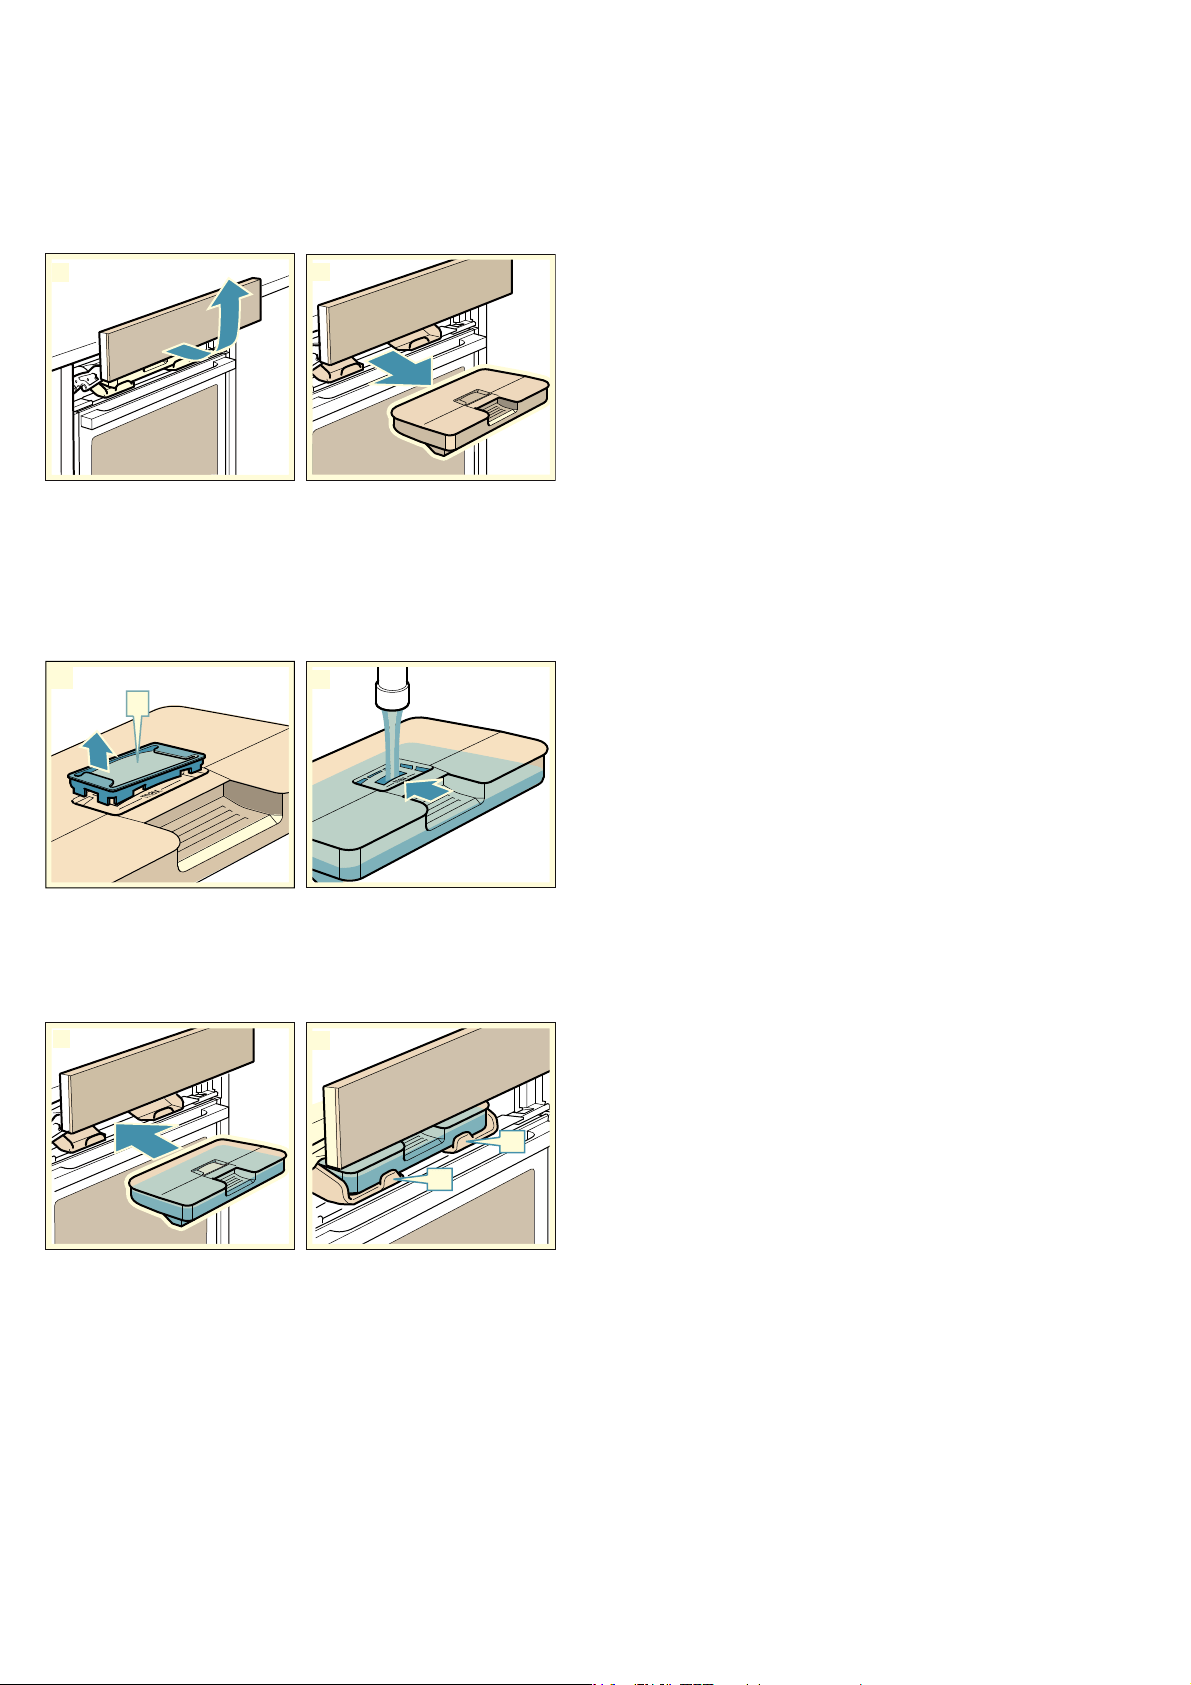
2. Pull the control panel forwards with both hands and
then push it upwards until it locks into place (Fig. !).
3. Lift the water tank and remove it from the water tank
recess (Fig. ").
4. Press down on the cover along the seal to prevent
water from leaking out of the water tank.
5. Take out the cover ‚ (Fig. #).
Note: Whether or not there is a cover ‚ depends on
the appliance type.
6. Fill the water tank with cold water up to the "max."
mark (Fig. $).
7. Put the cover ‚ back into the opening on the water
tank.
8. Insert the filled water tank (Fig. %). Ensure that the
water tank locks into place behind both holders ƒ
(Fig. &).
9. Slowly slide the control panel downwards and then
push it towards the rear until it is closed completely.
The water tank has been filled. You can start using
operating modes with steam.
Refilling the water tank
Notes
■ Steam-assisted operations continue without adding
steam.
■ If the water tank runs dry during the operation with
the Steaming, Reheating, Dough proving or
Defrosting settings, the operation is interrupted. Fill
the water tank.
1. Open the control panel.
2. Remove and refill the water tank.
3. Insert the filled water tank and close the control
panel.
After every steam operation
:Warning – Risk of scalding!
When you open the appliance door, hot steam can
escape. Steam may not be visible, depending on its
temperature. When opening, do not stand too close to
the appliance. Open the appliance door carefully. Keep
children away.
:Warning – Risk of burns!
The appliance becomes hot during operation. Allow the
appliance to cool down before cleaning.
Caution!
Enamel damage: Do not start any operations when
there is water on the cooking compartment floor. Before
operation, wipe away the water from the cooking
compartment floor.
The remaining water is pumped back into the water
tank after every operation with steam. Then empty and
dry the water tank. Moisture remains in the cooking
compartment. To dry the cooking compartment, you
can either use the "Drying" operating mode or dry the
cooking compartment by hand.
Notes
■ Once the appliance has been switched off, the v
field remains lit for a little longer to remind you to
empty the water tank.
■ Remove limescale marks with a cloth soaked in
vinegar, then wipe with clean water and dry with a
soft cloth.
Emptying the water tank
Caution!
■ Do not dry the water tank in the hot cooking
compartment. This will damage the water tank.
■ Do not clean the water tank in the dishwasher. This
will damage the water tank.
1. Open the control panel.
2. Remove water tank.
3. Carefully remove the lid of the water tank.
4. Empty the water tank, clean it with detergent and
then rinse it thoroughly with clean water.
5. Dry all parts with a soft cloth.
6. Rub the seal on the lid until dry.
7. Leave to dry with the lid open.
8. Place the lid on the water tank and push it down.
9. Insert the water tank and close the control panel.
2I
1
D
E
E
I
Loading ...
Loading ...
Loading ...